This video glossary covers the terminology and defines the meaning of common video terms related to cameras, codecs, lighting, film set lingo, post-production workflows, and everything else you ever wanted to know about film and video production.
 See also The Most Frequently Asked Questions About Camera Shots and Camera Angles
 Suggested reading: How to Choose the Right Camera Settings for Video Production
 See also Video Lighting Guide Part 1: Different Types of Light
 See also:
Introduction To Green Screen, Blue Screen, And Chroma Keying
&
Guide: How To Shoot And Key Green Screen Footage
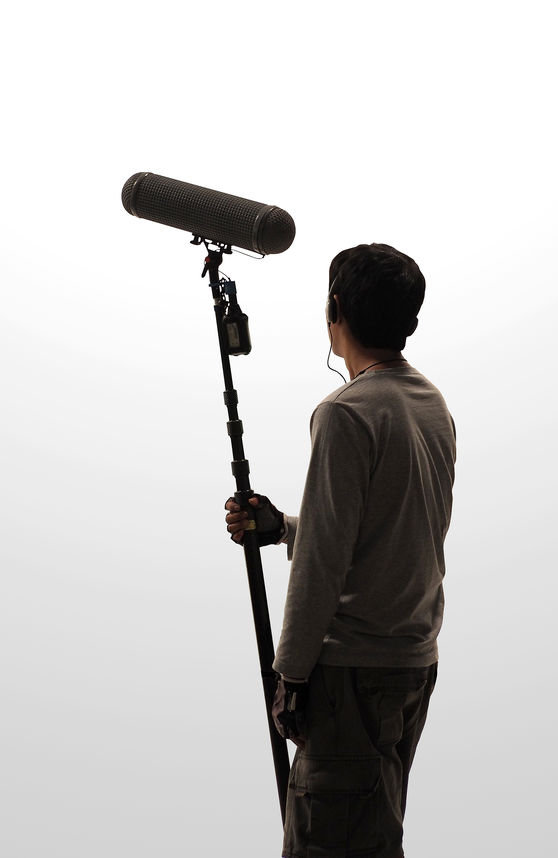
A boom, also known as a boom microphone, is a directional mic attached to an extending pole used to capture on set audio by a boom operator. These poles can extend longer or shorter, and the microphone itself is usually angled directly at the person talking, usually bouncing back and forth. Boom mics are usually used in addition to lav mics to capture redundant audio in case the lav mics aren’t 100% clear.
A bounce refers to a bounce board which is a tool used to bounce, or reflect, light onto a subject. Bounces are good for lighting a subject’s face without using a source light, softening shadows on a subject or wall, or creating a naturally lit look in outdoor settings.
A C-stand is a stand with three legs that is used to hold up lights, flag off shadows, and rig additional light controls like diffusion, bounce boards, or whatever else you might need to use to control the available light and shadow in a shot.
C stands are set up and operated on set by Grips, who are essentially stagehands who do all the rigging on behalf of the gaffer and cinematographer.
The close-up is a camera shot that is angled closely on a subject, be it character or object. Usually referring to a close-up of an actor’s face, the close-up can be used to highlight an important item or small action, like the handing over of a secret document or a clue inscribed on the back of a pocket watch.
All light technically has a color associated with it; it’s why we see rainbows when light is bent through a prism or after a rainy day. It’s also why we see different colors, as all matter reflects different colors back to our eyes.
The light that our cameras pick up can be manipulated, either with camera settings, with lens filters, with actual colored lights and gels, or in post-production through the process of color correction.
Color correction refers to the process of editing the color of your image to enrich and highlight the colors and tones of your footage to match the style and look you want for your film or video.
Color correction is almost always done in post after you picture lock your video - so as not to make a colorist do extra work that won’t even make it into the movie.
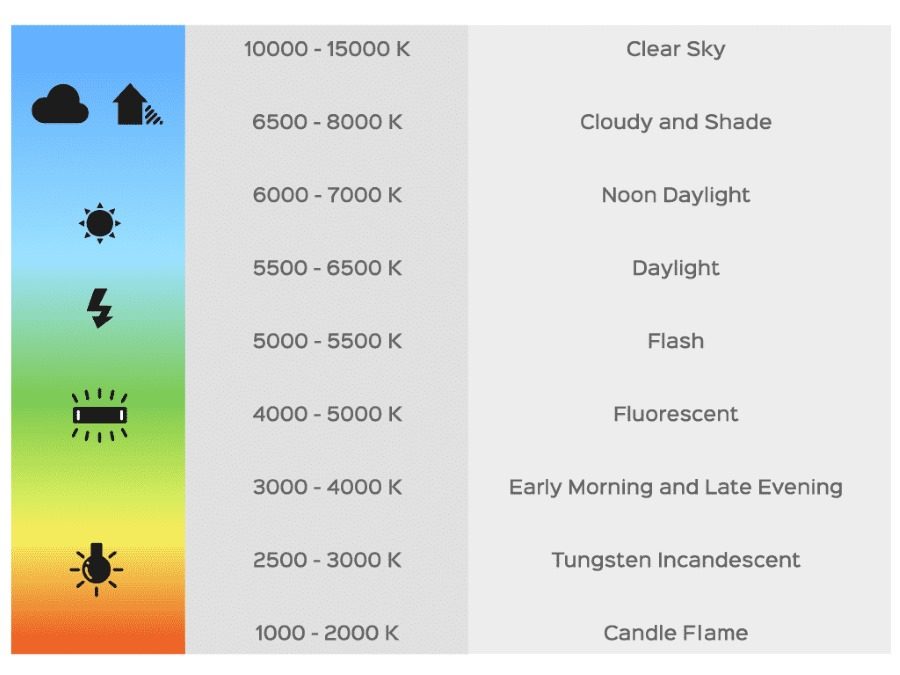
Color temperature refers to the look and feel of available light in an image. The color temperature of light is usually rated in terms of cool colors (bluer) to warm colors (more orange and red). One of the fun things about color temperature is, like real temperature, which is measured in degrees of either Fahrenheit or Celsius, color temperature is measured in degrees of Kelvin.
Have a look at our in-depth article What Color Temperature Should I Use For Video Lighting?
Compositing is a type of editing where you stitch together a series of images in post-production. If you composite one image over another image, you are essentially combining the two over one another. This is usually used in the context of creating animated sequences or titles, as the software is bringing digital animations to life.
Compression refers to the process of shrinking a video file’s data. When your files have high resolutions, they take a lot of processing power to play, especially at an average speed. Compression helps reduce the file size and resolutions of the video so that your computer isn’t struggling so hard to play it at the right speed. This also makes it faster to upload and download and especially to stream online.
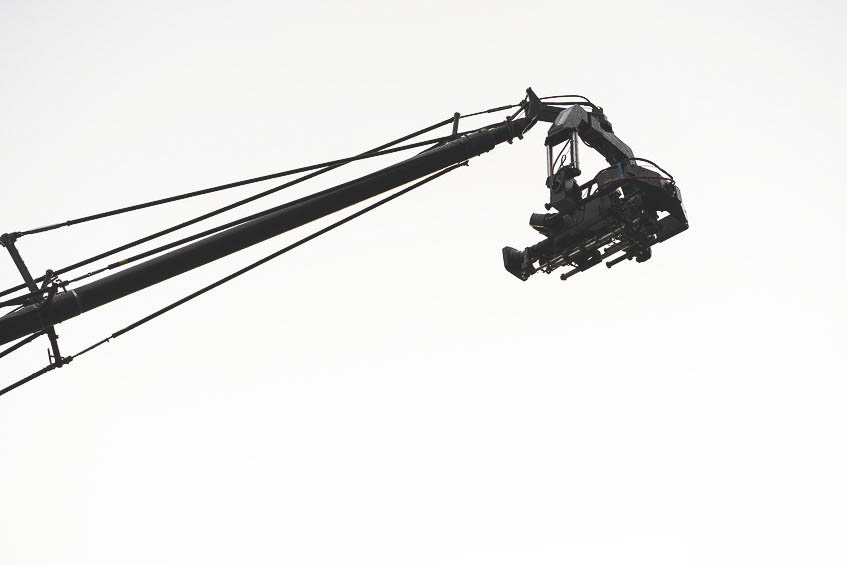
A crane refers to an actual crane arm that you attach your camera to in order to raise and lower it for the purpose of an aerial shot or tracking movement.
These types of camera moves are referred to by the shorthand “Crane shot” and create the iconic look of starting on a subject and raising the camera as you pull away into the sky, dwarfing them below.
You can also use a crane shot in reverse, starting from high above and lowering in on a subject to show their importance in a crowded space.
Data rate refers to the amount of information being captured to a memory card per second. As it tends to go, having a higher data rate means your image will be captured and recorded in a higher quality. That’s why higher resolution cameras, like those that shoot 4K and beyond, will require memory cards with higher data rates to record all the image’s information correctly. For more about Data rate and memory cards, check out our ultimate guide to memory cards.
The depth of field of a particular shot refers to your camera’s area of focus and is usually referred to in the form of deep or shallow depth of field. Shallow depth of field refers to only a small part of your frame actually being in focus while the rest of the frame is out of focus. A deep depth of field refers to a larger portion of your image being in focus and is particularly useful when showing things that are close up and far away at the same time. When you rack focus, you are changing the area of the screen that’s in focus, thus changing the depth of field.
Diegetic sound (or music) is sound that originates from within the narrative of the film. If a gangster fires a gun, the sound of that gun is a diegetic sound (also if the sound is a sound effect, which is added in post-production).
The point is, that the sound of the gun originates from within the film narrative. Likewise, it is considered diegetic music when the pianist Sam plays the tune ‘As Time Goes By” at the bar in the movie Casablanca. For more about diegetic and non-diegetic music and sound, check out our deep dive on it here.
Diffusion refers to a type of material that diffuses light as it comes from a source and reaches a subject. Diffusion can help to soften a harsh source or decrease strong shadows that might be caused by the angle of light or cast by grip equipment that’s in the way. In this way, diffusion helps cinematographers control and shape light to be softer and create fewer shadows.
Digital zooms are zooms that get added in post, usually by cropping in from a higher resolution to a lower resolution without changing the actual aspect ratio itself. This creates the illusion of zooming in without needing a lens change.
Dollys are a wheeled film tool that runs along a dolly track for the purpose of recording smooth movements without any bumps or hiccups.
When you create a shot using a dolly (or a similar style of tracking movement) this can be called a dolly shot and is a popular device in a lot of shows and movies.
However, not all tracking shots use actual dollys - nowadays, Steadicams and gimbals can help create smooth movement without the need to lay down any actual track.
Standing for Digital Single Lens Reflex, DSLR refers to mid-level digital cameras like the Canon 60D and similar mirrored cameras. The mirror refers to how the DSLR cameras reflect light from the lens to a viewfinder, or directly to the image sensor when you are recording.
A camera’s dynamic range refers to the spectrum between the darkest part and the lightest part of an image that the camera can pick up. In this instance, “pick up” refers to what a camera can capture without losing the detail and definition of what’s being captured. So for example, a camera with a high dynamic range would be able to capture a lot more visual information in a dark room or a really blown out daylight exterior than a camera with a lower dynamic range. In the case of lower dynamic range, you would lose more image quality, resulting in the shadowy part becoming a detail-less mass of black, or an extremely bright image to a large white mass - which is why you want a camera with a high dynamic range!
Exposure refers to light being exposed to your camera’s image sensor. A long exposure means more light will reach your sensor, while a short exposure means less light will get in. In a long exposure situation, your image will be nice and bright, while a short exposure will make your image pretty dark. Long exposure is usually used as a cinematic tool for a specific effect.
In video editing, a fade is a transition from one image to another. You can fade to black, fade to white, or even dissolve to another scene. Usually fades are referred to as either fading in from black or fading out to black, and are one of the more common transitions, though they are used best sparingly. And never use a fade in the middle of the same scene - that is just weird looking!
Focal length refers to the distance from an object in focus in relation to how lenses capture distance, which is why we refer to the focal length of lenses to determine how wide or long they are. For instance, a lens with a longer focal length can make objects that are farther away seem closer up, while lenses with shorter focal lengths can make objects that are closer seem fuller in the frame, which is why a lens with a shorter focal length is referred to as a wide-angle lens.
The term foley refers to the art of creating original sound effects for a film or video project. Sound designers will either use sound libraries to mix together previously recorded sound effects into a video, or they will create the sounds on a foley stage. People who specialize in creating foley sounds are typically referred to as foley artists.
A Follow Focus is a control mechanism that allows you to easily make changes on the focus ring of your camera lens.
Framerate refers to how many frames per second your camera can record. The more frames per second a camera capture, the more frames you have to play with when you edit. So for example, if you were trying to film a scene in slow motion, you would shoot with a higher framerate. Then, when you want to slow down the footage, you play it back at a lower framerate, like the standard framerate of 24 frames per second, and the same scene will play out slower.
You know cameras have lenses, but did you know lights can have lenses too? That’s what a fresnel is - it’s a lens that goes in front of lights, usually tungsten lights, that can focus light to be wider or more narrow depending on your need. You can operate a fresnel to create a wider spread of light or to hone it in and focus the light to a single point, like a spotlight.
Gaff tape refers to a specific type of tape carried by gaffers and grips that works best for applying to lights, rigging equipment, and camera gear. It’s very durable, but easily removable, as it doesn’t stick so strongly to walls or equipment that removing it will damage paint or leave thick tape residue.
Gels are colored plastic filters that are used to cover the front of a light. In the same way, a polarizer or colored filter can change the colors your camera picks up, gels are used to change the color of the lights themselves.
For example, you might use a blue gel to make a light cooler in temperature or use a red gel to create a warmer temperature light.
 See also Video Lighting Guide Part 1: Different Types of Light
You might be familiar with High Definition Media Interface connectors, otherwise known as HDMI cables, from your home TV and computer electronics. If not, HDMI refers to a type of connection plug that acts as a standard for connecting TVs to computers and vice versa. HDMI is good for carrying both high definition audio and video between two sources.
High key lighting refers to a style of lighting where you put the source of your lighting behind and high above your subject to give them both a backlit glow and a softening look. This creates the effect of softening any harsh features, like removing blemishes or shadows that might appear on a face in a different type of light formation.
HMI lights are powerful lights that produce a large amount of light. HMI stands for Hydrargyrum Medium-arc Iodide, which means they use pressurized mercury vapor inside an arc lamp, which both runs more efficiently and more cool than tungsten light sources.
HMIs are used most often to emulate daylight, both because of their color temperature and light output. For example, if you are trying to shoot a scene night for day (meaning filming a daytime scene at night) you would likely use a large HMI as a source to bounce light off of to create the illusion of daylight.
HMIs are powered through ballasts, an electronic (or simply magnetic) device that regulates the arc.
An image sensor is a mechanism in a digital camera body that captures the image and records it as digital information. Different lenses impact how much light reaches the sensor, among other factors, while the size of the sensor will impact how well the resulting image will turn out. For example, a full-frame sensor, which is one of the largest possible sensors, will do better at reducing noise (the grainy stuff we mentioned earlier) as well as provide a wider field of view of your lens. This is where better image sensors on a camera can make the same lens look better, or in the case of a full-frame sensor, make a wider lens look wider. There are two other sensor sizes: M43 and APS-C, the latter of which is the standard for 35mm cinema cameras.
Importing files is the process of uploading individual video files into your editing software in order to cut them up and splice them together on your timeline.
When you have assembled a finished timeline in your editing software and you want to share your video with the world, you will export it.
Exporting is the process of then taking your timeline and exporting it back into a single video file, which will usually be used as the master file that the sound mix and color correction is then added onto.
When all is finished, one last file is exported as the final video file.
One note: the higher the ISO, the more your camera will pick up the grain on your image referred to as noise, and lose image quality, making your footage look grainy and, in the case of daytime shooting, very washed out. That’s why you want to keep to a lower ISO number known as the native ISO which is what your camera developer has deemed as the best ISO for your camera.
A J-Cut is not referring to a jump cut - in actuality, they are two different terms completely. Also sometimes referred to as pre-lapse, a J-Cut is a type of cut where the audio comes before the video.
This could be mid-scene, where two actors are talking and we hear one’s dialogue before we see them, or in the case of pre-lapse audio, between scenes, where we hear dialogue from a new scene before we enter that scene.
The reason this is called a J-Cut is that it creates a J-shape on the editor’s timeline when applied.
A jump cut is a transition that makes the subject appear to jump in time or space. It is usually a sudden cut, oftentimes cut between two points of action from the same continuous take.
Because of the suddenness of a jump cut, they often take the audience out of the scene or at least make the viewer aware of the presence of a camera (as opposed to watching a continuous scene that is edited to eliminate the presence of editing / cutting all together).
L-Cuts are the reverse of J-Cuts. Instead of the audio coming before the video from one take to another, in the case of an L-Cut, the audio from one take is carried over to the video from another take.
This could be due to a character’s line lingering as we change scenes, or due to the editor’s choice to cut away from a character before they finish talking.
Once again, the name is derived from the shape this type of cut creates on an editor’s timeline.
Latitude is a term that related to your camera’s dynamic range. When editing the exposure of your image digitally, the amount of latitude the image has relates to how much room you have to tweak it. What it’s really referring to is how much dynamic range was present in the camera when you captured the image - or how much detail there is for you to change. So for example, an image captured with a higher dynamic range camera will have greater latitude when editing it later.
One note: the higher the ISO, the more your camera will pick up the grain on your image referred to as noise, and lose image quality, making your footage look grainy and, in the case of daytime shooting, very washed out. That’s why you want to keep to a lower ISO number known as the native ISO which is what your camera developer has deemed as the best ISO for your camera.
Lavalier mics, also abbreviated as lav mics, are single direction mics that are attached to an actor’s body in order to pick up their dialogue. They are usually clipped on their clothing or taped directly to their body, and are attached to a battery pack on the back, which also has a receiver in them so the sound mixer can hear and mix the lav mic channels.
LED lights, short for Light Emitting Diode lights, are tiny electronic devices (semiconductors) that emit lights as electricity passes through them.
LED lights have grown in popularity as they are highly efficient sources of light, requiring less power and producing less heat than traditional tungsten or HMI light sources. They also change color depending on the amount of energy used, with white light requiring the most energy (and multiple semiconductors per LED) to produce.
Low key lighting is essentially the opposite of high key lighting, where the goal is to create harsher light that creates more contrast and more shadows. In contrast to high key lighting which uses multiple lights to reduce shadows, low key lighting uses a single source of light to create more shadows, creating a more dramatic look.
For more on low key lighting, have a look at our great article How To Use Low-Key Lighting For Dramatic Effect.
Referring to the rule of thirds here, the lower third refers to the bottom third of your frame, usually in the context of adding a subtitle or ticker-tape style heading used by broadcast news organizations. This would be the title below an interview that labels the person’s name along with a brief headling about whatever it is they are talking about.
Memory cards are little memory drives used in digital cameras to store the data files of the images you capture. Where film cameras record images onto strips of film, digital cameras record data onto these handy flash drives. Some of the most common memory cards come in the form of Secure Digital cards, Compact Flash cards, and Solid State drives. For more about memory cards, check out our ultimate guide to memory cards!
An optical zoom refers to a zoom that happens via a lens, as opposed to a digital zoom that is applied later on in post. Optical zooms are created when a lens changes its focal length, either getting longer when zooming in or getting shorter when zooming out. Lenses that are built for zooming optically are referred to as zoom lenses, while lenses that can’t zoom at all with a fixed length are referred to as prime lenses.
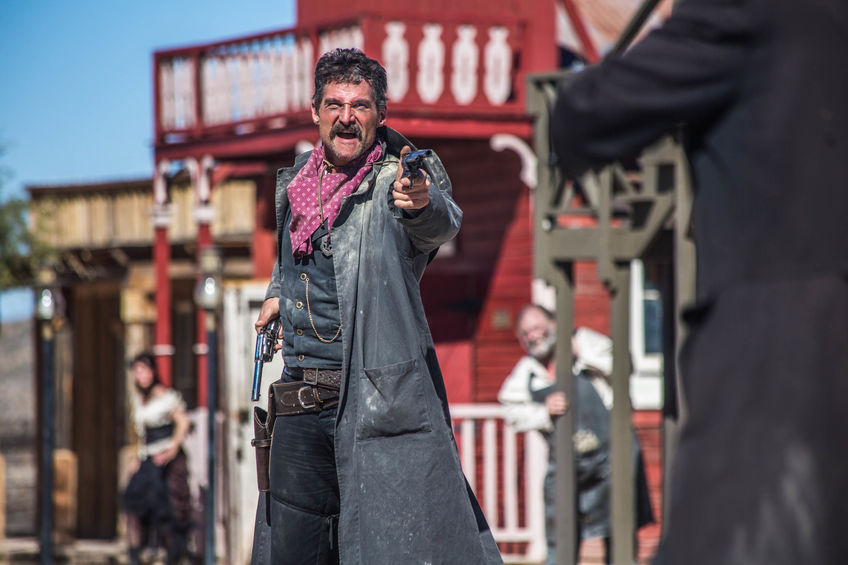
Over the shoulder shots, commonly abbreviated as OTS shots, are shots taken from the perspective of the camera being behind a subject’s shoulder. These can be dirty, where the subject’s shoulder is seen in frame, or clean, where the shoulder is not in frame.
OTS shots are great for dialogue scenes where two characters are having a conversation back and forth. Depending on how they are used, they can create a feeling of intimacy or a feeling of distance from the subjects depending on how they are shot and used.
Shooting a dirty OTS on a long lens could make you feel like an observer spying on a subject from afar while shooting a clean OTS on a shorter lens makes you feel like you’re right next to the action.
Panning shots refer to shots where the camera is moving horizontally from right to left or left to right while in a stationary position. Usually, this implies that the camera is attached to a tripod, and the operator is just physically turning the camera to capture the action. Panning shots are good for capturing sweeping locales or following the action while keeping a distance from the subject.
On most if not all digital cameras, there is some kind of digital onboard menu for you to control your camera’s settings. This is the picture profile, where you can change settings like your camera’s contrast, color tone, saturation, and sharpness. Most of these menus come with built-in picture profiles for you to choose from, but you will want to create and set your own depending on the stylistic look and feel you are choosing for each project.
POV shots, an abbreviation for “point of view” shots, are a type of shot that takes on the perspective of a particular character or subject.
The camera will usually be placed in the position of the character and will act as if the subject’s eyes, following the focus of that character’s vision. This can be by zooming in on an important detail, or by creating a handheld, shaky feeling to emulate a nervous character.
You could even add a filter to the image in the edit bay to denote that character’s state of mind, like a blurry vision effect to imply their vision is impaired in some way.
POV shots are great for implying a character’s point of view can’t be trusted, either when a character sees information with their own eyes that disputes another character’s point of view, or when the audience sees their point of view character’s perspective revealed to be flawed, untrustworthy, or flat out wrong through another character’s eyes.
Practical sources, or practicals, are sources of light that are actually seen on screen. This could be a lamp in the corner of a room or the actual sun. If the source of light is seen in the frame, it is considered a practical.
In cinematography, you should almost always aim to have some sort of practical in every scene, even if it’s just the sun or the moon. In fact, most light you add to a room should be made to look as if it’s coming from a practical source, even if that source is not seen on screen.
This term refers to light that is defined by its quality, or how hard or soft a light source is. The way that you measure the quality of the light is by how close the source of the light is to the subject. An easy shorthand is to measure how harsh, or hard, the shadows are.
If the shadows cast by or cast onto your subject are large and have hard, defined edges to them, that would qualify as hard light. This happens when the light source is too small or too close to your subject.
Compare that to softer, smaller shadows, and you have soft quality light. This is usually because the light source is farther away, more spread out, or more encompassing of your subject.
A good example of this would be the shadows cast by the sun on a clear day versus a cloudy day. On a clear day, you get harsh shadows from a single source of light, versus a cloudy day where the light is diffused by the clouds, resulting in softer (if any) shadows.
The term resolution refers to the amount of pixels of the image you are recording. Over time, the amount of pixels we have been able to capture with our cameras has increased, leading to the advent of HD cameras, which can record pixel resolution of 1920 by 1080. By contrast, 4K cameras refer to cameras with resolutions of or around 4000 pixels wide, but it varies depending on if you’re going for a theatrical resolution (4096x2160) or HDTV standard (3840x2160). The standard resolution for streaming HD on a platform like Youtube is 1080p.
Room tone refers to the base level sound of the set you are in before any dialogue or sound effects are added.
When you are on set, room tone is usually captured by the sound team before or after you start shooting so that the editors will have it later in case they need to fill blank space in order to cover a part of the scene where the sound has been removed or more space has been added between lines.
Without it, it creates a vacuum of sound completely, which removes users from the reality of the scene.
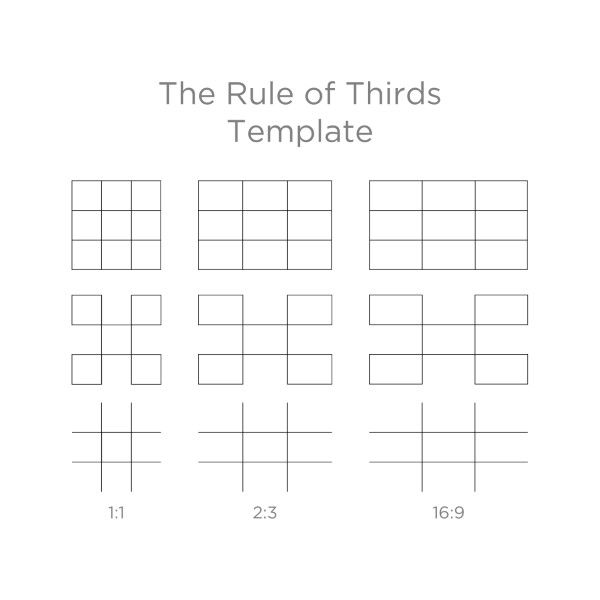
The rule of thirds refers to a tenet of good film composition that advises directors and cinematographers to mentally break up the frame into three vertical and three horizontal sections. Then, the goal is to place subjects strategically in one of the thirds so that they line up in an aesthetically pleasing manner, be it juxtaposed by another subject in an opposite third, or directly in the center opposing another centered subject in a reverse shot (like Wes Anderson, who often puts his subjects in the middle of the frame as a stylistic choice). Most cinematographers follow these rules religiously unless they are breaking them on purpose for a desired (and disorienting) effect.
The shot list is a director and cinematographer’s guide to all the shots they intend to shoot in any given scene on any given day. Functionally a checklist, the shot list determines the schedule for the day and what will be shot and from what angle.
This is what we refer to as coverage; how a scene is “covered” in different various shots.
The shot list helps film crews keep track of what they are filming and from what angle, and what they still have to accomplish.
Shoulder rigs are stabilizers that attach to a camera operator’s shoulder in some way to use the operator’s own body to help stabilize the camera. Shoulder rigs are nice for taking the pressure off an operator’s arms to carry the entire load of the camera, which is very nice for shooting handheld, as having to hold the camera all day can be a real drain.
The speed of your shutter refers to the duration of time that each frame is exposed to light for. Shutter speed is most easily referred to in degrees of speed, i.e. “1/60th of a second”, but can also be referred to in degrees of angle, i.e. “180 degrees.” Shutter speed is useful when controlled manually for creating specific effects. For example, shutter speed will impact the amount of motion blur captured. A faster shutter speed helps you capture crisp, clean movements, while a longer shutter speed will capture blurrier, more chaotic looking images - which creates an interesting effect when used intentionally.
The slate is a famous piece of film equipment - it’s the mini whiteboard that you write the shot, scene, and take number on before clapping shut in order to sync the sound with the video in post-production.
The slate is an organizational tool to help the editors both match the audio with the visual, but when used in conjunction with the script supervisor’s logs, it is also good for keeping track of which takes are the best from each set of shots.
A slider is a type of camera mount that actually slides forward and backward (or side to side, depending on how you position it). This is to create a push in or push out effect and is nice for creating dynamic movement in an otherwise stationary shot. You can also lock sliders in place and use them as shoulder rigs when shooting handheld, too.
For more information on sliders have a look at our in-depth guide Best Professional Camera Sliders For Any Budget.
Slow-motion is a pretty commonly known special effect where you slow down footage for a specific effect. Slow-motion is almost always applied after the fact, but you do need to consider what frame rate you are shooting a scene in when you are intending to slow it down later in post-production. As mentioned before, a higher frame rate creates a smoother effect when you slow footage down.
A snorricam is an interesting camera attachment that you rig to an actor’s body to create the illusion that the world is moving around them. With the camera locked on an actor’s face / upper body as they move through the world, the snorricam makes the camera stationary while the world behind the actor is fluid and rotating around them.
Softness and sharpness in cinematography refer to the crispness of an image, or in other words, how in-focus an image is. What we consider “soft focus” is the opposite of “sharp focus”, i.e. if an image is soft, that means that it is in-between being completely out of focus and in focus. However, it can sometimes be hard to tell, which is why it is called “soft” as the details of the image will be blurred slightly so that they look a little less crisp, or what we would consider “sharp.”
A split-screen is an editing term that refers to two different shots being spliced together into the same frame at the same time. So for example, one character is talking to another on the phone, and both of them are in separate locations (that were filmed separately) but are edited together to appear in the frame at the same time.
Steadicams, or Steadicam rigs, are camera stabilizers that create the impression of fluid movement, usually through a counterbalance system to keep a camera steady while moving it around in a handheld fashion.
Steadicam rigs usually hook up via a vest that the operator wears and an arm attachment that the camera can move around on. These arms are either side holstered like a third appendage or slung up the back of the vest to hang the camera from a tight extension cable above the operator’s head.
Stop motion is a type of animation where you create the illusion of movement through taking a series of still images and then cutting them together.
While that definition technically encompasses all of video and film, stop motion is different in that the subject being recorded can’t actually move on its own - or can’t move in the same way on its own.
Stop motion is best used to animate inanimate objects to make them appear to move. The animation style known as claymation, where clay figures come to life, is created via the stop motion process.
The storyboard is a director’s tool to visually outline every shot prior to filming them on the day by drawing them out in a sequence.
Storyboards are good for capturing the exact frame and angle of each shot and allows the director to draw what they see in their head. These storyboards are then used as visual guides, or blueprints, for the director and cinematographer to follow on the day.
Sync sound refers to all diegetic sound that is synchronized with an image. Dialogue matching lips, a shatter sound effect corresponding with a window breaking, or a car horn blaring as a fist slams onto it all count as sync sound.
Because sound is always recorded separately and not on the camera itself, it is necessary to sync sound up in post. This refers to the process of matching the sound file with the image file, which is why every scene begins with a harsh clap sound via the slate - so editors can sync up the sound from the scene in post.
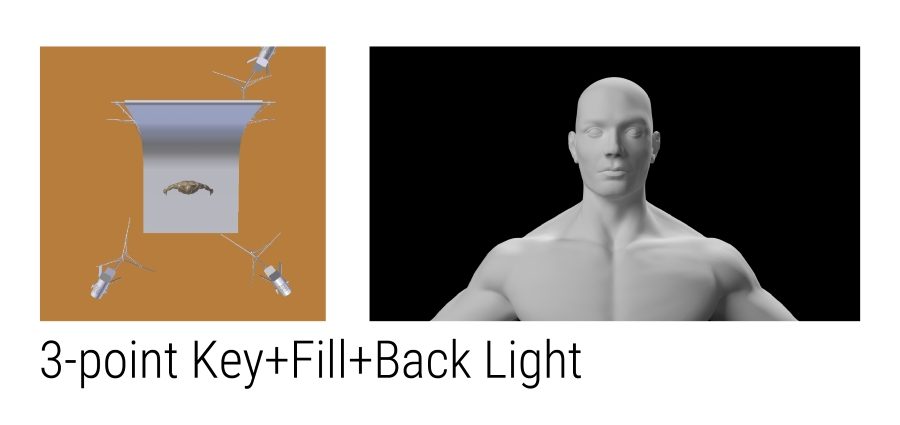
Three-point lighting refers to a lighting setup that has three points. Traditionally considered the standard for film and video cinematography, three-point lighting always includes a key light that directly faces the subject, a backlight that lights the subject from behind, and fill light (or multiple fill lights) on the side to balance out the light from the key to control for contrast and shadows.
For more on 3-point lighting have a look at our article Video Lighting Guide Part 3: Basic Lighting Setups.
Tilting shots are shots where the camera is angled up or down from a stationary position. Unlike crane shots where the camera is physically moving up and down, tilting shots happen while the camera is attached to a tripod and is physically moved upward in angle or downward in angle by the operator.
Tilting shots are great for revealing important information hidden in plain sight, like when you tilt down to reveal a character hiding underneath a table, or tilt up to show a leak in a water main above the characters’ heads that’s about to blow.
Timelapse is an effect where you speed up footage to imply the passing of time. Essentially the reverse of the slow-motion effect, in order to create time-lapses, you will want to capture longer stretches of footage over longer periods of time.
To create this effect, most digital cameras have a built-in timelapse feature that records at a slower rate - usually in low power mode to save battery strength, which is particularly useful for shooting overnight time-lapses.
Tracking shots refer to shots where the camera moves alongside a subject, following them along a set track.
Tracking shots are often created using a dolly, which is a film equipment term we’ll get to in a minute, in which case an actual track is set up for the dolly to follow. However, shots taken via handheld, slider, Steadicam, gimbal, or glidecam that follow a subject or multiple subjects in action throughout a scene are still considered tracking shots.
A tripod is a three-legged stand that you attach your camera to in order to keep it stationary and stabilized while shooting. Tripods are also often referred to as “sticks.” Another stationary camera stabilizer, monopods are tripods with only one leg. Monopods are used in situations where a tripod is impractical, or if used with a counterbalance, can also be used for camera movements like panning, tilting, or even tracking.
Have a look at our in-depth guide Six Things You Need to Know Before Buying a Tripod for Video. And if you're looking to buy a tripod, you should read 10 Best DSLR Video Tripods For Beginners, Travel, And Pros.
Tungsten lights are warmer type light bulbs that create a more orange look. They are defined as tungsten by the tungsten wire filaments that power them.
Since they are more red and orange looking, they have a warmer color temperature - somewhere around 3200 Kelvin.
Tungsten bulbs are most commonly used in everyday light sources like desk lamps or ceiling lights, and thus have a more “homey” feeling to them, as opposed to cooler color temperature LED lights.
The viewfinder is the eyepiece of your camera that you look through to see the image you are about to capture. A camera’s viewfinder should show you everything that your lens sees in its field of vision, and as such, you should be seeing more or less exactly what is being recorded. This doesn’t account for how your image will capture color and light, though, which is why many digital cameras also provide tiny LCD screens for you to compare to. However, these on-board screens don’t always perfectly emulate the exact image you are capturing in terms of color in light, which is why it’s important to know how your camera settings will impact your final image files.
White balancing is the process of correcting the colors that your camera picks up prior to shooting to an objective standard, in this case matching the color of white on your camera screen to an objective “true white.” This is necessary so the color of your image is as true to reality as possible, as many digital cameras might pick up hints of other colors, such as red, blue, or even yellow and green, if not white balanced prior to shooting. Most digital cameras come with an automatic white balance built into them, but you’ll still need to point your lens at a white object of some kind to match to.
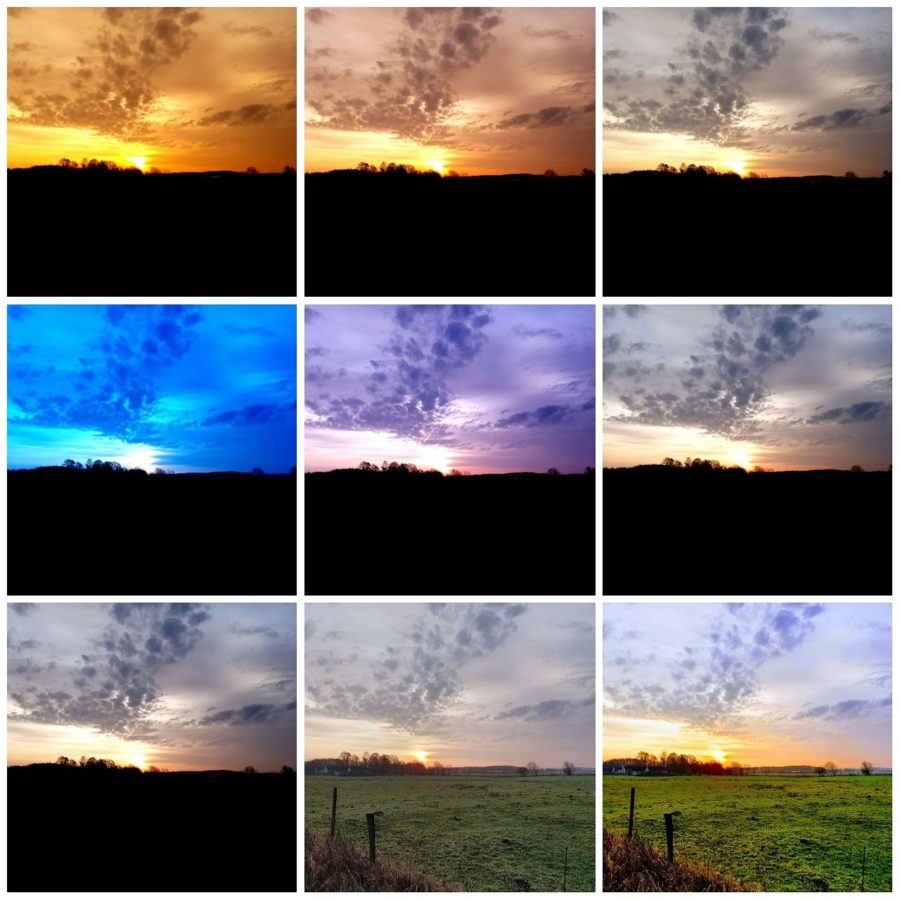
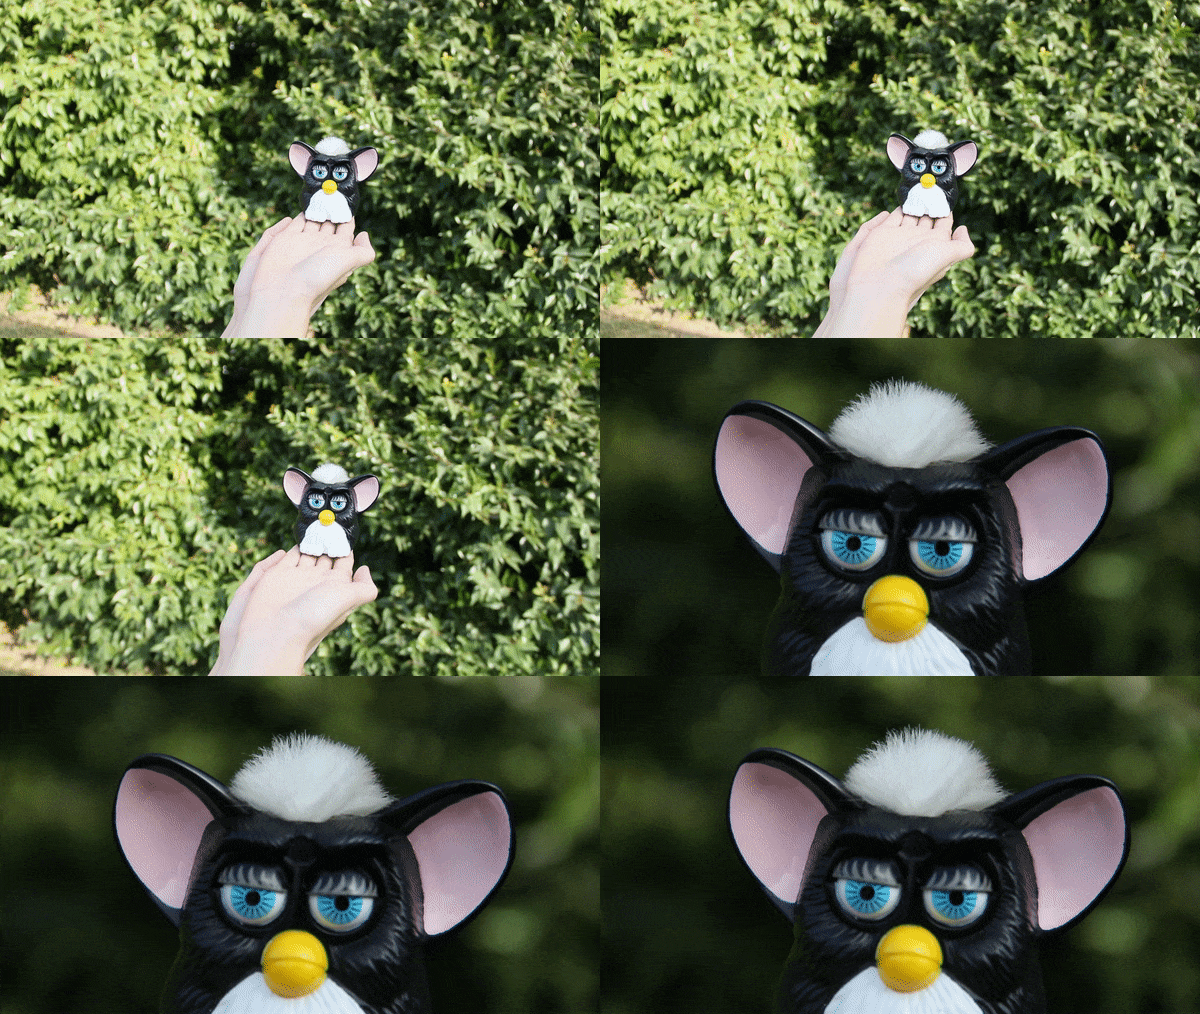
If you want to get creative, you can manipulate the white balance on purpose in order to get different colors in the shot. Here's a series of shots taken a few seconds apart with different white balance settings along with a neutral shot and an HDR shot with different exposures (the two last shots):
For more on camera angles and camera movements, check out our guide on the most frequently asked questions about camera shots and camera angles.

