Adding text to videos is one of the most basic and important steps to the editing process. Premiere does a wonderful job of making this simple for any skill level.
Premiere also does a great job of allowing an editor to create dynamic text through customization and animated motion.
We recommend learning the basics of creating a text file before jumping into animation, but this article will show you the basics of both.
There are a lot of different properties to a text file that you may not have realized existed. It can go well beyond the font style, size, and color.
Let’s begin by learning how to add text in Premiere Pro.
How to add text in Premiere
Adding a text file is extremely simple inside of Premiere. There are four primary methods to create a text file.

- With your sequence selected, press the keyboard shortcut Mac CMD+T or Windows CTRL+T. A new text file will appear on the sequence and in the Program window.
Check out our guide to Premiere Pro shortcuts [PC/Mac].

2. Use the Type Tool by either selecting the icon in the Tool panel, or by using the keyboard shortcut T. Next, click anywhere inside of the Program window, and then a new text file should appear on the sequence and Program window.

3. Go to Graphics > New Layer > Text. A text file should appear on the sequence and Program window.
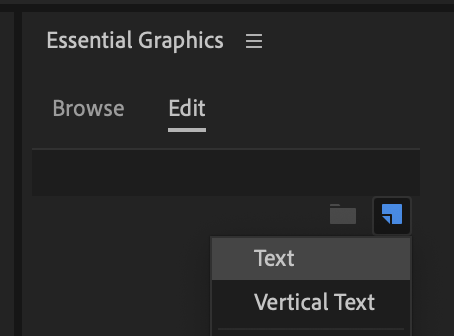
4. Visit the Essential Graphics panel by going to Window > Workspace > Graphics. The Essential Graphics panel will appear on the right side of the screen. Hit the New Layer icon pictured below and select Text. A text file should appear on the sequence and Program window.
The simplest way to create a text file is to use the keyboard shortcut. It’s important to know all of the different methods as they all have different use cases. Now let’s learn how to edit the text file.
How to edit text in Premiere Pro
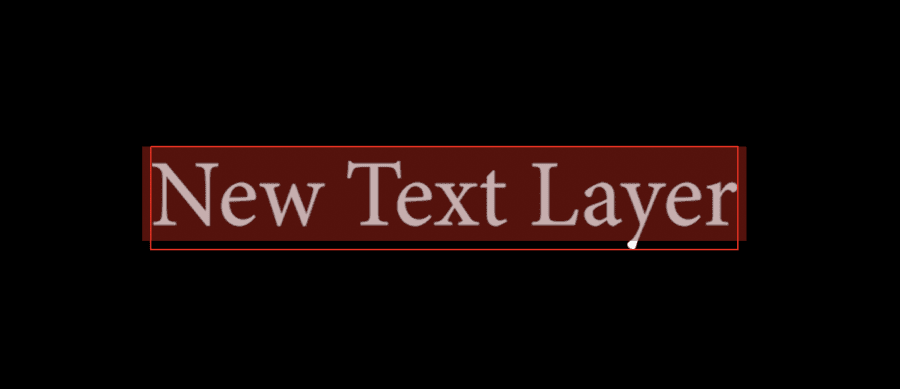
You can change the copy of the text file by clicking on the dedicated area of the Program window and typing whatever you desire. For the purpose of this demonstration, I will leave the copy as is.
There are two main ways to edit the properties of a text file in Premiere: in the Effect Controls panel or the Essential Graphics panel.
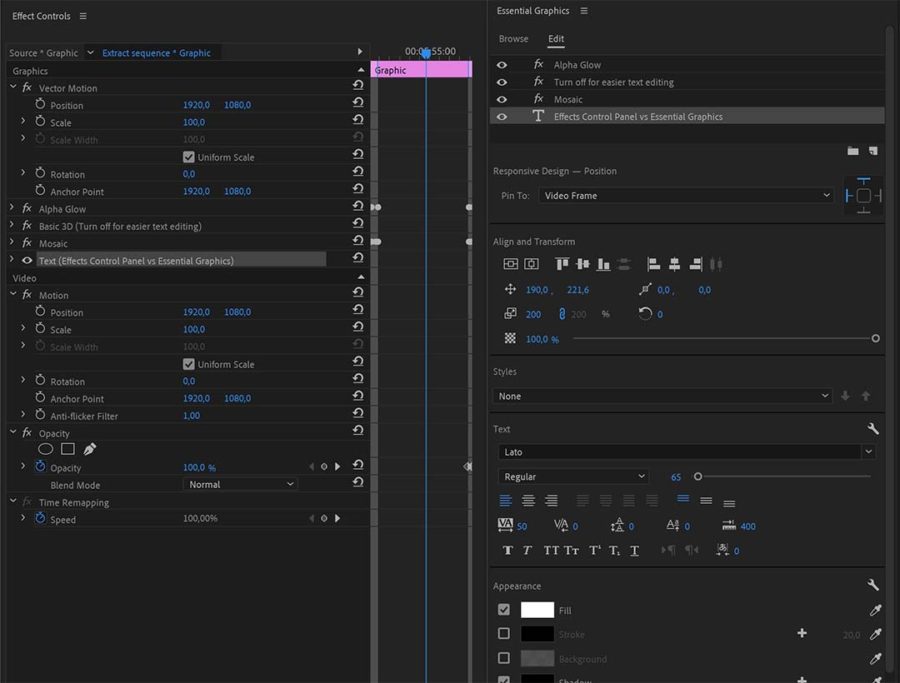
The Effect Controls panel is great if you want to make simple changes to your text and create animations with keyframes.
The Essential Graphics panel is great if you want to do more customizations to the text properties.
As a side note, most of the property icons are not labeled directly. You can see the icon’s label by hovering your mouse above the icon.
We will briefly look over the Effect Controls panel later, so let’s begin in the Essential Graphics panel.
Editing text in Premiere Pro with the Essential Graphics Panel
So let’s start by breaking down the most important features for editing text within the Essential Graphics panel in Premiere Pro.
Tip: to learn how to use this panel see our in-depth guide on how to use the Essential Graphics panel in Premiere Pro.
Responsive Design – Position

The first section of a text file on the Essential Graphics panel is the Responsive Design. This function will require you to create a shape as a background behind the main text layer.
You can then attach the shape to the text by selecting the text file in the dropdown menu that currently reads “Video Frame.”
This will create a responsive graphic. This means that the background shape will change its size based on the length of text. This helps you from having to reposition the background shape once you’ve added or removed text.
You can then tell Premiere which edges to use via the icon pictured below. You can choose the edges individually, or all of them by selecting the center icon.

Align and Transform

This section allows you to align the text perfectly based on certain parameters. The top layer of icons is related to alignment, which includes aligning vertically, horizontally, and more.
For example, you can center the text perfectly by hitting the Center Horizontally and Center vertically icons pictured below.
This section also allows you to change the position, rotation, scaling, and opacity of the text file.
Styles

Premiere allows you to create and save text styles once you have changed the properties to your desire. This is a helpful tool if you work with many different types of fonts, colors, etc.
You can save the text style by clicking on the dropdown menu and selecting Create Style. Premiere will save the style based on all of the current properties of the text file in the Essential Graphics panel.
Text

This section is where you will change the font, font size, spacing, etc. This should be similar to using any type of word processor that you may have used before.
Appearance

Here you can change the color of the text, add a colored stroke around the text, or add a colored background or shadow.


You can also mask the text on a shape the Mask with text checkbox at the bottom of this tab.

Editing and Animating text in Premiere Pro with the Effect Controls panel
You can see many of the same properties can be changed directly in the Effect Controls tab. There are only a few missing items in comparison to the Essential Graphics panel.
However, one major difference between the Effect Controls tab and Essential Graphics panel is any animations will need to be created in the Effect Controls tab.
This is because you cannot currently create keyframes in the Essential Graphics panel.
Let’s briefly touch on how to create text animations.
How to animate text in Premiere
Premiere makes it simple to create basic animations with text files. You will be able to create animations with Position, Rotation, Scaling, Opacity, and some select Effect presets aka Motion Graphics templates.
You create an animation by using keyframes with the allowed text properties.
Let’s create a simple fade in transition using keyframes.

Change the Opacity of the Text file to 0%. Create a keyframe by clicking on the Clock icon next to the Opacity property.
Next, skip a few frames forward using the keyboard shortcut right arrow. I am on a 24 frames per second timeline, so I will skip ahead 12 frames for half a second. You can copy what I am doing, or choose your own number of frames.

Change the Opacity to 100%. A keyframe should be automatically created since we used the keyframe clock on the Opacity property.

The text should now fade in from zero to 100% between the two keyframes.
You can use this same process for adding motion with the Position, Rotation, and scaling properties as well.
You will not be able to create 3D animations inside of Premiere. 3D animations require the use of After Effects.
Speaking of After Effects, you can see how to create and use Motion Graphics Templates (fx animated text) within AE here.
if you don’t want to create MORGT files yourself here’s a link to an article with the best places to free and paid templates.
Premiere also has some preset effects that can add motion to your text files. A great effect to use for animation is the Transform effect. This effect will give you keyframe options for all of the same Position, Rotation, Opacity, and Scaling properties as a general text or video file.
However, the Transform effect allows you to change the shutter speed of the text. This is great for adding motion blur to your animations, which will look much more natural and dynamic than without it.
A text file works similarly to a video file inside of Premiere. This means that most of the Effect presets will work on these files. Unfortunately there are too many to name, but here are a few of my favorite for text files.
Transform – Adding motion blur to movement
Gaussian Blur – Adding a transition blur effect
Linear Wipe – Creating a customizable wipe transition
Basic 3D – Creating basic faux 3D motions
Conclusion
This article covers the basics of how to create and edit a text file in Premiere Pro. Mastering the basics is an important first step.
You will have a much easier time creating dynamic text files once you learn what Premiere can and cannot do.

