MOGRT files are pre-made MOtion GRaphic Templates that can drastically speed up your workflow. They can be reused and easily tweaked from project to project. They are an easy way to add motion graphics to your video projects without the hassle of creating keyframes every time you need a new graphic with motion.
MOGRT files can be created in both Adobe Premiere and After Effects. After Effects allows you to create more advanced motion graphics, whereas Premiere has some limitations.
Here’s a step-by-step guide on how to create a MOGRT file in After Effects:
Table of Contents
1: Decide what type of Motion Graphic you want to create
The first step is to decide what we want to happen on our MOGRT file. Typically, the most common assets used in a MOGRT file are text and shape layers. Some examples of motion graphics could include the following:
- Lower thirds – typically used during interviews to show a speaker’s name and title
- Callouts – used to highlight a feature of something within a video. For example, a product review highlighting a feature of the product
- Quote titles – Used to show a quote and its author
- Titles – Could be used for titling your video, video section, etc
- Transitions – Used for transitioning one clip to another with shapes and masks
You don’t want to overwhelm yourself in the beginning. The best way to learn is with a simple motion graphic that we can replicate.
For this tutorial, we will use the graphic below.

Looking at the image below, this motion graphic uses a line of text, a shape layer for the mask, and a null layer to tie the previous two elements together. I used Helvetica for this graphic, but feel free to use any font.

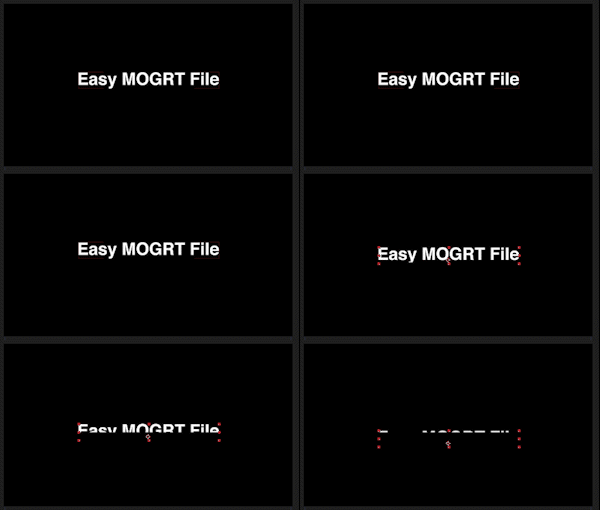
The line of text moves up from behind the mask, holds for a few seconds, and then moves back down behind the mask using keyframes. Note that keyframes are only used on the text layer.

We can now create the motion graphic from scratch using the same elements.
You might also like Best places to find MOGRT files (free and paid)
2. Create a new composition
Go ahead and open a new project in After Effects. Then, create a new composition by hitting the keyboard shortcut (Mac: CMD+N) or (Windows: CONTROL+N). A pop-up will appear for the composition settings.
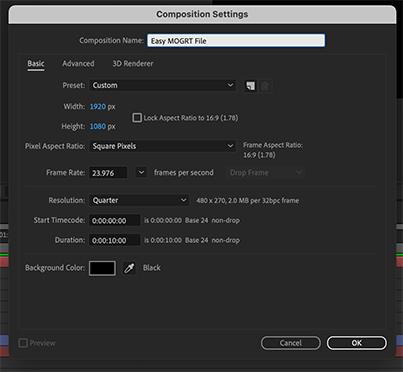
Feel free to use whatever settings you would like, or you can copy the settings I used above. I am using a standard 1080p setup at 23.976 frames per second.
I recommend working under the Essential Graphics workspace when creating MOGRT files in After Effects. Many tools are automatically set up when customizing graphics. The Essential Graphics workspace is under WINDOW > WORKSPACE > ESSENTIAL GRAPHICS.
3. Create a text layer
You can create a new text layer under LAYER > NEW > TEXT. An empty text layer should appear in the Layers Panel.
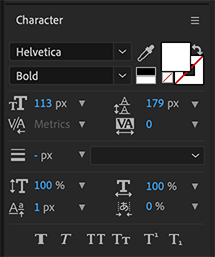
Now, type anything on the text layer. I will type “Easy MOGRT File” for this tutorial. You can also change any of the text characteristics under the Character Tab. I am using Helvetica bold and 113 pixels.
4. Create a shape layer
Next, create a new shape layer under LAYER > NEW > SHAPE LAYER.
The new shape layer will appear on the Layer Panel, but the shape will not appear immediately.
You’ll notice the mouse cursor looks different. We will need to draw our shape layer. We want to create a rectangle large enough to cover all the text on the screen.
However, I will create a shape layer large enough to accommodate more text if we decide to use this MOGRT file.
Use your cursor to click and drag until you create a rectangle. After you let go of the cursor, a colored shape should appear. Don’t worry about the shape’s color; we will address this later.
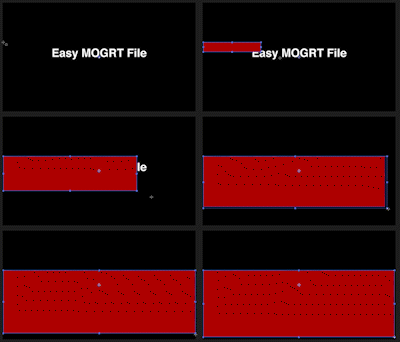
Shift the position of the shape’s position down so we can see the text layer we created.
5. Add an alpha channel to the text layer
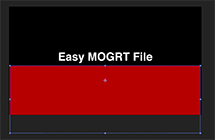
Now, we need to add an alpha channel to the text layer so the shape will act as an invisible wall. To do this, you must turn on the Layer Switch Pane.
You can do this by clicking the button at the bottom left of the After Effects window or the “Toggle Switches/Modes” button circled in red below.

A dropdown menu should appear in the TrkMat column on the Layer Panel. Select Alpha Inverted Matte “Shape Layer 1.” Note that your shape layer must be above the text layer on the Layer Panel for this to work properly.
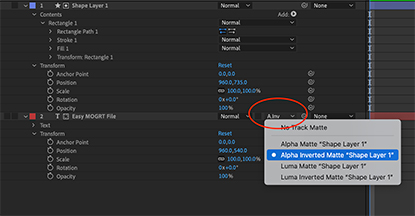
You should then see the colored rectangle disappear from the screen. The mask, or invisible wall, is now created. The text will disappear is you move the position down toward where the colored rectangle used to be.
6. Create a null object
This step is optional, but it’s helpful if you want to move both of these layers simultaneously without damaging what we’ve created. You can skip to the next section if you do not want to complete this step.
A null object is an invisible layer that other layers can attach to. As mentioned, this is useful when you need to move or resize multiple layers without doing it individually.
Create a null object under LAYER > NEW > NULL OBJECT.
Parent the text and shape layers to the null object by clicking each dropdown menu under the Parent & Link column in the Layer Panel.
Select “Null Object #” for both layers. The text in the dropdown menus will match the selected item.

7. Add motion keyframes
We will set keyframes on the Y position so the graphic will move up and down.
The graphic is where we want it to appear, so we will place this keyframe first.
I want the graphic to appear after half a second. We can manually move the playhead half a second by using the curser or by typing +12 in the Playhead Position box, as shown below.
Note this number may be different depending on the framerate you chose while setting up the composition earlier.
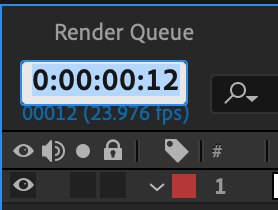
Now, let’s set the keyframe. We can set After Effects to place keyframes automatically when the position is moved.
First, hit the clock icon next to Position on the text layer. After Effects will automatically place a keyframe.
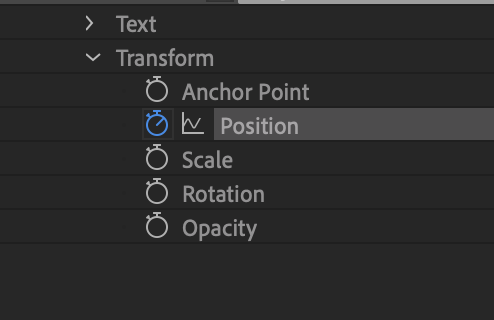
Next, let’s move the playhead back to the beginning of the sequence to place the next keyframe.
You can place the playhead manually or type 0 in the Playhead Position box.
Then, move the Y position down on the text layer until the text is under the shape layer. Note another keyframe will be automatically placed.

Repeat these steps at the end of the composition so the text disappears behind the shape layer.
The motion graphic is now complete. Now, we will set up the MOGRT file.
8. Setup the MOGRT file
If you did not do so earlier in this tutorial, you will need to pull up the Essential Graphics Panel. It will be a window like the one in the photo below.
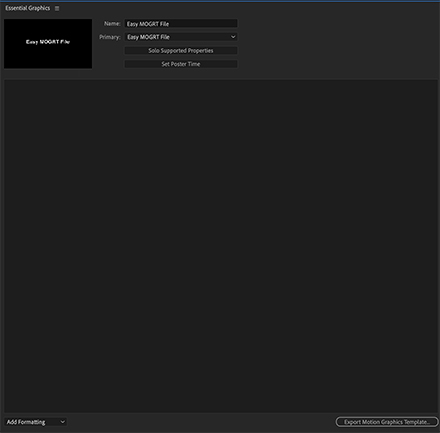
Different properties are displayed immediately:
- Name
- Primary
- Solo Supported Properties
- Set Poster time
Name
First, name the MOGRT file. I would name it something easy to reference later, such as what happens in the graphic. For example, you can name this “Text Reveal.”
Primary
Next, the Primary focus is on the composition. The initial composition should automatically show up here since it’s the only one on the Ae project.
Solo Supported Properties
Now, we can start adding customizable properties to the MOGRT file. This tutorial will be simple, but feel free to play around as you follow this guide.
Next, hit the Solo Supported Properties button. This will open all available properties on the Layer Panel for every layer in the composition. We only need to focus on the text layer, as the mask will automatically be added to the MOGRT file.
You now need to decide which properties you want available to edit later when the MOGRT file is imported into Premiere. For instance, we can allow the user to adjust the text size.
To do so, drag and drop Position from the text layer to the Essential Graphics Panel. First, click and hold Position under the transform tab on the text layer, which is circled in red below.
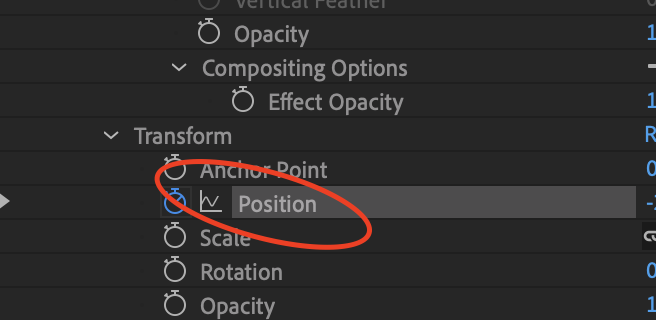
Then drag that icon up to the Essential Graphics Panel. A popup will prompt you to copy over the keyframes in the text layer’s position, and then it will appear near the top of the Essential Graphics Panel.
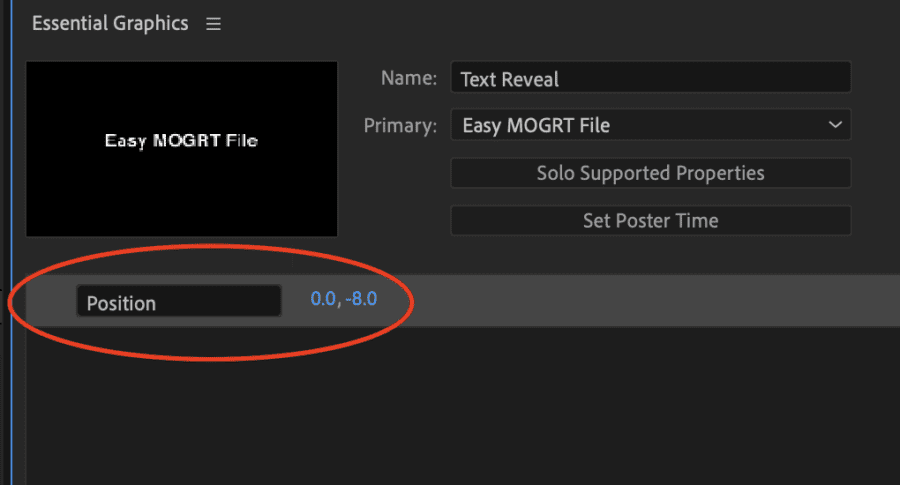
This is just one of many elements you can add to your MOGRT file. Let’s add the ability to change the text properties. Under the Text tab in the text layer, drag “Source Text” to the Essential Graphics Panel. Notice an “Edit Properties” button when the Source Text is added on the right side.
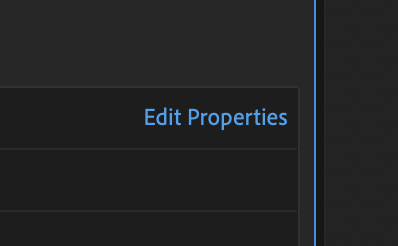
A popup will appear when you click this button. Check off all boxes on the upper half of the popup window, which is pictured below.
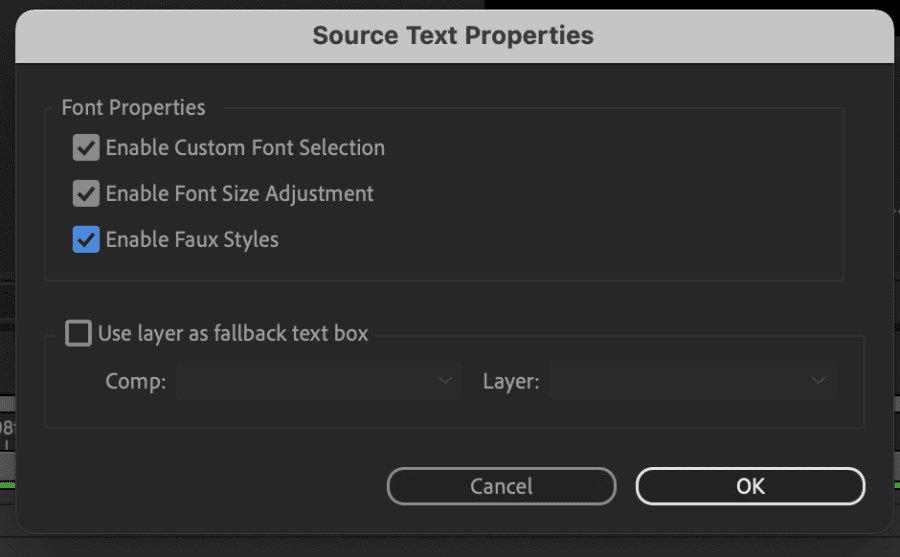
This will then allow the user to change multiple properties of the text.

Play around adding different properties to see what is possible. For this tutorial, we will stick with the Source Text and Position, but feel free to add as many as desired.
Set Poster Time
The “Set Poster Time” button will create a display image for your MOGRT file. You can set this yourself or use what is automatically set.
The last step will be to export the MOGRT file.
9. Export the MOGRT file
This step exports the MOGRT file to be imported into either After Effects or Premiere. After Effects will create a .mogrt file that can be easily imported into either application.
Click on the “Export Motion Graphics Template…” button on the lower right corner of the Essential Graphics Panel. After Effects will prompt the project to be saved.
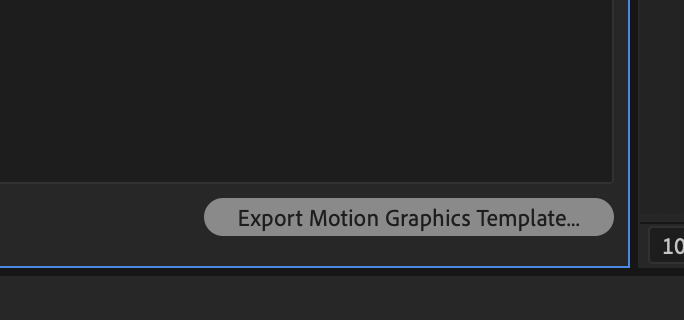
After the project is saved, a new popup will appear. This is where you will set the save destination of the MOGRT file.
I recommend keeping all your MOGRT files in Adobe’s “Local Templates Folder,” but you can save them to any preferred folder. You can also add keywords for easy search later.
Hit “Okay” once you are satisfied.
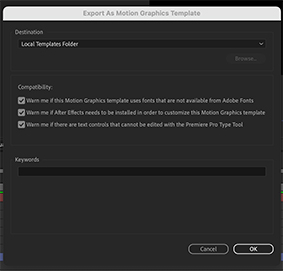
That’s it. The MOGRT file is created. It will automatically appear inside Premiere if you saved it in the Local Templates Folder, but you can learn how to import it here if you saved it to a different folder.
Head off into Premiere and check out your new motion graphics template.
Sell your MORGT templates
Another great benefit is selling your MOGRT files on other platforms. MOGRT files are exported in the .mogrt format, which can be easily downloaded and installed on another machine.
You can sell MOGRT files on places like Storyblocks, Envato Elements, Motion Array, and more. You can even sell them on your website or in stores. This can be a great way to make passive income with graphics you already use.
Conclusion
MOGRT files are a great way to add motion graphics to your projects without having to recreate them repeatedly. You can also add shapes, colors, etc, so you’re not limited to text.
MOGRT files can be created in both Premiere and After Effects. However, you can add more customization creating inside of After Effects. Practice makes perfect, so I would create different graphics until you are comfortable.
Open one of these files inside After Effects and look at what the creator used to create the graphic. Then, you can try to recreate the graphic yourself or use similar elements to create your own.
Up Next: How To Import And Edit Motion Graphics Templates (MORGT) In Premiere Pro

