Normalizing audio for your video projects should be the first step in your workflow for audio editing and mixing.
Normalizing is simply defined as boosting the loudest value of your audio to reach a specified threshold.
This basically means that Premiere will increase or decrease the volume based on a decibel level you set.
We normalize audio to help achieve a consistent decibel level between all of our audio clips.
This article will show you how to easily normalize audio in Premiere Pro.
There are two primary methods: normalizing the individual clips or normalizing the mix track.
Normalize one or multiple clips
This method of normalization can be used on one or multiple clips on your timeline. We recommend one to start, but you can easily apply this process to multiple clips.
I have a single audio clip on my timeline shown below. The waveform is fairly consistent throughout the entire clip.

However, the audio is fairly low. The audio looks like it peaks around -12 to -15 dB on the audio monitor as pictured below.

In this example, we are mixing an audio clip that will be published on YouTube. Our audio will sound very low on YouTube if we keep it at this volume, so we will need to boost it.
YouTube videos generally sound good when they peak around -3 dB, so we will make this our threshold.
We will need to open the Audio Gain dialog box in order to normalize the audio. Right-click your clips on the timeline and hit Audio Gain. You can also find this with keyboard shortcut G.
Check out our guide to Premiere Pro shortcuts [PC/Mac].

A window will appear with a few different parameters.
First note that on the bottom is the Peak Amplitude. We guessed the peak of our audio was around -12 to -15 dB, which was pretty close to the actual peak of -10.9 dB. This means we will want to adjust our audio about +8 dB in order for the value to reach -3 dB.
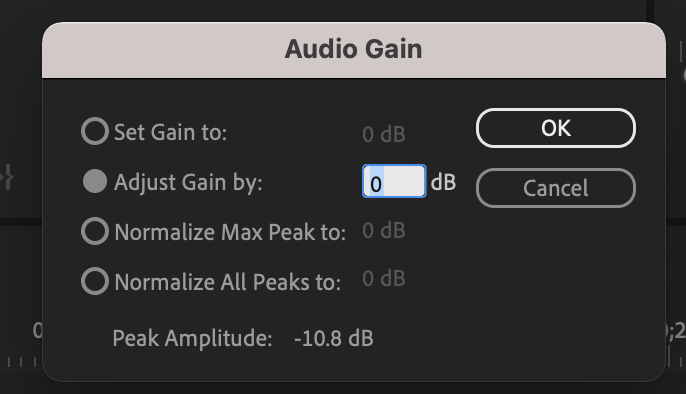
There’s four ways this can be done.
1. Set Gain to:
This is the current gain level of our clip. We can set this to a specific gain level, but it will be on the scale of the clip. The default clip audio level for any imported clip in Premiere is 0 dB.
For example, let’s say we want to boost the gain from the default 0 dB to 6 dB. Enter 6 on the Set Gain to parameter. The gain will be boosted to 6 dB on the scale of the clip.

However, let’s say the audio level is too high and we need to decrease it to 2 dB. Notice how the set gain is now 2 dB for the clip. We did not decrease it 2 dB levels, but rather set the clip itself to 2 dB.


How do we apply this to normalizing? We know that we have to adjust our audio 8 dB levels, so setting the gain to +8 dB should do the trick.

Note, this technique can be applied with multiple selected clips using the same process.
2. Adjust Gain by:
This option allows you to adjust the gain by a specified dB level. This is similar to the previous parameter, but you can adjust by a specific dB level as opposed to setting the clip to a specific dB level.
For example, let’s say we’ve adjusted the gain to +6 dB on the clip. We want to adjust the gain again by adding +3 dB, but we don’t want to set the clip to +9 dB on the previous parameter.
We can type 3 on the Adjust Gain by parameter, and Premiere will adjust the gain to +9dB. This method added +3 dB instead of setting the clip’s level to 3 dB.

Normalizing will work the same way as the previous parameter. Do the math to figure out how much again you need and adjust accordingly.
Note, this technique can be applied with multiple selected clips using the same process.
3. Normalize Max Peak to:
This parameter is much quicker than using the previous two methods for normalizing. We can easily set the desired decibel level, and Premiere will normalize the audio to that level.
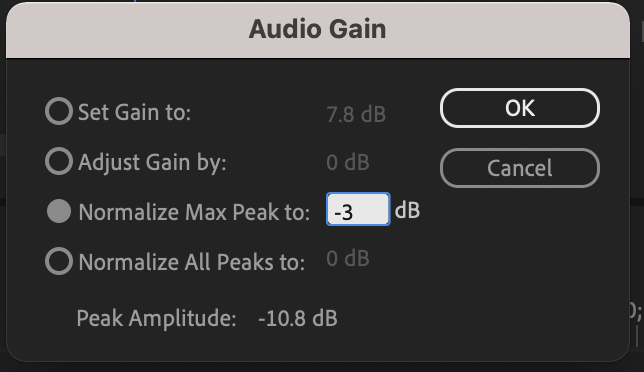
For example, we mentioned before that we want the waveform to peak at -3 dB for YouTube. We type -3 in this parameter, and Premiere adjusts the audio.
We can see that the Set Gain to parameter has changed to 7.8, which is around the 8 dB level we estimated earlier. The highest level should now peak at -3 dB.
This setting is also powerful when it comes to multiple clips. You can change the gain of all of the selected clips collectively so that the loudest peak will determine how much gain needs to be increased or decreased.
4. Normalize All Peaks to:
This parameter is the same as Normalize Max Peak to, but with one major difference.
This parameter will adjust the gain of each individual clip based on the clip’s peak values instead of all of the clips collectively.
Normalize the Mix Track
Normalizing the Mix Track is pretty straight forward. This method will normalize the track’s overall audio levels rather than the clip’s audio level.
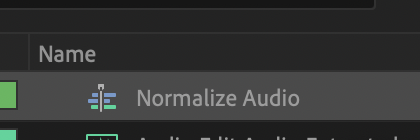
First, select the timeline that you want to normalize in the Project Panel.
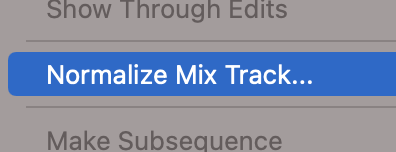
Second, select Sequence > Normalize Mix Track. A popup window will appear.
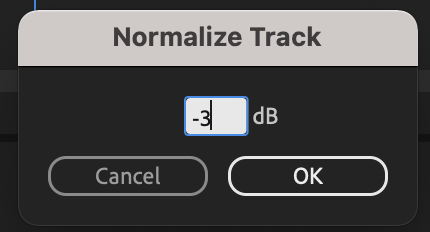
Third, enter a dB value. We will enter -3 dB since we want our audio to peak at -3 dB.
That’s it. The master track for the sequence will be normalized to -3 dB.
This is a good method if you’re in a hurry and want to normalize all of your audio quickly, but I would recommend using one of the previous methods as you will have more control overall.
Conclusion
As mentioned before, normalization is an important step in the audio editing and mixing process.
Setting the gain to a standard level will make things much easier for you when it comes to adding other effects to your audio.
Play with the different methods and parameters to see what works best for your workflow.


Great article, thank you.
Thank you. I’m glad you liked it.
Best, Jan