DISCLOSURE: AS AN AMAZON ASSOCIATE I EARN FROM QUALIFYING PURCHASES. READ THE FULL DISCLOSURE FOR MORE INFO. ALL AFFILIATE LINKS ARE MARKED #ad
A variable ND (Neutral Density) filter reduces the amount of light entering the lens without altering the color of the light. It works by using two polarizing layers that, when rotated, can increase or decrease the optical density and thus control the amount of light passing through. This adjustability allows for a wide range of exposure reduction options within a single filter, making it a versatile tool for filmmakers and photographers alike.
This guide teaches you how and when to use variable ND filters and discusses the pros and cons of variable ND filters with a focus on videography and filmmaking.
Table of Contents
What is a Variable ND filter?

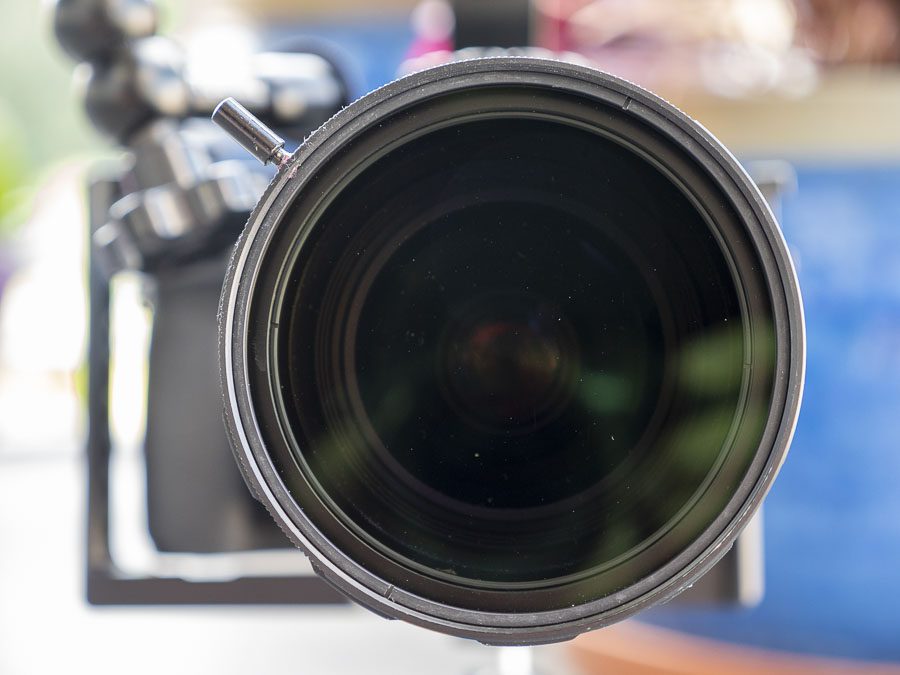
Variable ND filters allow you to continuously adjust the filter’s density by twisting a ring on the filter – and thus the amount that is let through to the lens.
I find VNDs with hard stops at the minimum and maximum range of stops the easiest to work with, as they prevent me from setting the filter to extremes and avoid severe cross-patterning.
I also like to have a lever so I can easily adjust the density – even in cold conditions.
Why use a Variable ND filter for video?
In video, we often work with a fixed shutter angle of 180 degrees or a speed of approximately double the frame rate.
In other words, we are left to play with the ISO and aperture.
If you want to shoot at a wide aperture for a nice bokeh and shallow depth-of-field outside in bright daylight, there’s a good chance your image will be overexposed.
You might try to set your camera to the lowest possible ISO, but most often, that still won’t be enough.
This is where you bring out your filter.
Why use a Variable ND filter over a regular ND filter?
Regular (non-variable) Neutral Density filters stop a specific amount of light from passing through. One filter might filter out two stops of light and another ten stops.
If you have a regular ND filter mounted on the lens, which filters out two stops of light, and you need a filter of four stops, then you need to exchange the filters, which takes time.
This is where a variable ND filter comes in handy.
Different mounting options for Variable ND filters
When it comes to mounting a neutral density filter, there are two choices:
- Screw-in filter (you screw in the filter using filter threads at the end of your lens)
- Drop-in variable ND filters (sits between your camera and lens)
Screw-in variable ND filters are the most common and least expensive option. I like the ones from
They attach easily to the front of your lens, and you turn a ring to adjust the exposure. They can get stuck (see the section below for tips to mitigate this), or you can break the lever.
Drop-in variable ND filters, such as the Canon DROP-IN VARIABLE ND FILTER A (1.5-9 STOP), sit between your camera and lens in a special drop-in mount, similar to where you’d place a focal reducer fx.
However, these filters are not suited for all lens mounts, and they can be quite expensive. However, they’re the closest you can get to a built-in ND filter experience for mirrorless cameras that don’t have that option.
Tips on How To Attach A Screw-In Variable ND Filter To Your Lens
So, how do you attach a Variable ND filter to your lens?
Well, it sounds simple, right? You buy one and screw it into your lens.
In reality, it is just as simple as that when the filter matches the diameter of your lens.
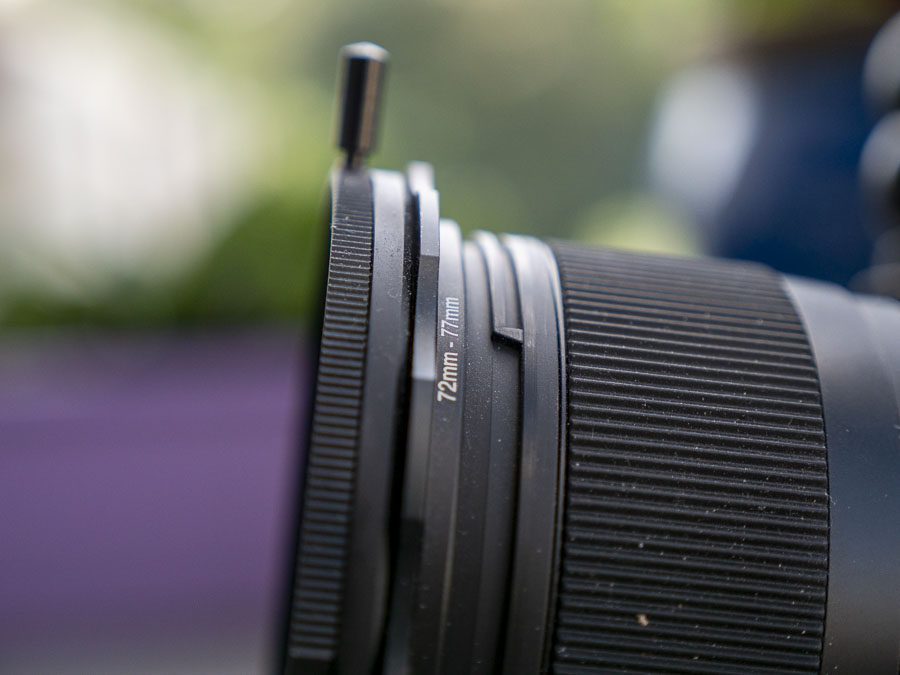
But what if it doesn’t? In that case, you need something called step-up rings.
For example, if your lens has a filter thread with a diameter of 72mm, and you get a 77mm filter (a common size), then you need step-up rings to take the diameter of the lens from 72mm to 77mm.

Brass rings, such as those from Luzid, are typically a better choice than metal rings, as brass doesn’t get stuck as quickly in the metal threads of your lens or filter.
Also, it is always a good idea to get larger filters.
For example, if your lens is 72mm and you can choose between a 77mm and an 82mm ND filter, it can be a good idea to get the 82mm.
Not only can this reduce the risk of vignetting (especially with wide-angle lenses), but you will also be able to use the filter on bigger lenses – for example, cinema lenses – in the future.
Does A Variable ND Filter Affect The Image Quality?
The short answer is “yes”. Variable ND filters will always affect the image quality.
On low-quality variable ND filters, artifacts such as vignetting, color shifts, or a cross-pattern in the middle of the image when the filter is at maximum density are more pronounced.
The cross-pattern can even be found on high-quality VNDs, so it is always wise not to fully close the filter if possible.
The point here is that a variable ND filter is only as good as the quality of the linear and circular polarizers combined.
But even the most expensive filter can still suffer from a bit of vignetting, color shift, softness, or cross patterns – or all combined.
So, what is a polarizer filter?
A variable ND filter combines two polarizer filters (a.k.a. CPLs).

As you might know, polarizers only allow light to pass through from a certain angle and work best at a 90-degree angle from the sun.
Polarizers are great for reducing glare from windows or the reflective surface of the water. They are also great if you want to saturate the colors fx of the sky or a field of flowers.
Linear and circular polarizers
There are two types of polarizers: linear and circular.
Circular polarizers are linear polarizers with a quarter wave plate on the back, which turns linearly polarized light into circularly polarized light.
In theory, and in some rare circumstances, linear polarizers can confuse the autofocus system of digital SLR cameras with mirrors, which is why circular polarizers are recommended.
For mirrorless cameras, I can’t see that it should make a difference. But please correct me if I’m wrong.
It is beyond the scope of this article to dive into more detail about polarizers. But now you’ve hopefully got an idea of the constructs of a variable neutral density filter.
ND filters and Infrared Pollution
High-density ND filters can also make the infrared pollution on camera sensors more apparent – fx on the BMPCC cameras.
See also the review of the BMPCC4K.
This can easily be negated by stacking an IR filter before the VND.
Some variable ND filters even come with an infrared filter built in.
When buying a Variable ND filter, how many stops do you need? And within which range?
With ND filter stops from below one to over twenty, you may have been wondering, “How many stops of ND filter do I need for video?”
The thing with VNDs is that even though some filters might advertise 9 or 10 stops of light reduction, they’re rarely usable in the last two to three stops because of heavy shifts in color or cross patterning.
So, for instance, if you’ve bought a VND with nine stops, you might only get good usable results up to six or seven stops.
Some manufacturers – like SLR Magic – have decided instead not to make VNDs with so many dense stops because of these problems. So, their filters have a shorter range of stops.
Here’s a quick test to see the number of stops available on the SLR Magic Variable ND Mark II in action:
So expect about the same usable range in stops for all of these filters – about six or seven.
In terms of range, I would say a good rule of thumb is from around 0.5-1 to 6 or 7 is a good place to start.
If you need denser filters, you can stack a regular ND on top of the VND. That way, you won’t get the weird color shifts at higher densities.
So, for example, if you own a VND that goes from 1 to 10, you will get a better result by dialing the VND up to stop six, maybe, and then adding a regular ND with an extra four stops.
How to pick the best ND filter for time-lapse videos with longer shutter speeds
I wouldn’t recommend a variable ND if you’re shooting time-lapse videos with long shutter speeds.
Instead, I would probably go for regular ND1000 first (depending on the course conditions).
This is because variable ND filters, which go all the way to 10 stops, are not common because, at high densities, color shifts are prone to occur due to how variable ND filters are constructed.
Also, timelapse videos are rarely run-and-gun scenarios. They usually require quite a bit of planning and setup. So, you’ll have plenty of time to set your exposure and choose the right ND filter for the job.
Summary
A variable ND (Neutral Density) filter reduces the amount of light entering the lens without altering the color of the light.
It works by using two polarizing layers that, when rotated, can increase or decrease the optical density and thus control the amount of light passing through.
This adjustability allows for a wide range of exposure reduction options within a single filter, making it a versatile tool for filmmakers and photographers alike.
Use Cases for Filmmakers:
- Depth of Field Control: In bright conditions, a variable ND filter allows you to use wide apertures without overexposing the image. This helps achieve a shallow depth of field, keeping the subject in focus while blurring the background.
- Exposure Control: It helps maintain proper exposure in varying lighting conditions without changing the camera’s shutter speed or ISO. This is crucial for maintaining the cinematic look of footage, especially the motion blur associated with the 180-degree shutter rule.
- Time-Lapse Photography: For time-lapse sequences, it helps balance the exposure throughout the day, especially during sunrise or sunset when the light conditions change rapidly. However, I would recommend a regular ND filter for this.
- Smooth Motion Blur: For capturing moving subjects with a smooth, natural-looking motion blur, a variable ND filter allows for longer exposure times even in bright conditions.
Pros
- Versatility: Offers a range of density levels in one filter, eliminating the need to carry multiple ND filters with fixed densities.
- Convenience: Quickly and easily adjust to changing light conditions without changing filters or significantly altering camera settings.
- Cost-effective: More economical than buying multiple fixed ND filters.
Cons
- Image Quality Degradation due to IR pollution: At high-density levels, some variable ND filters can introduce color casts due to IR pollution. It can be negated by stacking with an IR Cut filter or buying a VND with a built-in IR Cut.
- Vignetting: Especially on wide-angle lenses, the physical thickness of the filter can cause darkening at the corners of the image.
- X-pattern: At extreme density settings, some variable ND filters can produce an unwanted “X-pattern” or banding effect in the image.
Variable ND filters are invaluable tools for filmmakers, offering flexibility and control over the visual aesthetics of their footage.
However, selecting a high-quality filter and understanding its limitations is crucial to avoid compromising the image quality.

