Top photo: The blue areas are crushed shadows (crushed blacks) and the red areas are blown highlights.
As a videographer, balancing your exposure is always a major consideration.
Indoors or outdoors you’ve undoubtedly encountered situations where you can’t find the perfect setting to pick up the range of light and details before you. This is because the dynamic range of your camera is less than what your own eyes can see.
However, this doesn’t have to be a limitation. An understanding of the technical limitations of your camera can help you achieve your artistic vision. In this article, we are going to look at doing this via crushed shadows, and blown highlights.
First off we will give an overview of the techniques these terms refer to, how to avoid doing it, or how to use it as a tool to achieve your goals.
What are Crushed Shadows and Blown Highlights?
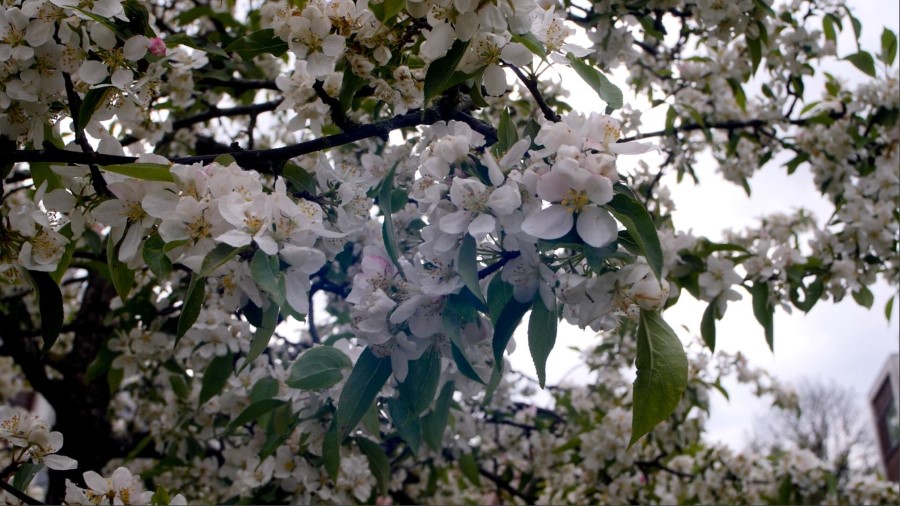
Crushed shadows (also called crushed blacks, blocked blacks, etc.) and blown highlights are ways to refer to exposure issues.
At one end of the spectrum, crushing the shadows is a term for underexposing the shot resulting in large areas of pure black in the picture.
On the flipside, blowing the highlights is overexposing to the point having a shot with large pure white regions.
Pure black and pure white regions mean that there are details being lost in the shot. No matter what you do in post-production those white and black pixels can’t be edited to recover those details.
Brightening an underexposed image will tend to just add digital noise while dark regions and shadows stay black. In the same way, darkening an overexposed image won’t bring back any of the brighter details lost among the white space.
Of course, there are situations where the range of lighting (the dynamic range) is too great for you to pick up details in both the brightest and darkest regions of your shots.
For example in a sunset shot, the sun might appear as a ball of white light in your shot while there are some true blacks in the shadows. But there is still a lot you can do to make sure you don’t sacrifice some of the important details.
How to Avoid Crushed Shadows and Blown Highlights
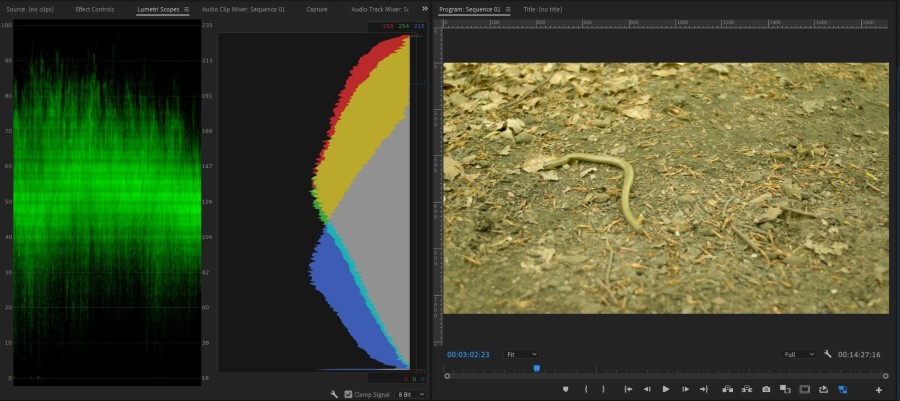
In general, you want to avoid losing as much detail in your shots as you can. In some situations, though there’s nothing you can do to capture everything in both the lightest and darkest parts of the shot.
In shots with a large dynamic range, there will be things your eyes can observe in both the bright regions and among the shadows that can’t be reproduced by your equipment. But there are steps you can take to make sure you aren’t needlessly giving some of that data up.
If you want to avoid crushing your blacks or blowing your highlights there are a few tools at your disposal. First off you can just take a look at your shot.
If everything appears too dark or too bright you might want to readjust your settings accordingly. Try to record several takes if possible while exposing for the brighter regions and a few darker ones too and see what works best.
Sometimes the problem isn’t so obvious. For more subtle shots it might not be so easy to tell if you are losing details in the shadows or the highlights. In that case, you can check your camera’s built-in histogram, waveform or zebra stripes.
How to use the histogram to avoid blown highlights or crushed blacks
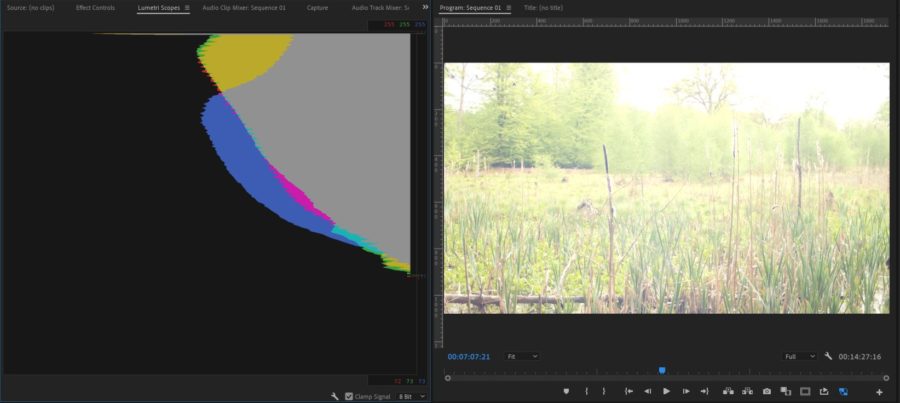
If all your data is collected at either one end of the histogram or the other then you might have an exposure issue.
Big spikes at either end of the histogram tell you you have a lot of pure black or pure white pixels that will stay that way even in post-production.
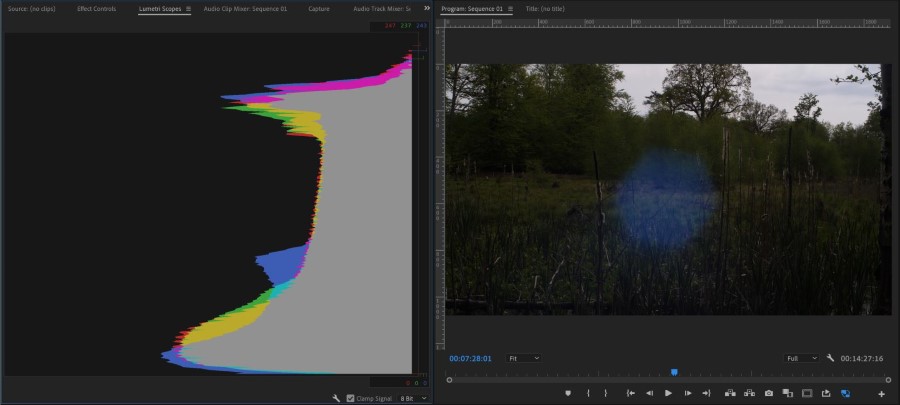
However, you should keep in mind that it’s likely to have spikes at either or both ends of your histogram even if you aren’t blowing the highlights or crushing the shadows. In extremely bright scenes you are likely to have a bunching towards the white end of the histogram.
Conversely, a dark setting will tend to have a spike of black pixels due to the shadows. It’s also possible there might just be a bunch of plain white or black in the shot. The question is, how much of skew is too much?
How to use the waveform monitor to avoid blown highlights and crushed blacks
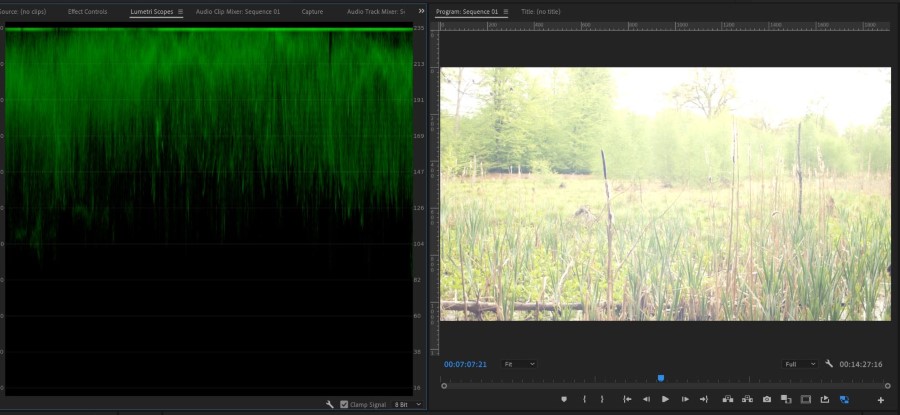
Another tool you can use to avoid overexposing or underexposing your image is the waveform monitor.
Some cameras – like the Panasonic GH5 and GH5S – has a waveform monitor in-camera. If your camera doesn’t come with one, you use an external monitor or recorder that has it. For example, the SmallHD Focus comes with waveform.
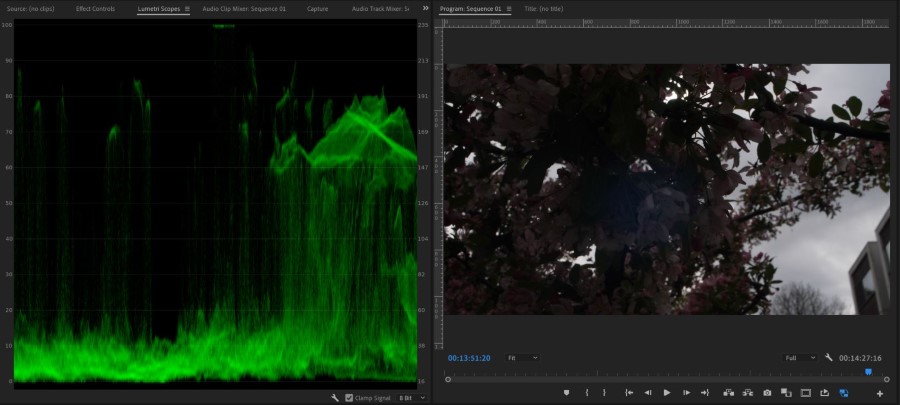
A waveform monitor shows you the brightness of the picture from left to right, i.e. the left side on the waveform monitor represents the left side of your image, etc.
On the X-axis you have your image mapped horizontally. And on the Y-axis you have the exposure value of the image (usually ranging from 0 IRE to 100 IRE, but there might be slight variations and settings available).
If some parts of your image have crushed blacks it will be at 0 or below IRE. And if some parts of your image have blown highlights, it will have an IRE value of 100 IRE or above.
How to use zebras to avoid blown highlights
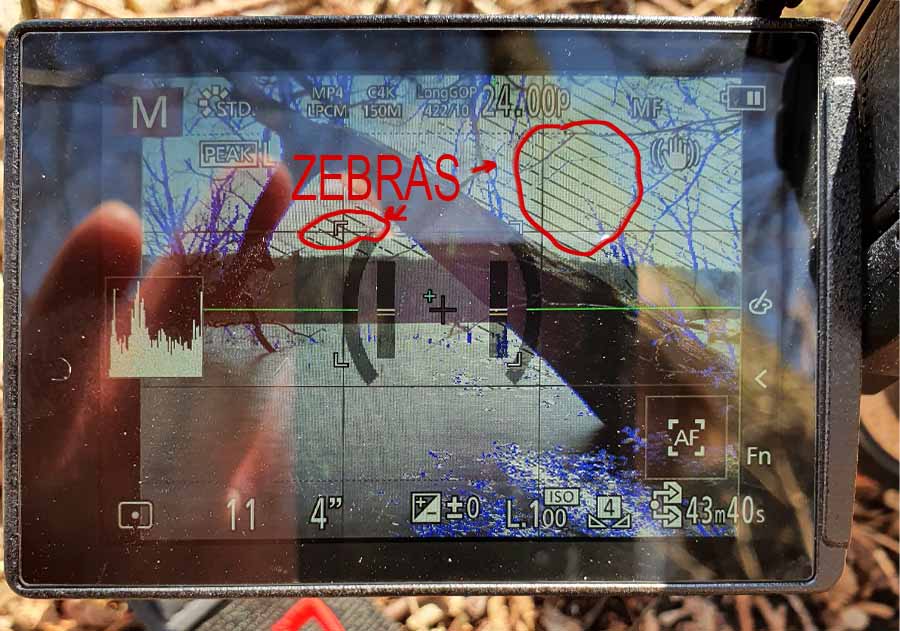
If your camera has zebra stripes you can set a safety value to avoid overexposing your image.
For example, if you set a value of 100% in a standard picture profile and zebra stripes begin to appear on your screen it means that your image is overexposed.
Often you would set a value of e.g. 95% as a safety measure. That way you know you need to take care of not pushing the dynamic range any further when the stripes appear, but you might still be able to save the details in the bright areas.
What the safety threshold should be set to vary from picture profile to picture profile. Some profiles – like vlog for example – call for a bigger safety margin. Check your camera’s manual or instructions for any LUT you might want to use.
Using different high dynamic profiles
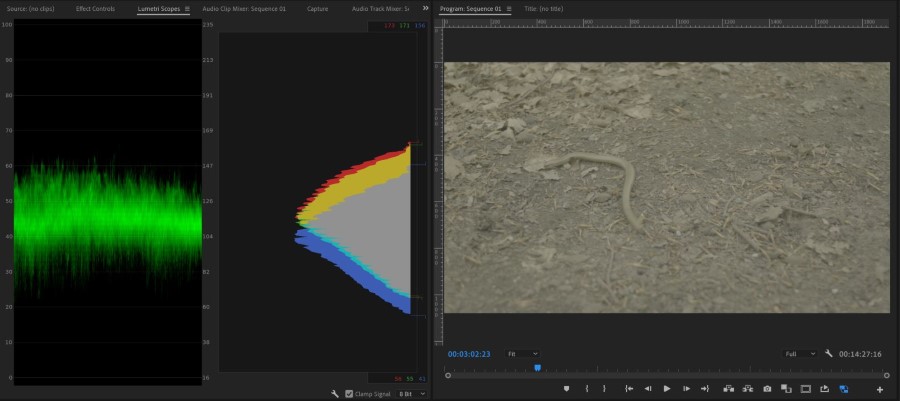
If you want to record video with a high dynamic range and enhanced color gamut beyond the SDR standard (Standard Dynamic Range), you can give HDR (High Dynamic Range) try.
Within photography, HDR works by taking several images and combines them into a final product that captures details in both the shadows and the highlights.
But some video cameras also have an HDR setting (like Dolby Vision and HDR10+), you can use.
If you’re shooting video, you can give HLG (Hybrid Log-Gamma) a try. In a way, HLG is to video what HDR is to photography.
HLG isn’t widely adopted yet, but it will give you extra dynamic range to work with because it uses the same gamma curve as SDR but adds a logarithmic curve with extra brightness over the top of the signal, hence the “log” and “gamma” in Hybrid Log-Gamma (source).
Last but definitely not least, make sure you are shooting RAW images when taking photos and using a picture profile that captures the most information with video.
Depending on your video camera, this could range from recording actual RAW video to the different log profiles, to simply making sure you’ve decreased contrast and saturation in your picture profile.
Keep in mind though, that neither HDR, HLG, log profiles, nor RAW can save you from blown highlights or crushed blacks. But they do give you more dynamic range to play with.
How to Make Crushed Shadows and Blown Highlights Work For You
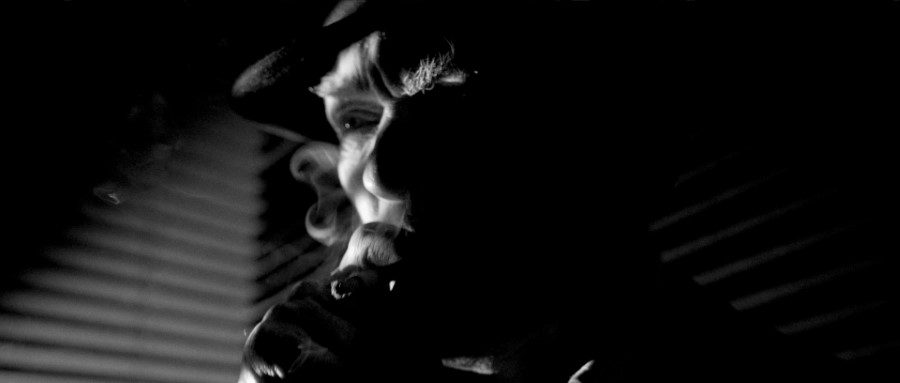
Often you want to avoid losing as much detail as you can in your shots. However, in some situations, you can turn crushed shadows and blown highlights to your advantage.
As an artist, you should always pursue your artistic vision. That might mean manually or digitally deepening the shadows, or brightening the highlights. As long as you capture the important details you can still have a great shot with some pure black and pure white in it.
Also, if you want to make use of the full dynamic range, having small parts of the image clipping in both the highlights and shadows can be a nice way to add more contrast.
As a photographic or cinematographic technique, crushing the blacks can be used as a tool to help you make the subject pop, add atmosphere, or reduce noise in your shots.
Sometimes it’s worth giving up some of the inessential details in the shadows or highlights. This can help to reduce clutter and noise and focus the attention on your subject to make it pop.
In a completely different setting, horror movies rely on the hidden danger amongst the shadows to build atmosphere. Crushing the blacks deepens those shadows. By hiding the details in the dark corners you can contribute to the feeling of uncertainty and fear.
And sometimes the setting you are shooting in will force you to blow the highlights or block some blacks. That’s not the end of the world. The shadows might end up darker and maybe you’ll have sun flare. Remember it’s always your vision and it’s up to you to decide what fits your style.
Conclusion
So there you have it, an introduction to crushed shadows and blown highlights. Remember to check your shots to be sure you aren’t losing too much detail in the brightest or darkest areas.
Sometimes it’s obvious, other times not so much. So check that histogram or waveform before you press that record button.
But always remember that as an artist it is always important to follow your vision. Understand the limitations of the equipment you are using, and use that to help you to pursue your artistic goals!

