Rotoscoping with the roto brush tool is great for separating a person or a single object from the background in After Effects. But when separating trees, leaves, or clouds, or for sky replacement, I often find both of these methods lacking.
Instead, I resort to using the Extract effect tool instead. This is also a handy tool for sky replacements.
This step-by-step guide explains how to “roto” out clouds or leaves/trees with the Extract effect, i.e., key out the background, and how to use the same process for sky replacement in After Effects.
Table of Contents
Video tutorial
First, here is a video that shows some of the steps mentioned in this article:
If you want a more detailed explanation, keep reading…
1. Choose Your Footage Carefully – good and bad scenarios for using the Extract tool for separation
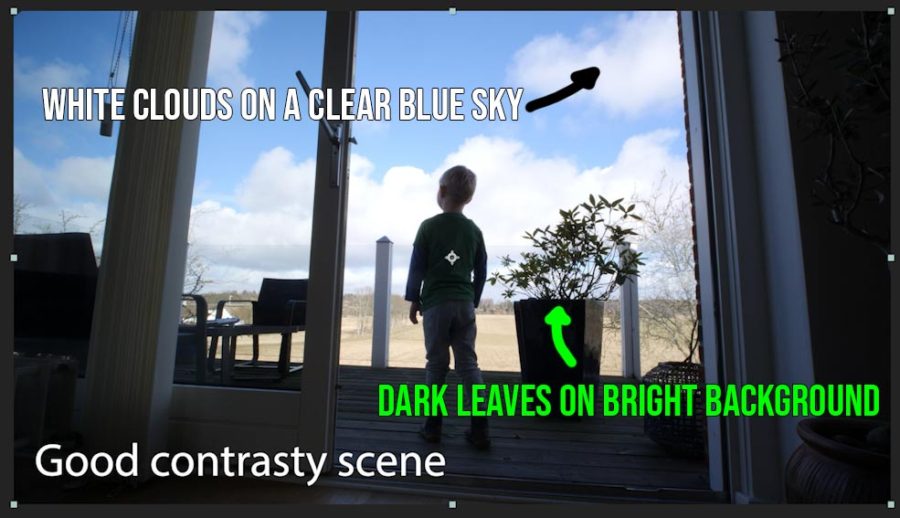
This method isn’t perfect either, and it works best if there’s a clear contrast between the foreground object you’re trying to separate from the background.
Good scenarios are white clouds on a blue sky, green leaves on a bright background, a bright concrete wall or a blue sky, or naked branches against a blown-out or light grey sky.
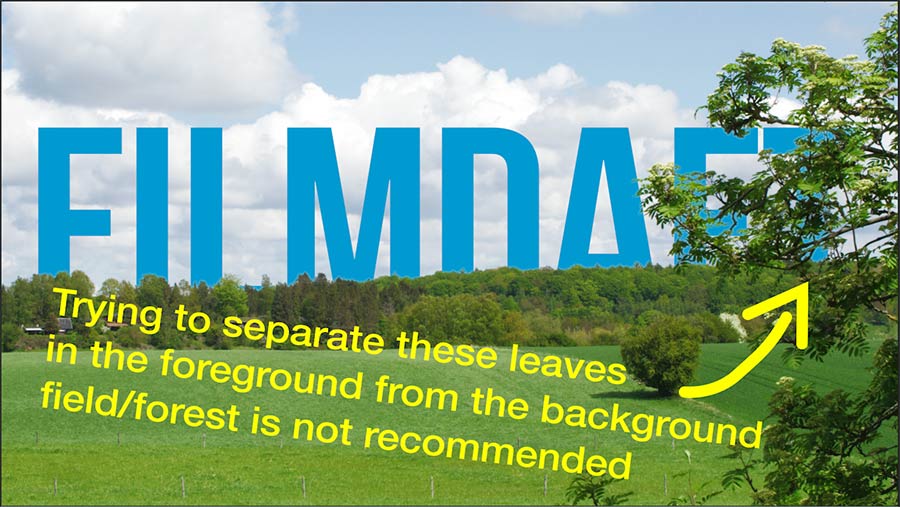
If you have green leaves on a tree or bush in the foreground and want to separate them from a green field or wood edge in the background, this method will be difficult.
2. Duplicate the footage layer

Duplicate the layer (Ctrl+D/Cmd+D) and rename the new layer to “bright” or “clouds.”
3. Apply the Extract Effect To Your New Layer
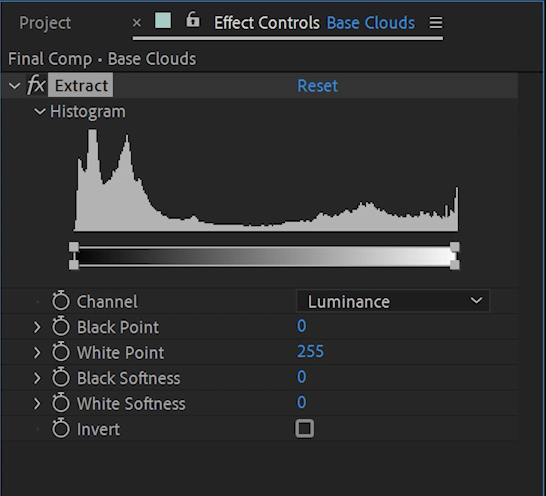
Apply the Extract effect to your new layer (in this case, the layer I name ‘Base Clouds’).
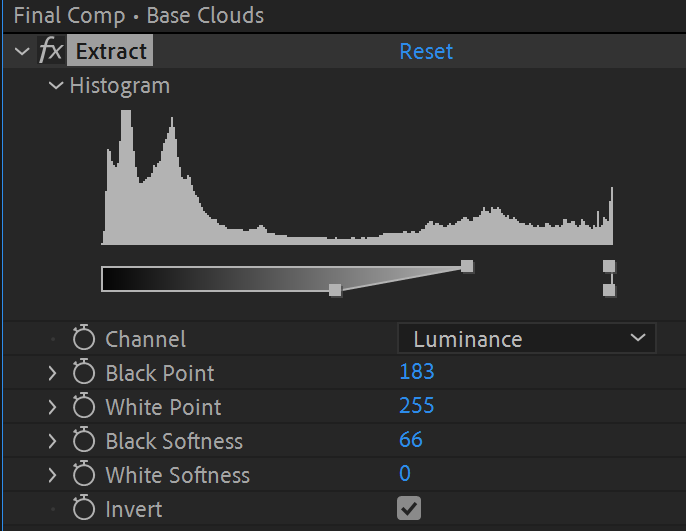
The Extract effect shows your footage as a histogram with the darkest parts on the left and the brightest parts on the right.
Below the histogram is a thin rectangular box that fades from black to white.
In each corner, there are small squares that you can drag. The squares represent the values you can see below:
- Top left square = Black Point (the threshold for cutting out blacks)
- Bottom left square = Black Softness (the “feather” of the Black Point)
- Top right square = White Point (the threshold for cutting out whites)
- Bottom right square = White Softness (the “feather” of the White Point)
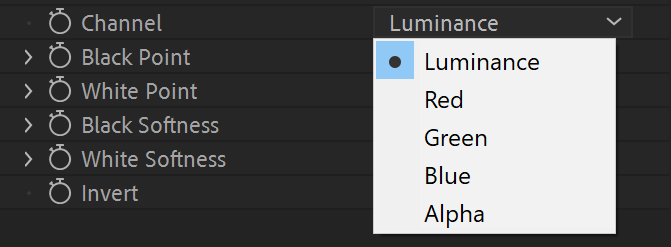
You can fine-tune your selection individually for the Red, Green, and Blue channels, and check the alpha by clicking on the drop-down menu under Luminance:
You can also invert your selection by enabling invert:
4. Drag the Black Point square so that only the clouds are visible

Now drag the Black Point square to key out all dark areas so only the clouds are visible.
5. Insert the object you want to appear behind the clouds (but in front of the blue sky) by placing the layer between your base layer and the cloud layer

Now insert/create the object you want to appear behind the clouds but in front of the blue sky by placing the layer between your background footage (here: Base Footage) and the clouds layer (here: Base Clouds).
I’ve chosen a UFO for this example, but you can include anything you want—some simple text.
Track your footage with the 3D camera tracker and connect your object to a null if necessary.
6. Set the White Softness to make a nice feathered edge on the clouds

Now, set the White Softness to make a nice feathered edge on the clouds.
In this case, it gives a nice effect of the UFO emerging from the clouds.
And that’s it. The process is the same for sky replacements and dark areas of the image; except for dark areas, you set the White Point and White Softness instead. Here’s a quick rundown of the two:
Tips and tricks to extracting dark areas
Keying out and extracting dark areas such as branches or leaves is hard. And you shouldn’t expect it always to work. The problem is that you often get a fringe or halo around each branch or leaf.
This is because the light from the video’s original surroundings and background spills onto the edges of the branches and leaves.
To avoid this, you’ll get the best result if you find a replacement sky similar in color, lighting, and saturation to the one you’re trying to replace. You can also try to color-match the two backgrounds using color correction tools.
Refine or choke your matte.

You can try choking it with the Matte Choker, Refine Hard Matte, or Refine Soft Matte effects in After Effects (found under Effects and Presets -> Matte).
Below, I’ve extracted the dark areas and put some smoke behind the plant’s branches and leaves. I chose smoke because it isn’t a solid color layer, i.e., the particles make the fringes seem less prominent. Even so, you can still see them:
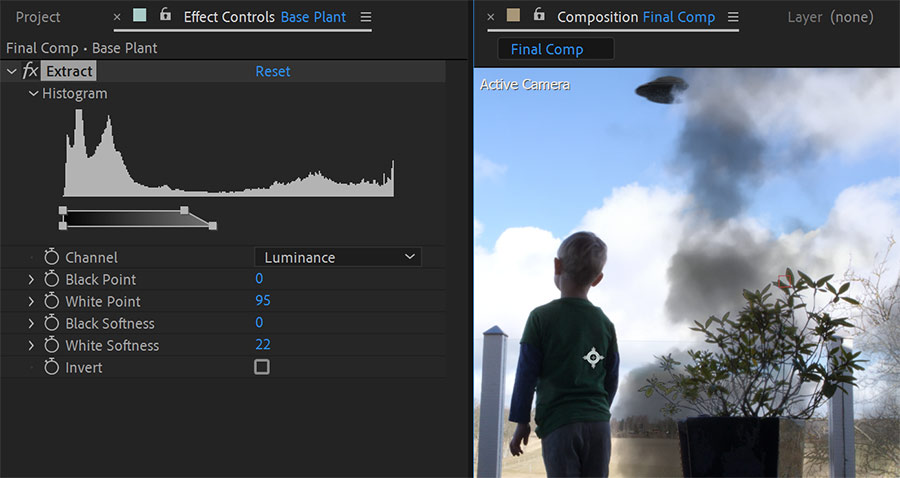
The Refine Soft Matte tool can make dark trees semi-transparent for a cool, eerie, and foggy look.
Another thing I recommend trying is using the different color blending modes.
Use Multiply combined with Linear Burn and Luma Matte
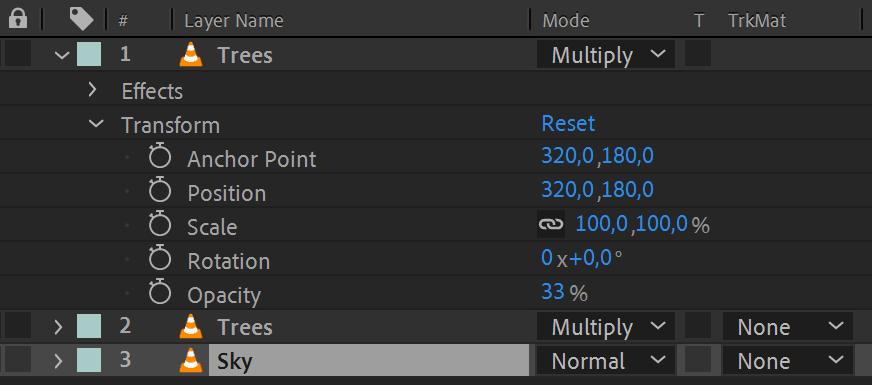
Sometimes, I’ve had luck using Multiply on the trees and duplicating the layer. Set the duplicated tree layer to the transparency of around 20-35% like so:
You can also try placing the sky layer between your footage and a copy of your footage and then set the sky layer to Linear Burn and the track matte (TrkMat) to Luma Matte.
Then place another layer with your foreground trees on top and set it to Multiply like so:

The two tricks above using different blend modes are great for sky replacements; speaking of which…
Sky Replacement Using The Extract Effect
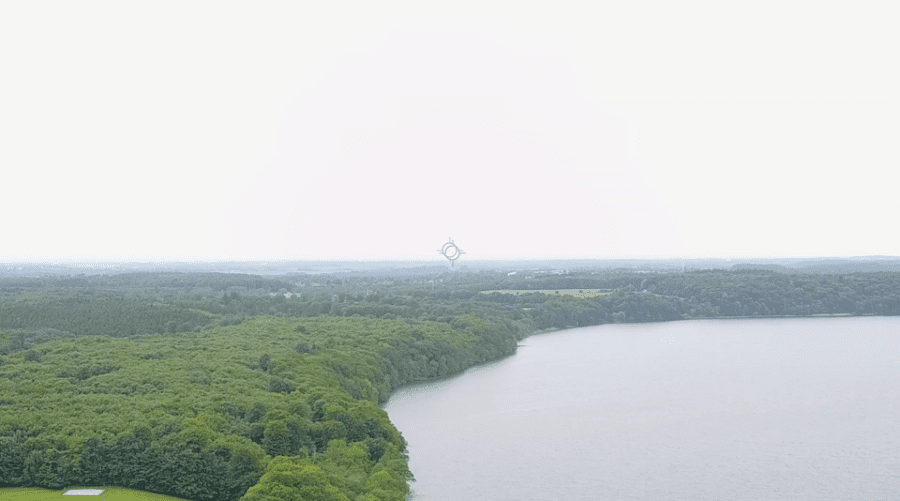
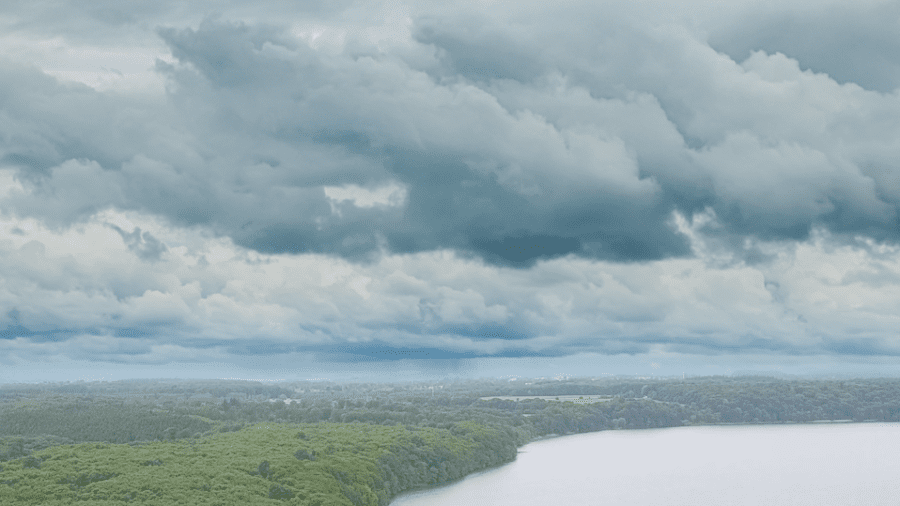
The process is the same for sky replacements. Above is a shot I took with my Mavic Pro drone. It shows a boring and blown-out sky.
1. Use the Extract effect tool to key out the boring sky like so:
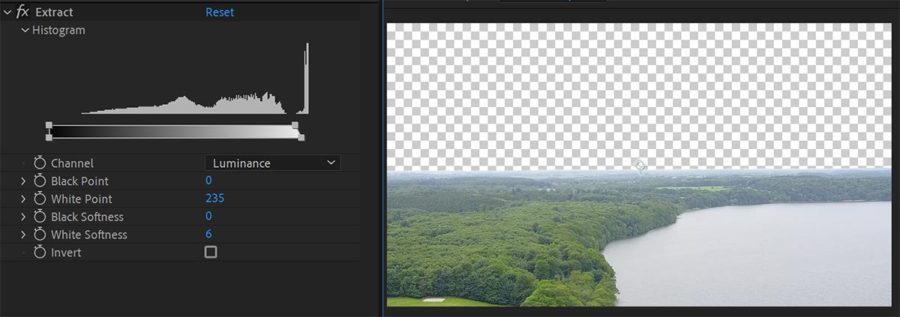
2. Add a mask to feather the transition between your footage and the new sky
I then added a mask around the bottom half of my drone footage and some feathering to smooth the transition between the footage and the new sky.

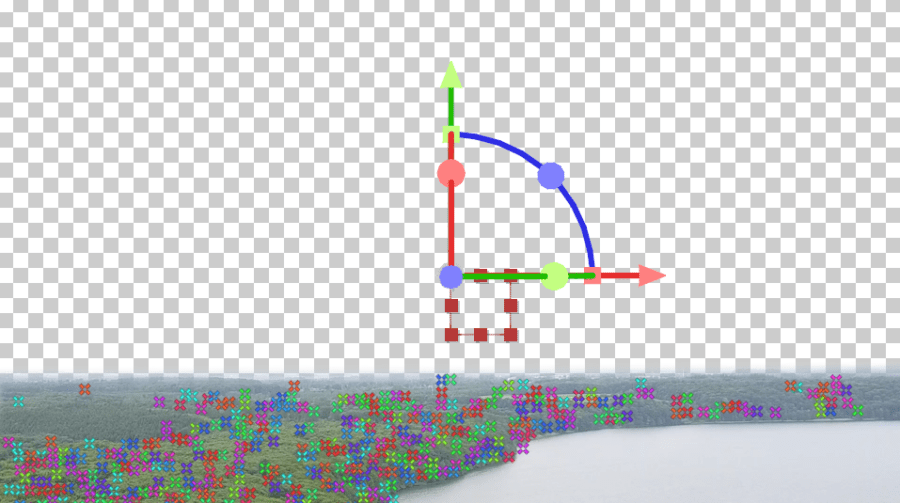
3. Track your footage with the 3D-camera tracker if necessary
Unless your camera sat perfectly still on a tripod while capturing your footage, you should track your footage with the 3D camera tracker.
Then, create a camera and a null so you can link your new sky’s position with the movement in your footage.
In this case, I tracked my drone footage using the 3D camera tracker and created a camera and a null.
4. Pick your sky – video or photo
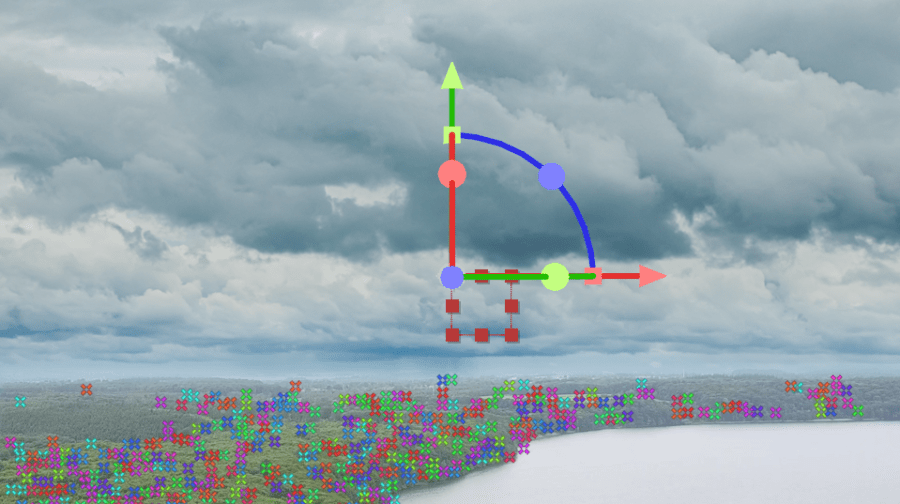
You can insert videos or still photos for your sky. Since there’s not much movement in this clip, I chose a still photo.
Insert the sky layer below your footage.
I chose not to go overboard in this example but to find a more interesting sky and match the colors of the rest of the footage. The Mavic Pro footage isn’t good for color grading; it quickly falls apart.
Had the footage been raw or Pro-Res, I could have changed the colors much more, which would have opened up more possibilities. Fx, I might have picked a warmer or clearer blue sky. Keep in mind, though, that I would have had to account for reflections in the water as well.
See free tutorials on color correction and grading in DaVinci Resolve.
But you can insert whatever you like. It doesn’t even have to be a sky.
5. Turn your photo into a 3D layer, link it to the null, and adjust it to taste
I then turned the still photo into a 3D layer as well and pick-whipped the position to match the position of the null:
Now adjust the placement of the sky using Anchor Point (shortcut: a) and scale it to taste. Here’s the result:
Conclusion
Using the Extract effect tool in After Effects is a great way to do things like sky replacements and creating masks for clouds or trees. Rotoscoping out these things with the Roto Brush tool or creating masks manually is next to impossible.
The technique can’t solve all problems, so consider contrast when you shoot your footage.
I hope this helps. If you’ve got any questions or feedback, let me know in the comment section below.
Up Next: How to Create A MOGRT Template in AE (Illustrated Guide)

