Understanding video resolution is an essential part of being a video editor. Nearly every single platform where you may post a video will have a specific video resolution required. Instagram posts in a square 1:1 format, TikTok in a vertical 9:16, and many others.
The standard HD resolution for a video is 1920 x 1080 or more commonly referred to as 1080p. What if you need to change your video to match the resolution for one of these platforms like Instagram, TikTok, or Snapchat that doesn’t use the traditional 1080p resolution?
This article will explore how to change the sequence resolution in Premiere Pro. I will also list some common resolutions as a quick guide for you to reference later.
How to change the sequence resolution
This article assumes that you know how to create a sequence in Premiere Pro. I created a sequence with a 1920 x 1080 video clip in the Project Panel that matches the settings of the clip.
Let’s say you created this sequence and you want to upscale the video to 4K. 1920 x 1080 is in the 16:9 aspect ratio, so we will want to make sure we have a matching resolution to keep the aspect ratio the same. The standard 4K resolution for 16:9 is 3840 x 2160.

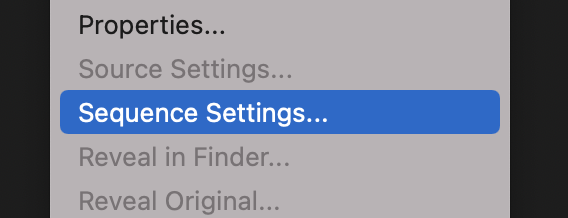
Now we will need to get into the sequence settings to change the resolution. In the Project Panel, right-click the sequence and click Sequence Settings.

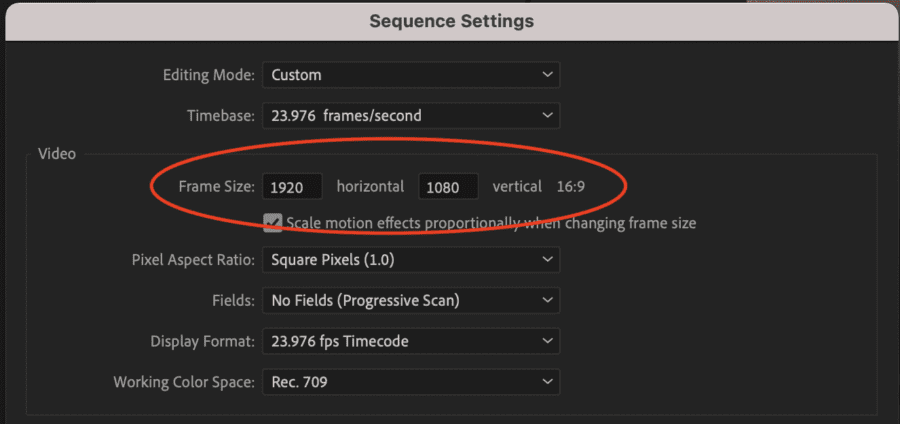
You can see the resolution under Video > Frame Size. Currently, 1920 x 1080 is entered as mentioned earlier.

Next, simply replace the 1920 and 1080 with 3820 and 2160. Enter 3840 for Horizontal and 2160 for Vertical. The resolution is now changed.

You will need to complete one additional step when upscaling or downscaling the sequence.
Resizing content after changing resolution
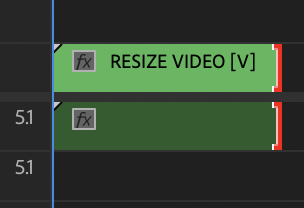
The content on your timeline will need to be scaled to fit the new resolution. You can do this quickly by selecting all of the clips (Window Control+A/Mac Command+A), and selecting Scale to Frame Size or Set to Frame Size. Read this article to learn about the difference between the two.

An alternative method is to create a new sequence using the old sequence. In the Project Panel, right-click on the original sequence and select New Sequence From Clip.

Premiere will create a Nested sequence of the original sequence so that it acts as one clip.

A nested sequence is easier to upscale or downscale because you only have to adjust the scaling of one clip rather than all of your original clips. This is also helpful when creating videos for social media platforms like Instagram or TikTok because you can quickly resize your video to fit their resolution requirements.
Resolution quick reference guide
Here is a quick reference guide to some of the most common video resolutions you may run into. H is for Horizontal and V is for Vertical.
16:9 aspect ratio – YouTube, TVs, computer, etc
- SD 480p – 720H x 480V
- HD 720p – 1280H x 720V
- HD 1080p – 1920H x 1080V
- UHD 4K 2160p – 3840H x 2160V
1:1 aspect ratio – Instagram, Facebook, etc
- 1000H x 1000V
- 1080H x 1080V
9:16 aspect ratio – Instagram Stories/Reels, TikTok, Snapchat, etc
- 1080H x 1920V
Conclusion
Changing the resolution of a sequence is extremely easy, but also very important to know. Play around with the resolution of your videos to learn how to adhere to the different platform requirements. Remember to use this article as a quick reference guide for the different resolution sizes.

