Learning how to edit with Premiere Pro’s multi-camera features is essential for your video editing tool bag.
You may think of multi-camera from television sitcoms you enjoy, but it’s also great for editing client interviews, podcasts, etc.
This is an extremely easy process that only requires a little bit of setup. In this article, I will explain how to work with multiple cameras in Premiere Pro in 3 easy steps.
Step 1: Media setup
The first thing we want to do is set up all of our media. You can have as few as two clips for a multi-camera setup. Place all of your media inside a bin. You can do this by selecting all of the media, right-clicking, and selecting New Bin From Selection.

There are two recommended ways you can set up your media: using an in point or creating a nested sequence for each clip. Let’s go through each of these.
In point
The first method is to set an in point on each piece of media that will be in the multi-camera setup. Find a common sync point between all of your clips. Usually, there will be a spike from a clapboard, but you can also find any similar waveform piece.
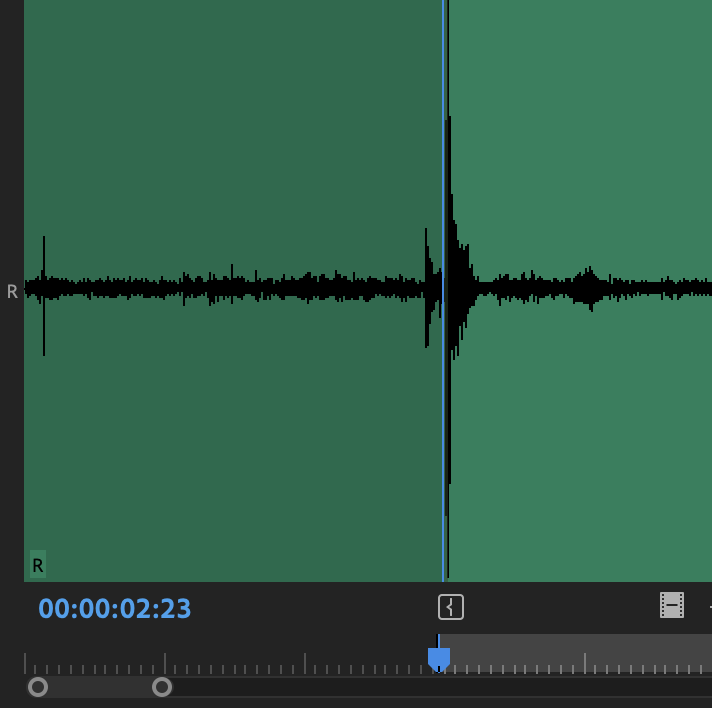
Set the in point by hitting the keyboard shortcut (i). That’s it. This will help Premiere sync the multi-camera sequence later.
Nested sequences
The second method is to use nested sequences. This method takes a little bit more setup, but it’s much easier to make changes or customizations later.
Put all of your clips on one timeline. You can sync all of the clips using the In Point method mentioned above, or you can use any of the methods mentioned in the article here.
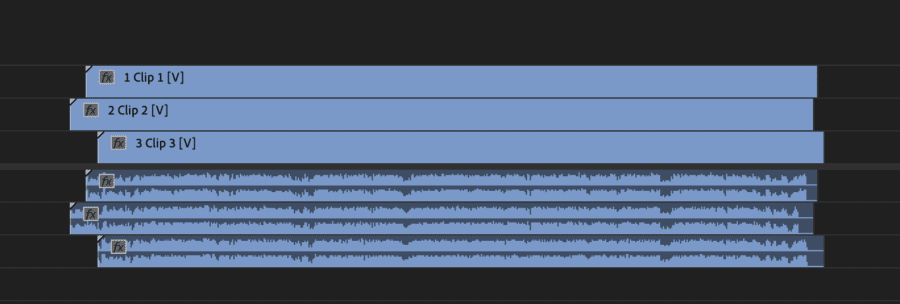
You can then trim the excess head and tailpieces off of the clips so they are all the same length.

Next, right-click each individual clip, hit Nest, and name the sequence. Put all of your nested sequences in a bin.

Using this method will allow you to make changes to your clip at a later time if desired. The first method does not allow for this, so you will have to change each individual clip on the multi-camera timeline.
Audio clip
I would recommend attaching your audio clip to whichever clip will be your Clip 1 on the sequence. This will be an easy way to attach audio to your multi-camera sequence later.
However, you can also attach audio to multiple clips if you have multiple sources of audio. You can also add the audio manually to the sequence later. You can use whichever method is easiest for you.
Renaming the clips
You should rename the clips once either of the methods is completed. You can keep the name of the clip the same, but I would recommend adding a number in front of the title.
Here’s an example:
Change “Clip 1” to “1 Clip 1.”
Do this for each of your clips. This will tell Premiere how to order the clips for each of the cameras, which we will talk more about later.
Step 2: Create the multi-camera sequence
The next step is to create the sequence for our multi-camera setup.
Right-click on the bin that houses all of your media. Hit Create Multi-Camera Source Sequence. A setup menu will appear. We have a lot of options for setting up our sequence.

First, you can name the sequence. You have the option of using the name of the first audio or video clip, or you can enter a custom name.

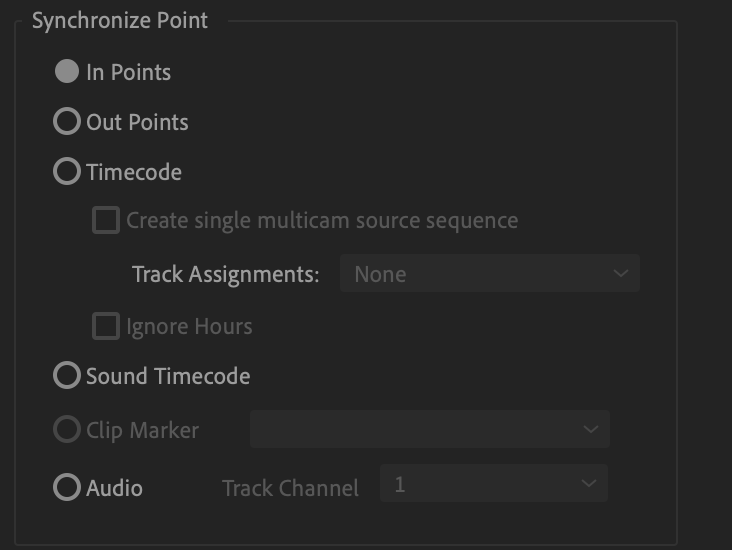
You will then set a Synchronize Point. As you can see, there are multiple ways to synchronize your clips. However, both of the methods mentioned in the previous section use the In Point option, so you can leave this selected.
Next, you can select a Sequence Preset, which will be settings for the actual sequence. We will leave this at automatic, but you can select whatever you prefer.

You can then set the audio source in the next tab. You have the option of selecting Camera 1 (mentioned in Step 1), All Cameras, or Switch Audio. We will select Camera 1 since we have this setup. You can also set the Audio Channels to a specific channel. Again, we will leave this at automatic.

Last, you can specify how you want the Camera labels set up. Enumerate Cameras will label the cameras with a number. Use Track Names or Use Clip Names will label the cameras based on the track or clip name you set previously.

Select okay once you have completed all of your settings.
A new item will appear in the Project Panel. This will be your multi-camera sequence.

To begin editing, right-click on the multi-camera sequence and select New Sequence From Clip. A new timeline will appear with your multi-camera setup.

Step 3: Editing
The last step is to edit the sequence. There are a couple of functionality buttons you will need to be aware of before starting.
Toggle Multi-Camera View
First, you will need to enable multi-camera editing. You can do this by finding the Toggle Multi-Camera View on the Program Monitor.

If it isn’t on the Program Monitor, select the + icon on the right-bottom corner of the screen. Reference the photo below for the Toggle Multi-Camera View icon. Click and drag the icon onto the Program Monitor.

Click on the icon to activate this feature. All of your clips within the sequence will appear in the Program Monitor next to the selected camera. These are all of your “Cameras” that you can switch between for the cuts.

Multi-Camera Record On/Off Toggle
The next icon we will use on the Program Window is the Multi-Camera Record On/Off Toggle. This icon looks like your standard camera record red dot icon.

You can use the same method for adding the icon as the Toggle Multi-Camera View if it is not on the Program Monitor.
Hit keyboard shortcut (0) to activate this feature. Note, that this feature acts as a recorder for all of the cuts you will make during the edit. You will need to reactivate this anything you stop the edit.
Editing
Activate the Multi-Camera Record On/Off Toggle function before editing. You can then hit the spacebar to begin playing the sequence. The edit will start with the Camera outlined in yellow on the Program Monitor.
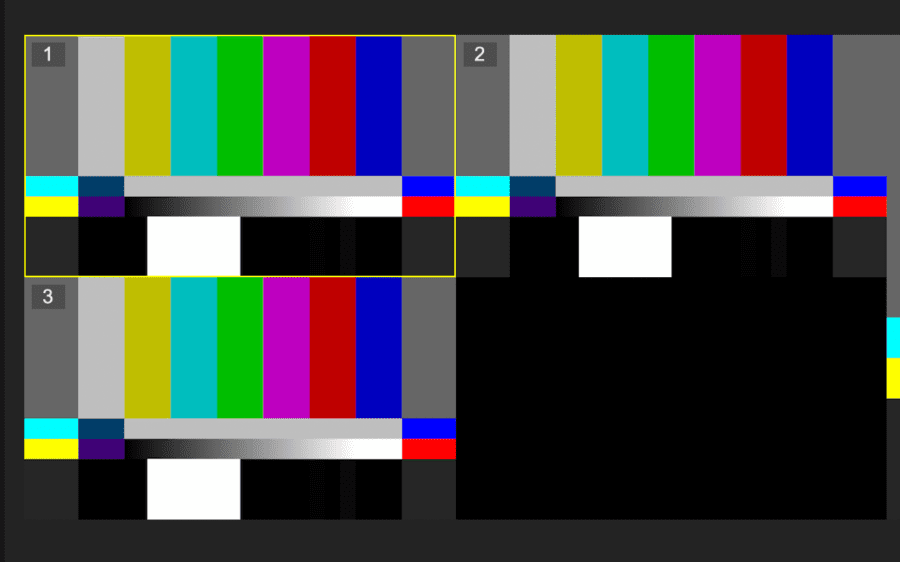
Each camera will have a keyboard shortcut. Camera 1 will be keyboard shortcut (1) and will continue sequentially for each camera.
To make a cut, simply switch the camera by hitting the keyboard shortcut for the desired camera. You will not see the cut in real-time, so you will need to stop playback in order to see the cut.
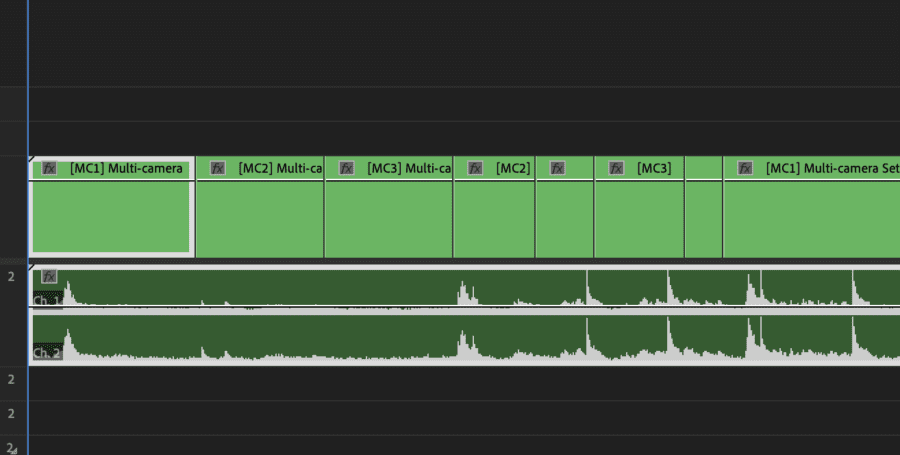
You can also make edits by selecting the cameras in the program monitor. Select the cut on the timeline you want to change, and then select the Camera by using the matching keyboard shortcut.
That’s it! Follow these steps for the entire sequence and your multi-camera edit will be complete. This sequence works like any other sequence in Premiere Pro, so there are no additional steps needed for rendering.
You can also add any normal effects, text, etc. to your sequence just as you would any other video.
I hope you enjoyed this guide. Check out our other tutorials for Premiere Pro here.

