DISCLOSURE: AS AN AMAZON ASSOCIATE I EARN FROM QUALIFYING PURCHASES. READ THE FULL DISCLOSURE FOR MORE INFO. ALL AFFILIATE LINKS ARE MARKED #ad
You cannot make professional videos without high-quality audio. The built-in microphone in your camera just doesn’t cut it if you want to capture the natural sound of a scene or an interview.
One way to improve the quality of your audio significantly is to use an on-camera shotgun microphone, which can be attached to your DSLR.
Shotgun microphones pick up sounds from sources in front of them. But not all on-camera shotgun microphones are created equal.
Here, you can see eight excellent on-camera shotgun microphones that don’t break the bank.
If this is your first time buying an on-camera microphone, I recommend you read the guide at the end of the article first.
Let’s look at some of the best on-camera shotgun microphones that are affordable within most budgets.
Table of Contents
These mics are ideal for beginners and experienced filmmakers and fit well with almost any DSLR or mirrorless camera!
1. Azden SMX-30 Stereo/Mono Switchable Video Microphone
Key specifications:
- Stereo and mono recording modes
- Cardioid and super-cardioid polar patterns
- -10dB, 0dB, and +20dB gain adjustments
- Auto power mode (automatically turns on/off with camera)
- Powered by two AA batteries
- 40Hz – 20kHz frequency
- Low-cut filter (high-pass filter) at 120Hz, 3dB/octave
- Integrated shock mount
- 3.5mm TRS output
- Foam and furry windshield included.
- 10-year manufacturer warranty
The Azden SMX-30 is an inexpensive and popular option among videographers. And with good reason, it’s a versatile and good option at this price point.
It comes with several interesting functions, such as the ability to record mono or stereo audio tracks. Because of this, the Azden SMX-30 has two polar patterns:
The stereo mic has a cardioid polar pattern, meaning it will pick up most of the sound from the front and some from the sides.
The mono microphone has a super-cardioid pattern, meaning it will pick up most of the sound from the front and some from the back. A switch on the mic allows you to toggle between mono and stereo modes.
You can adjust the mic and increase the gain by -10 or +20 dB if necessary.
This microphone also comes with a shock-absorbing shoe mount, which minimizes vibrations and eliminates handling noises to record a crystal-clear soundtrack.
Regarding power, this microphone works with two AA batteries. The microphone switches off automatically when your camera isn’t switched on.
This prevents it from using batteries when the camera isn’t in use. And it also prevents it from using its battery when it’s in the bag.
An LED light also lets you know when the microphone is on or off. That way, you can easily see if it’s attached to your camera and ready for recording.
As for connections, your Azden microphone also comes with a 3.5mm jack and can be easily connected to any DSLR camera.
Pros:
- Stereo and mono modes
- Inexpensive
- Auto power on/off
- Professional features
- Battery powered
Cons:
- No XLR cable
2. Rode VideoMic GO II Light Weight On-Camera Microphone
Key specifications:
- Supercardioid polar pattern
- Runs on plug-in power (no battery of phantom power necessary)
- 20Hz – 20kHz frequency
- Integrated shock mount
- Foam windscreen
- 3.5mm TRS output (with detachable cable)
- USB-C connection
- (Headphone connection)*
- MFi certified for Apple Lightning-equipped iOS products.
- Optional accessories available make it possible to use the mic with mobile devices.
The second microphone on our list is the Rode VideoMic GO II, the successor to the extremely popular Rode VideoMic GO.
Compared to the earlier version, the Rode has significantly upgraded the body, the shock mount, the cable, and more.
As you probably already know, Rode is a popular manufacturer of shotgun microphones for DSLR cameras.
The VideoMic GO II has a super-cardioid polar pattern to pick up most of its sound from the sources in front of it.
The frequency range of the RodeVideoMic GO II is 20Hz – 20kHz, which is excellent for interviews and vlogging and a significant upgrade from its predecessor.
It also includes a 3.5mm jack, which can quickly connect to your DSLR camera.
Your camera powers it, so you don’t need extra batteries. But the GO II also has a new USB Type-C connection to use it as a USB microphone for your mobile device or computer.
*When you do so, the 3.5mm TRS output works as a headphone output, so you can monitor the volume of whatever you’re recording and check that you don’t get any nasty spikes, which ruins the recording.
You’ll find a windshield for this mic, a Rycote Lyre shock mount, and the instructions manual in the package.
The microphone is made from ABS materials, which are durable and lightweight. The mic only weighs 96 grams (3.4 ounces), including the mount and windscreen.
You can get accessories such as a TRRS jack to connect it to your smartphone or an XLR adapter to attach to your camcorder.
Pros:
- Inexpensive
- Good microphone for vloggers
- Detachable cable
- Lightweight
- Camera-powered
- USB-C connection
- Headphone out possibility
- Removable cable
Cons:
- No options to adjust the input gain
- No high-pass filter
- No extra furry windshield included as standard
3. Rode VideoMic Pro+ Compact Directional On-Camera Shotgun Condenser Microphone
Key specifications:
- Supercardioid polar pattern
- Runs on 2 x AA batteries or one rechargeable Rode LB-1 battery
- Power switch with LED and auto on / off
- 20Hz – 20kHz frequency
- A high-pass filter with low cuts at 75Hz or 150Hz
- Treble boost
- Integrated shock mount
- Foam windscreen
- 3.5mm TRS output (with detachable cable)
- Optional accessories available make it possible to use the mic with mobile devices.
If you’re looking for a good shotgun mic that is a bestseller, check out the Rode VideoMic Pro+.
The Rode VideoMic Pro has long been very popular among videographers and filmmakers for good reasons. The Pro+ has several improvements over the original version, which was already good.
The Pro+ has a frequency response of 20Hz to 20kHz and multiple built-in features.
The polar pattern is super-cardioid so that the surrounding noise will be minimal. The mic also comes with a Rycote Lyre shock mounting system, which reduces vibrations and rumbles while recording.
The microphone also has a two-stage high-pass filter at 75Hz and 150Hz.
You have a 3-Stage Gain Control allowing you to get +20dB while recording, -10dB, or regular gain. Gain control is a great option if your sound source is very high or low.
The Rode VideoMic Pro+ also comes with a high-pass filter, which reduces the surrounding noise and rumble caused by traffic.
The mic can be powered in multiple ways.
First, it comes with a rechargeable lithium-ion battery lasting over 100 hours. And when it is time to recharge it, you can do so by USB. S
Second, if you’re out on a shoot, and the battery runs out of power, and you don’t have the time to recharge it, you can just put in standard AA batteries.
Third, if you have a USB power bank, you can run the microphone off of this. Nice!
Also, the microphone automatically switches on and off when you turn your camera on and off.
This is nice because you’re sure always to have the microphone turned on when you press record, and you won’t miss recording the audio in a scene.
Likewise, you won’t need to worry about switching the microphone off to save battery. The microphone does that for you automatically.
Another nice feature is that the cable can be detached. So if you need to plug in a 3.5mm TRRS cable (instead of the 3.5mm TRS cable you use with your DSLR) and use it with your smartphone, you can easily do so.
Because the cable isn’t soldered to the microphone, you can buy a new one if it gets damaged.
It is nice that you don’t have to send the whole microphone for repair if the cable gets damaged.
The package contains multiple accessories such as a windshield, 3.5mm mini-jack TRS cable, manual instructions, a USB cable, a rechargeable battery, and a charger.
The Rode VideoMic Pro+ is one of the best microphones in this price range and my top pick when I don’t need boom microphones (see the NTG2 below).
Pros:
- Reasonable price for the professional features
- Auto power on/off with LED indicator
- Gain control
- 2 high-pass filters
- Treble boost
- Professional features
- Battery powered
Cons:
- No XLR cable included as standard
- No extra furry windshield (DeadCat) included as standard
4. Rode NTG2 Multi-Powered Condenser Shotgun Microphone
Key specifications:
- Supercardioid polar pattern
- Runs on 1 x AA battery OR 48 V phantom power
- Power switch with LED and auto on / off
- 20Hz – 20kHz frequency
- High-pass filter 80Hz, 12 dB/octave
- Slight presence boost
- Integrated shock mount
- Foam windscreen
- XLR connector
- Mic Clip
Yes, this is yet another microphone from Rode!
The Rode NTG2 is more of a traditional condenser shotgun mic that provides excellent sound quality while remaining lightweight and easy to use.
This short shotgun mic is supplied with a mount (not a shock mount) for microphone stands and boom poles.
However, if you get the Rode SM3 shock mount, you can easily attach it to your camera.
The Røde NTG 2 has a super-cardioid polar pattern, which minimizes the surrounding noise while recording. Most of the sound will be picked up from the front, so ensure your subjects are positioned ahead of the microphone, not at the sides.
The frequency response is 20 to 20 kHz and features an 80 Hz high-pass filter that eliminates unwanted noise caused by traffic or similar sources.
You also get a windshield.
This mic uses AA batteries or 48 Volt phantom power. Because it can be powered either way, you can use it with cameras that don’t have phantom power.
The Rode NTG 2 also has a maximum SPL (Sound Pressure Level) of 131 dB so that you can use it on loud sound sources without distortion.
The metallic construction makes this microphone nearly impossible to damage, so it will be a loyal companion for any videographer for years to come.
If you’re worried about weight, remember that this mic weighs only 161 grams, or about 5.7 ounces. It can be easily attached to any DSLR camera and works well with a boom arm.
Another great advantage of this mic is its 10-year warranty supplied by Rode. Knowing that your investment is protected gives you more peace of mind.
This is an excellent choice for a true shotgun microphone if you’re on a tight budget.
Pros:
- Best budget shotgun mic
- Usable on a mic stand, boom camera or on-camera
- Auto power on/off with LED indicator
- Gain control
- 2 high-pass filters
- Treble boost
- Professional features
- Battery powered
Cons:
- No XLR cable included as standard
- No shockmount included as standard
- No extra furry windshield (DeadCat) included as standard
- It needs an adapter to a 3.5mm jack if your camera or recorder doesn’t have XLR
5. Sennheiser MKE 400 Professional Shotgun Microphone
Key specifications:
- Supercardioid polar pattern
- Runs on 2 x AAA batteries
- Auto-power on / off
- 50Hz – 20kHz frequency
- High-pass filter 200Hz
- Gain switch of -20 dB, 0 dB, and +20 dB
- Built-in wind jammer
- Green LED power indicator
- 3.5mm locking output and detachable cables (TRS and TTRS)
- Headphone connector 3.5mm with volume control
- Furry windshield
- Mic Clip
Sennheiser is known for high-quality audio equipment and providing some of the best sound tools for the music industry, such as microphones and headphones. The Sennheiser MKE 400 is no exception.
It has a stereo, super-cardioid polar pattern, meaning it can pick up most of the sound from the source directly in front of it.
It can be connected to your DSLR using a 3.5mm jack and uses two AAA batteries as a power source. At around 5.8 ounces, this relatively light microphone won’t add too much weight to your camera while filming.
The frequency response is from 50 Hz to 20 kHz, and it includes a dB pad with three sensitivity levels (-20dB (left button position), 0 (middle button position), and +20dB (right button position)), which can be used in different loudness situations.
The mic also has a switchable low-cut filter at 200 Hz to filter out low-frequency noises.
You might also be happy to find out that the all-metal construction makes this solid as a brick.
The Sennheiser MK 400 is compatible with most DSLR cameras and has a shoe mount for easy installation. However, the optional Sennheiser CL 35 USB-C cable also allows you to connect it with select mobile devices.
The MKE 400 is a professional microphone with great audio quality and comes at an affordable price.
Pros:
- High-quality mic at an affordable price
- Auto power on/off with LED indicator
- Gain control
- High-pass filter
- Battery powered
Cons:
- The high-pass/low-cut filter is at 200 Hz, high for bassy voices.
- No XLR cable included as standard
- No shockmount (though low handling noises still)
6. Shure VP83F LensHopper Camera-Mounted Condenser Microphone
Key specifications:
- Supercardioid polar pattern
- Can record directly to microSDHC card in the mic
- The backlit LCD screen lets you monitor everything the microphone does
- Joystick for easy menu control system
- Runs on 2 x AA batteries
- Auto-power on / off
- 50Hz – 20kHz frequency
- High-pass filter 170Hz, 12 dB/Octave
- Stepless gain control of up to +60 dB
- 3.5mm jack output
- Headphone connector 3.5mm with volume control
- Foam windshield
Shure is a well-known brand in the microphone world. I think it is impossible to find a singer in a band who hasn’t, at some point, used a Shure SM58.
The Shure VP 83F LensHopper is another great addition to your filmmaking arsenal, which lives up to the high standards and ruggedness we’ve come to expect from this company.
The Shure VP83F has a unique trick we haven’t seen before; it comes with integrated flash (Micro SDHC slot) recording/playback capabilities. This enables the microphone to capture your audio onto the flashcard!
The VP83F can capture audio at a sample rate of 24-bit/48kHz.
This is a neat trick, especially if your camera has no microphone input. And even if it does, being able to capture a backup recording of your sound on an extra flash card is just awesome. Then you never have to worry about, e.g., a bad connection in the cable running from the microphone to the camera.
The VP83F has a super-cardioid pattern that eliminates side noise to ensure crisp audio from any audio source.
Depending on your preferences, you even have a switch to increase or decrease the dB gain.
Lastly, the frequency response is from 50 Hz to 20 kHz, which is standard for most shotgun microphones.
You’ll also love the Rycote Lyre shock mounting system, which efficiently eliminates rumbling noises, vibrations, and shocks.
2 x AA batteries provide the power.
Pros:
- Innovative design with lots of features
- High-quality microphone
- Records to integrated micro SDHC card and camera simultaneously for extra backup security
- LED display for easy monitoring
- Separate headphone output
- Stepless gain control
- High-pass filter
- Battery powered
Cons:
- The high-pass/low-cut filter is at 170Hz, which is high.
- No XLR cable is included as standard.
7. TAKSTAR SGC-598 Interview Microphone
Key specifications:
- Cardioid polar pattern
- + 10 dB gain adjustment
- Low power indicator
- Auto power mode (automatically turns on/off with camera)
- Powered by two AA batteries
- 40Hz – 20kHz frequency
- Low-cut filter (high-pass filter) at 200Hz
- Integrated shock mount
- 3.5mm TRS output
- Foam windshield included.
Look no further if you’re looking for a super-affordable shotgun microphone suitable for DSLR and mirrorless cameras.
The Takstar SGC-598 has a cardioid polar pattern, meaning it will record most of the sound from the front and some from the side.
It is ideal for interviews and vlogging.
The mic can also be used for other videos, with a +10dB gain switch mounted on the side.
You can connect it to your camera using a 3.5mm jack, which uses one AA alkaline battery. This battery can offer you up to 100 hours of continuous sound recording.
The frequency response is 50 Hz to 16 kHz, slightly narrower than some of the other microphones on this, but as we wrote in the guide above, this frequency range is still very good for interviews.
The Takstar SGC-598 has more self-noise than some of the other microphones on this list, so you might want to use the +10dB gain switch to eliminate some of this.
However, the sound quality is still absolutely usable, even if this is your only external microphone. And it is so cheap that you can easily buy one as a backup for your other microphones.
Pros:
- Very cheap
- Good sound quality
- Decent shockmount
- Battery powered
Cons:
- Bad shielding from RF noise
- High self-noise
- No XLR cable is included as standard.
- No DeadCat included.
8. Deity V-Mic D3 Pro Super-Cardioid Directional Shotgun Microphone
Key specifications:
- Super-cardioid polar pattern
- Stepless gain adjustments up to +20 dB
- Auto power mode (automatically turns on/off with camera)
- Powered by a rechargeable lithium battery
- 50Hz – 20kHz frequency
- Low-cut filter (high-pass filter) at 75 Hz and 150 Hz
- Integrated shock mount
- 3.5mm smart TRRS output
- Foam windshield included.
The last one on our list comes from Deity, another popular manufacturer of DSLR microphones.
The Deity V-Mic D3 Pro shotgun mic is made from aluminum and is lightweight at around 143 grams (5 ounces).
The microphone features a super-cardioid polar pattern and has a frequency range from 50 Hz to 20 kHz.
The Deity V-Mic D3 Pro has a unique step-less analog gain adjustment dial where you can increase the volume to 20 dB. It also comes with a two-step low-cut filter at 75Hz and 150Hz.
The internal lithium-ion rechargeable battery gives you around 50 hours of runtime. It’s not the best on this list, but it’s still very usable. It takes about two hours to recharge the battery in full.
Like the Rode Videomic Pro+, the Deity V-Mic D3 Pro has an auto switch on/off feature, automatically turning on the microphone when you switch on your camera and shut it down when not in use. This also helps preserve battery life.
It would have been nice if you could swap the battery for a standard double AA if you ran out of power during a shoot.
You’ll also get a shock mount with a camera shoe mount, which lets you slide the microphone back and forth along a rail, which is cool and makes it easier to fit your camera with your other accessories.
The package includes a foam windshield, but unfortunately, it doesn’t include a dead cat.
The Deity V-Mic D3 Pro has a smart connection 3.5mm TRRS mini-jack. A microprocessor detects which device you attach the microphone to in the microphone.
This is handy since there isn’t an exact standard for TRRS cables and what the Tip-Ring-Ring-Sleeve connections are used for. For example, some devices might use the Tip and first Ring for headphones, and others might use them for a dual-purpose headphone and microphone connection.
The Deity V-Mic D3 Pro microphone does this analysis for you, which makes it compatible with a broad range of devices such as DSLR cameras, mirrorless cameras, camcorders, smartphones, handheld recorders, laptops, bodypack transmitters, and tablets.
Some iOS devices require Apple’s Lightning to 3.5 mm Headphone Jack Adapter, which isn’t included in the package.
The downside is that some older devices might be incompatible with this microphone or still need an adapter. However, Deity has included a compatibility list on its website, which you should read before you purchase this microphone.
The Deity D3 Pro is an affordable microphone for run-and-gun video shooters.
Pros:
- Inexpensive, high-quality microphone
- Smart 3.5mm TRS/TRRS detection
- 75 Hz and 150 Hz high-pass filter
- Separate headphone output
- Stepless gain control
- Low self-noise
- Battery powered
Cons:
- No XLR cable is included as standard.
- No DeadCat included
Which One Is Your Favorite?
I know picking one from many excellent shotgun microphones can be difficult, but we hope this guide has made your buying decision easier.
I’ve done my best to describe what sets each microphone apart.
The on-camera shotgun mics mentioned in this guide are ideal for beginners and prosumer filmmakers, and they’ll help you start your filmmaking or vlogging career on the right foot.
If it helps, create a list of priorities such as power options, polar pattern, frequency range, etc., and select your future microphone based on that. You can read more about all of these in the great guide below.
Good luck on your filmmaking journey!
Buyer’s Guide: What Is An On-Camera Shotgun Microphone?
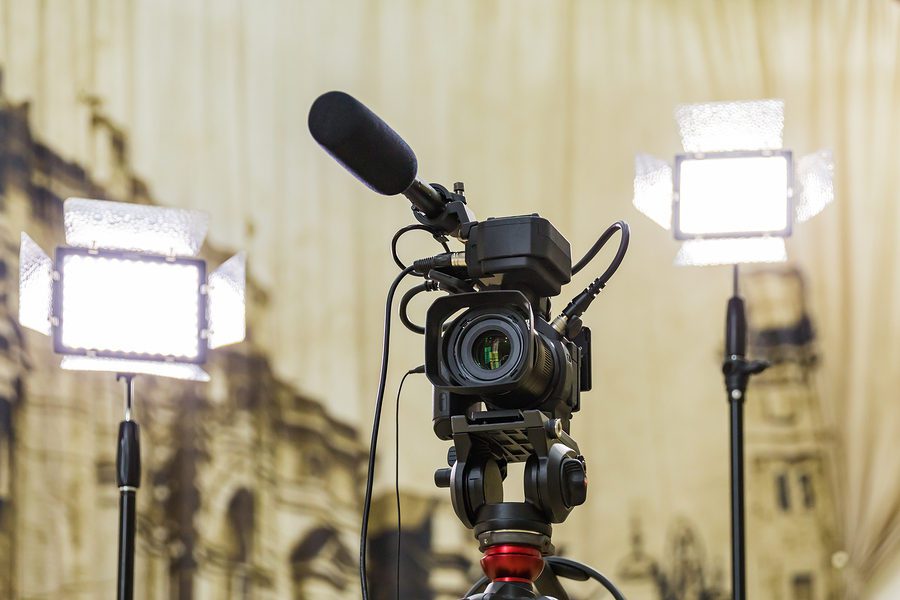
A shotgun microphone is a highly directional microphone. It is designed to pick up sound waves from sources in front of it.
If you move slightly to the left or the right of the shotgun barrel while talking, the mic will start to pick up less and less sound.
As you probably have already guessed, shotgun mics are ideal for YouTube videos, interviews, speeches, narrations, and vlogging. They don’t pick up noise from the surrounding areas, which is a great advantage.
On-camera microphone or shotgun microphone?
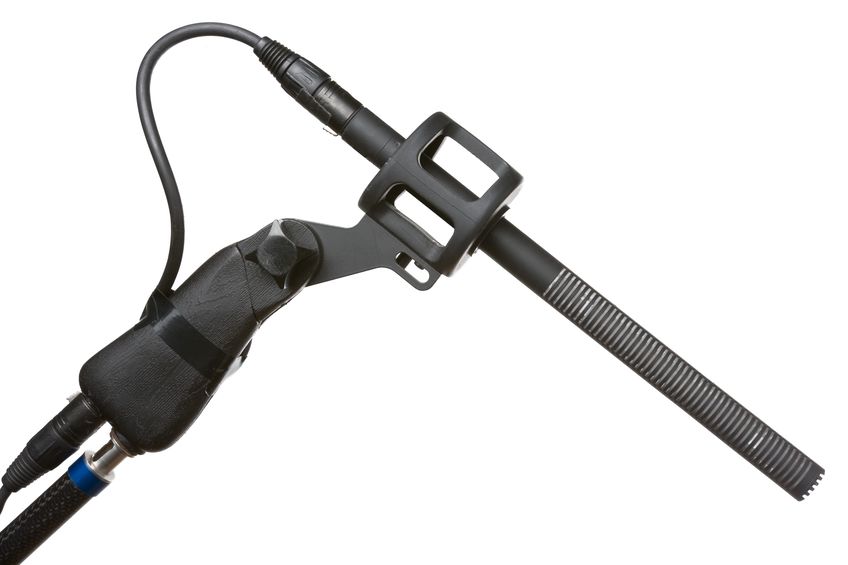
There’s a slight difference between a true shotgun mic and shotgun-style on-camera microphones. Most of the mics in this article will be of the latter type.
There are three major differences:
- the microphone pick-up / polar pattern
- the microphone directionality and length
- mounting
- how the microphone is powered
Professional shotgun microphones have a directional polar pattern, meaning they only pick up sounds directly in front of the microphone.
Shotgun microphones are often also longer than on-camera microphones. There’s a relationship between the length of the microphone, the polar pattern, and the directionality of the shotgun mic. Long microphones are more directional than shorter ones.
Long shotgun microphones are also better at picking up distant sound than shorter ones. That’s why you often see very long shotgun mics at live events such as football matches.
Shotgun microphones also have low self-noise and high sensitivity, which is another reason why they’ve become the industry standard.
Challenges with traditional shotgun microphones
Industry-standard shotgun microphones are often put on a boom arm close to the subject.
That’s why you often have a sound guy with a boom arm that controls the movement and position of the mic for the best audio recording possible.
This ensures an excellent signal-to-noise ratio, as the mic won’t pick up much ambient noise from the surroundings.
If you’re a solo video shooter, this isn’t possible. Instead, you can put the microphone on a stand close to the subject.
This can work wonders for interviews but not for moving subjects. And if you want to get more of the background in the frame, you can’t have the microphone very close, or it will appear on the footage.
The last challenge with traditional shotgun microphones is that they often need 48V Phantom Power from an external device.
If your camera supports this, then you’re good to go. If not, you need an external recording device, e.g., a Zoom recorder, which may also mean you need to sync the scratch audio from your camera and the shotgun mic in post-production.
Enter on-camera shotgun microphones.
Why on-camera microphones are great for the one-person filmmaker
On-camera shotgun-style microphones solve many of these issues but create some new ones.
The main reason to get an on-camera microphone is if you’re shooting the video yourself – as a wedding videographer, vlogger, journalist, or one-man videographer.
An on-camera microphone is one of the best options for video production if you’re a single person running all the tasks. Especially if you combine it with a lav mic – I’ll explain this in more detail later in this article.
Most on-camera mics pick up sound in a wider pattern than a true shotgun microphone and are more forgiving regarding where you stand in front of the mic.
However, this also means they pick up more background noise from the natural environment or room. So if you’re in a noisy environment, you’d want to combine them with a lav mic close to the body.
They are often mounted into the hot shoe of compact digital cameras or a cold shoe on a camera cage.
You can just as easily put a traditional shotgun microphone on your camera. But you’d rarely see an on-camera microphone designed to be attached to your camera on a boom pole.
Some on-camera shotgun condenser microphones need power. But unlike traditional shotgun microphones, the on-camera mics have an internal battery, removing the need for an external unit supplying phantom power.
Those were the major differences between industry-standard shotgun microphones and on-camera shotgun microphones.
Now, look into the specifications you need to know in more detail. Get familiar with those, and you should be ready to pick the best microphone for your needs.
Microphone Polar Patterns
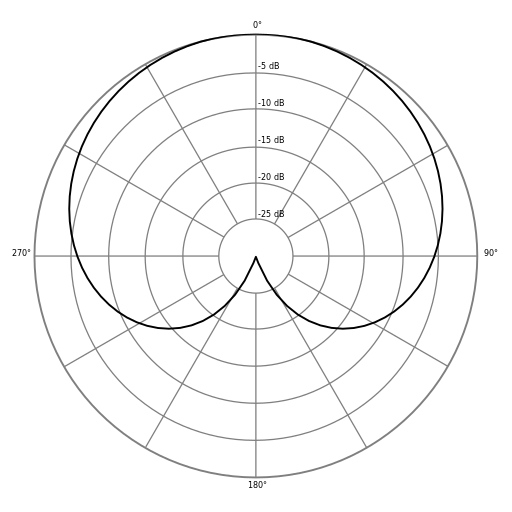
The microphone polar pattern refers to the direction from which the mic is designed to pick up sound.
There are multiple types of mics available with various polar patterns. For example:
Cardioid mics
Cardioid microphones are designed to pick up all sounds from the front and some from the left and right areas of the microphone. You can think of their pick-up pattern in the shape of a heart turned upside down.
On-camera microphones are sometimes cardioid and sometimes super-cardioid.
Super-cardioid mics
Super-cardioid microphones are also known as unidirectional microphones because they have a unidirectional pattern.
Super-cardioids are commonly used in shotgun microphones as they only pick up sound from the front and very little from the sides and back.
Some advanced shotgun mics don’t pick sounds from the sides, only from the front.
A super-cardioid pattern is also known as a hyper-cardioid or lobar polar pattern.
Bidirectional mics
Bidirectional microphones pick up sound from both sides – front and back or left and right. Shotgun mics aren’t bidirectional.
Omnidirectional mics
Omnidirectional microphones are designed to pick up sound waves from any direction.
They are great when filming moving targets and are often used in lapel mics, so the microphone can be placed on your talent in many different places and still pick up sound. You rarely see omnidirectional shotgun mics.
Frequency Response
A microphone’s frequency response refers to the sound range picked up by the mic in terms of hertz. For example, most shotgun mics pick up sound in the 20Hz – 20kHz range, which defines the absolute limits of what most humans can hear.
Before you obsess about frequency response, remember that human hearing is most sensitive in the 2000 – 5000 Hz frequency range. And many adults can’t hear anything above 16kHz.
The fundamental frequencies of human speech usually lie between 100Hz-3kHz, with harmonics ranging up to 17kHz.
So, if a microphone “only” has a frequency response of 40Hz-16kHz, it doesn’t mean it is a bad microphone.
If you want to read more about frequency response and microphones, here’s a great guide by the microphone company Shure.
High-pass filters
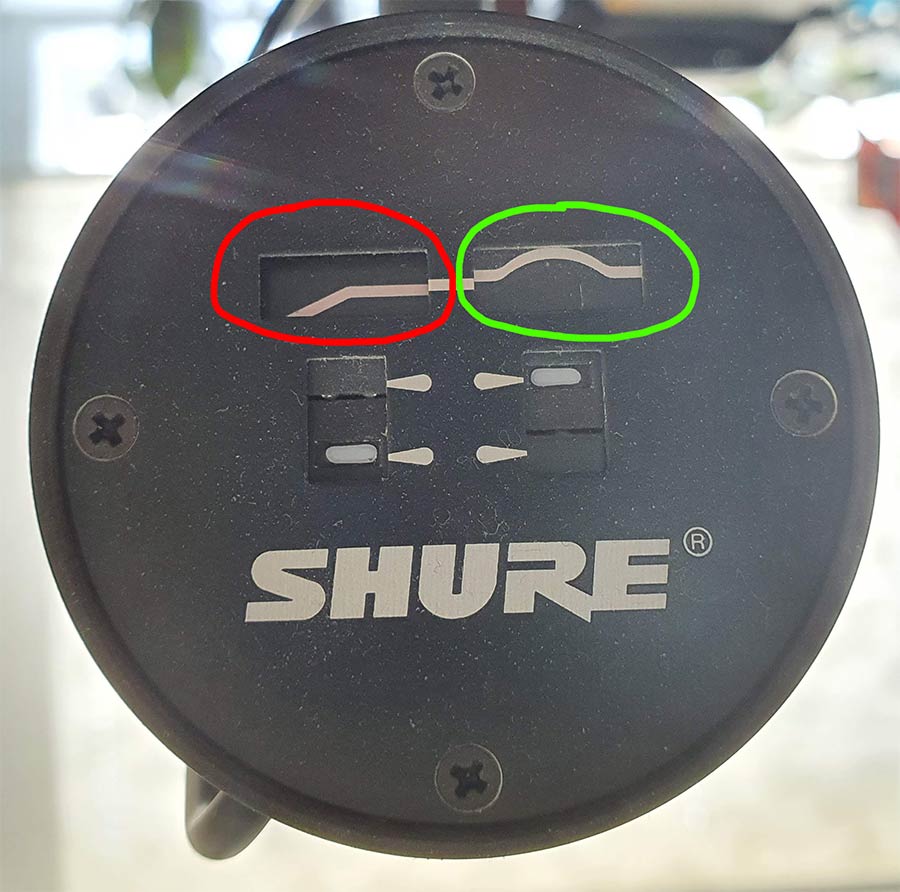
The high-pass filter curve is depicted in the red circle. The green circle depicts a mid-range filter. The microphone here is the Shure SM7B, which isn’t an on-camera mic. But it had a good and easy depiction of the filters.
Some on-camera microphones have a low-cut, a.k.a. high-pass filter, which cuts out sounds below a certain frequency, leaving only the higher frequencies.
For example, some shotgun mics can come with a high-pass filter at 90 Hz. The filter lets the higher sounds pass (higher than 90 Hz) and rolls off sounds below 90 Hz.
By “rolling off,” I don’t mean they entirely cut out all frequencies below 90 Hz. Instead, they decrease the volume of those frequencies by a set number of decibels per octave, fx 6dB, 12dB, or 24 dB.
High-pass filters are useful for cutting out low-frequency noise, such as handling noises, a low hum from traffic, and air-conditioning.
Power Option
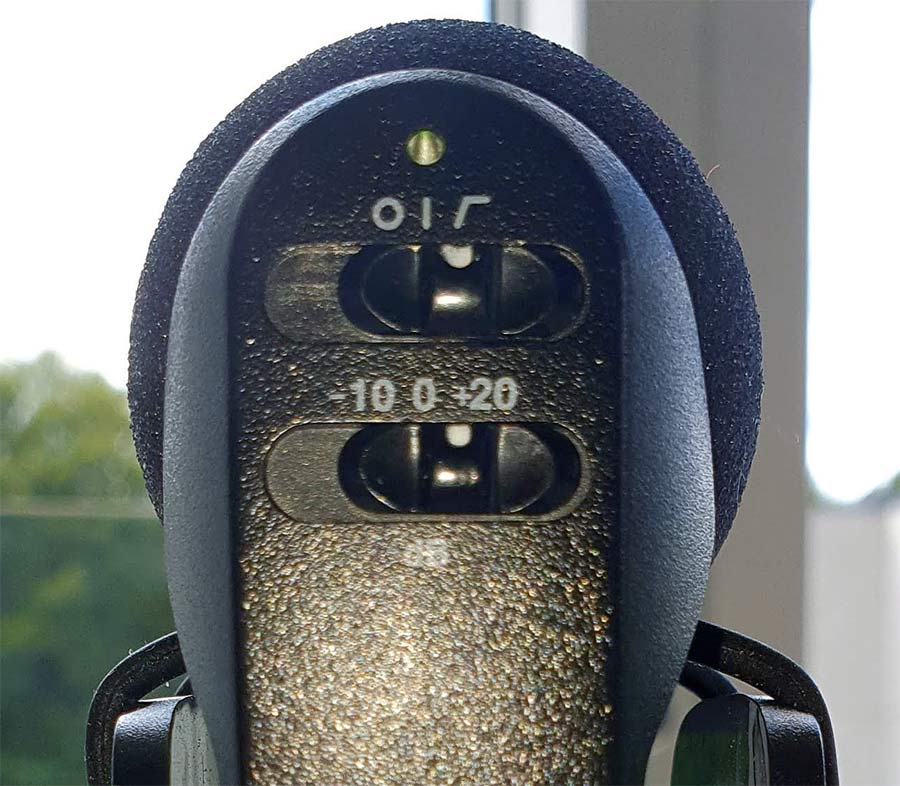
Your microphone must be attached to a camera, but it doesn’t work out of the blue. It also needs a small source of electricity.
Some mics draw power from your DSLR camera when connected. This can be either from the 3.5mm microphone input or the hot shoe on your camera. You don’t have to do anything but plug them in and get busy filming videos.
However, make sure that you keep an eye on your DSLR’s battery level since it will be drained slightly faster now.
Other microphones come with internal batteries.
The type of battery power differs from microphone to microphone. Some have rechargeable lithium-ion batteries. Others come with AA, AAA, or 9 Volt batteries, which can be replaced when they die.
While rechargeable batteries are nice, they might not be the best choice if you’re recording for long periods because you can’t simply switch out the battery.
So if you run out of power, you must recharge the battery during a shoot. Some microphones will allow you to recharge from a power bank, though, so that might be a solution – if you remember to bring one!
I prefer microphones where I can switch out the battery if needed. And I prefer microphones that use batteries. I can buy them anywhere from the gas station to the supermarket if I forget to bring one (fx a single AA battery).
Some microphones can be powered in multiple ways. This doesn’t make the mic dependent on only one power source, so you have one less thing to worry about.
Shock Mounting System

When recording video footage, you aim to minimize the surrounding noise and handle noises as much as possible.
If you accidentally bump into your microphone stand or hold your camera while you walk and talk, e.g., vlogging, you don’t want any of those noises picked up by your microphone.
The solution is to use a shock mount. This accessory keeps the mic stable on top of your camera, and any vibrations, noise, and rumble are minimized.
It works by essentially suspending the microphone in some rubber bands. This vastly minimizes any handling noise.
Accessories
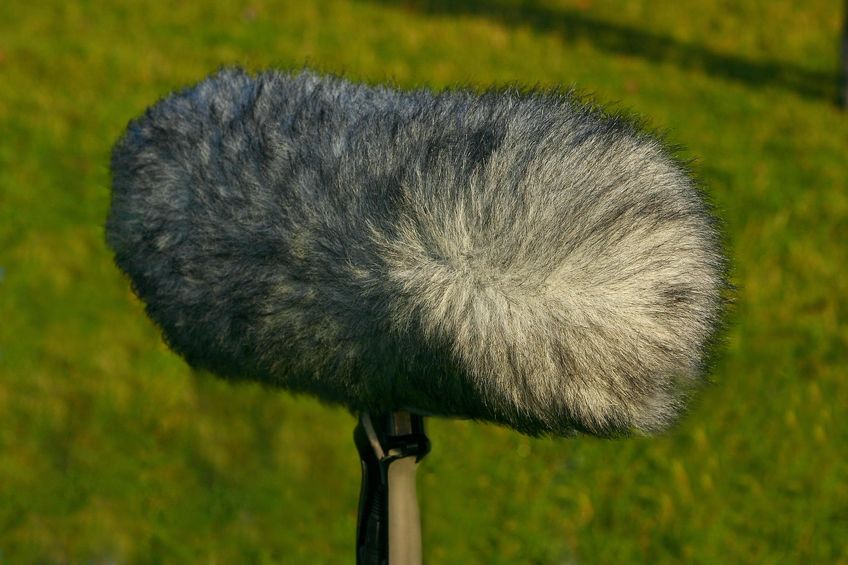
An on-camera shotgun mic is rarely sold alone. It also includes accessories such as a cable (usually 3.5mm) to connect it to your DSLR, a travel case, and a foam windscreen.
The foam windscreen is designed to minimize wind noise and vocal plosives (such as ‘p,’ ‘t,’ and ‘b’) to get accurate, crisp sound quality.
If you’re filming outside in strong winds, you should also get a “dead cat.” A dead cat is a furry shield. You can put it on top of the foam windscreen for extra protection from high winds.
Make sure that you find out what’s in the box before paying.
You should also get more information about the warranty period. Most manufacturers offer a warranty period of 1 or 2 years, which is reassuring.
Pro Tip: Use a lav mic in combination with an on-camera shotgun mic
I suggest combining a Lavalier microphone with an on-camera microphone for the best quality possible.
That way, you get the best of two worlds: a close mic and a room mic.
The Lavalier microphone is placed on the subject’s body, so you pick up speech but not much of the room.
The shotgun microphone is placed on your camera and pointed at the subject. That way, you get more room (but also more noise).
You use the shotgun microphone as an alternative to the built-in microphones of your camera.

Some of these MICs are the price of a DSLR. Some cost more than 400 CAN. Good hardware, sure, but not budget friendly.
Hi Botelio.
Thanks for your comment.
I know what is considered budget-friendly is relative. And sure you can get cheaper microphones, but I don’t think the quality is good enough on the cheaper options out there. So you’ll end up paying more in the end, because you’ll likely need to buy another microphone again soon. Plus you’ll have bad sound quality, bad build-quality, and possibly also problems with interference and the signal-to-noise ratio to deal with also.
Compared to industry-standard shotgun microphones (those that you would also use on a boom), these are REALLY budget-friendly.
I guess my point is, don’t buy too cheap, because you’ll end up paying more in the end. I’ve learned that the hard way myself.
Best Regards,
Jan – owner of FilmDaft.
The newest Shure LensHopper sounds like a solid recorder if you’re trying to use a small shotgun mic and avoid the in-camera audio jack.
Is it the Shure LensHopper VP83F you’re thinking of? If so, that’s actually pretty genius to include an SD-card directly in the microphone. That way you can have it on a stand closer to your subject, and use it with lots of different type of cameras – even those that don’t have a mic input. It’s actually mentioned in here btw: https://filmdaft.com/10-best-shotgun-microphones-for-film-video-interviews-2020/
Best, Jan
It’s mentioned up above in this same article as well, number 6 I believe, the image isn’t of the micro sd version but I’m pretty sure the writing is.
Yes. The image link to both options (with and without the flash). Unfortunately, it wasn’t possible to embed the image of the mic with the in-built memory card.
Best, Jan
This article would be well served if average prices were included, it would be very helpful. As another commenter said, some of these mics cost more than my camera and lenses combined,
Cheers
Hi Jason
I hear your critique. And I get it. The thing is that prices change all the time. And I simply don’t have the time to update them. So my team and I try to focus on the descriptions and content instead.
Best, Jan