DISCLOSURE: AS AN AMAZON ASSOCIATE I EARN FROM QUALIFYING PURCHASES. READ THE FULL DISCLOSURE FOR MORE INFO. ALL AFFILIATE LINKS ARE MARKED #ad
Let’s face it: webcams don’t exactly offer the best image quality. And if you often use Zoom or Skype for work, stream on Twitch, or make videos for YouTube, you might have been wondering: can you use a DSLR or mirrorless camera as a webcam for streaming?
The short answer is yes; you can use your DSLR or mirrorless camera as a webcam for streaming. All you need is a free piece of software like OBS, SparkoCam, or CamTwist and (for the best experience) an HDMI to USB capture device to pair your DSLR to your PC.
Table of Contents
Let’s start by considering why you should use your DSLR as a webcam.
Benefits of using a mirrorless camera instead of a webcam
There are a lot of benefits to using a mirrorless camera instead of a webcam:
- You get a better image quality
- You can use different lenses
- You can set the aperture for a shallow depth of field (bokeh)
- DSLR and mirrorless have bigger sensors (less noise)
- Set the white balance (no weird skin colors)
If you’re unsure how to set up your camera to get a professional-looking image for streaming, I recommend you read our guide 10 Tips On How To Shoot Professional Video On DSLR.
The only thing I can think of where a webcam beats a DSLR is size and battery life.
Often, you can get around the latter by buying a dummy battery, which will let you connect your camera to a wall plug, so you don’t need to worry about battery life.
Hardware for connecting your camera to your PC
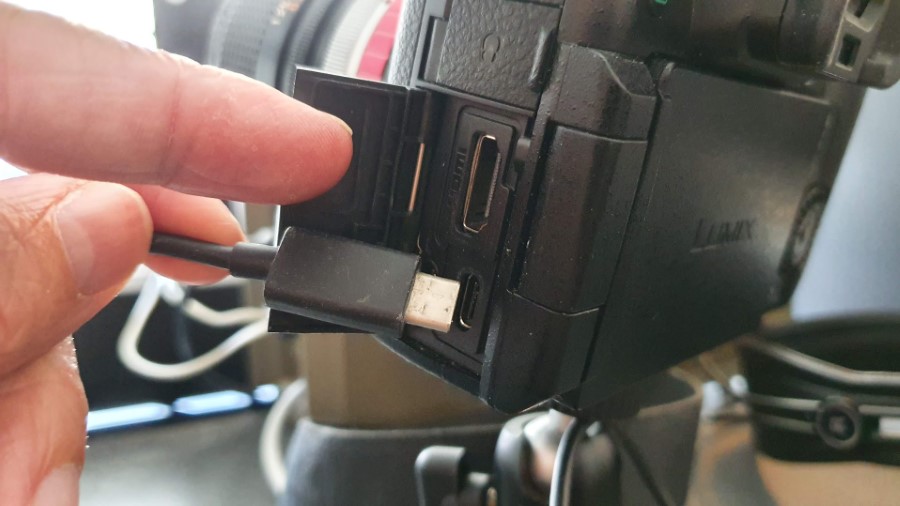
The first thing you’ll need is an HDMI-to-USB capture device for sending the captured image from your DSLR directly to your PC.
Now, there are ways you can connect your camera directly to software by only using a USB cable without a capture device, but the quality and user experience aren’t as good.
I’ll get back to the different options under the section on software further down in the article.
There are several options available on the market.
The main difference between a cheaper option and a more expensive one is the resolution; you can capture and stream.
Should I choose FullHD or 4K for streaming? And what about 2K?
Some devices can capture and stream Full HD (1080p, aka 1920×1080 pixels), while others can stream Ultra HD (aka 4K, aka 3840×2160 pixels).
If you only use your DSLR for things like Zoom meetings, I’d say you should stick to a FullHD option.
The reason is that good image quality not only depends on your camera but also the bandwidth of your internet connection and the internet connection of your friend, family, or co-worker.
4K takes up a lot of bandwidth, so you might have bad image quality because there isn’t enough bandwidth.
This might not be a problem if you’re streaming to YouTube, Facebook, etc.
But if you’re going to use this to talk to your colleagues – some of whom are on a train, some of whom are in a concrete building with bad Wi-Fi, etc.- this can be a problem.
That’s why capture devices that accept the 4K feed from your camera will often automatically downscale to 2K for recording and streaming.
That said, streaming has begun to move to 4K, so if you’re serious about streaming, you should go with a 4K device that streams 4K – but those are expensive. I’ll get back to that in a minute.
Best FullHD streaming options
Several popular FullHD options are available, such as the Magewell XI100DUSB Gen2, Elgato CamLink, and AJA.
I’ve only included the Magewell here because several users have problems with the AJA overheating and stopping the signal and the CamLink dropping frames.
Maybe a firmware or the next iteration will fix those issues, but for now, I wouldn’t recommend any of those.

The Magewell X100D USB is a simple and easy-to-use capture device that streams FullHD 1920×1200 at 60 frames per second (fps) and works with USB 3.1 and 2.0. It will support capture resolutions up to 2048×2160 and downscale from there.
Also, it will transfer the audio captured from your camera, and you can manually or automatically up or downscale the picture.
It’s compatible with Mac, Windows, Linux, and Chrome OS.
Best 2K/4K streaming option
Suppose you’re a gamer streaming on Twitch or Mixer or regularly streaming for your YouTube channel’s fans. In that case, you should get the more expensive 4K option for the ability to scale the resolution and get the best image quality possible.
But as mentioned above, even though a capture device will accept a 4K input from your camera, it will often downscale to 2K for recording and streaming.
Again Magewell offers a good option:
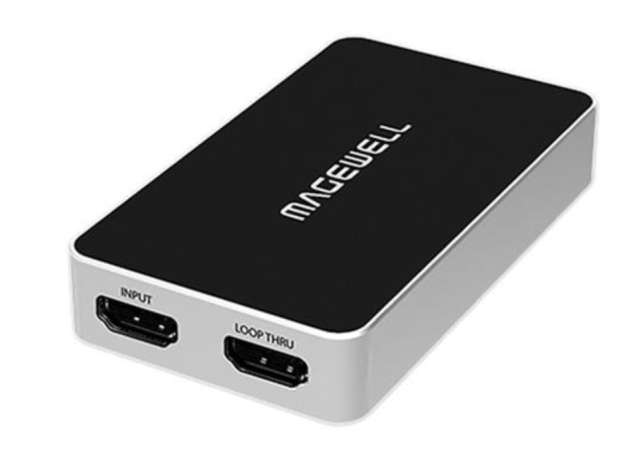
The Magewell USB Capture HDMI Plus is a simple, easy-to-use capture device that supports 4K 60 fps 4:2:0 input from your DSLR or mirrorless hybrid camera.
It will automatically downscale your signal to 2K for recording or streaming and include audio.
It even has dedicated microphone inputs and headphone outputs; the latter will extract the HDMI-embedded audio output to headphones.
It supports USB 3.1 and 2.0. and is compatible with Windows, Linux, Mac OS, and Chrome OS.
The Magewell capture devices are compatible with over 50 streaming programs and players, from Zoom and Skype to VLC, Quicktime, Microsoft, and Camtasia. You can check the full list here.
Best true 4K streaming option
Now if you want to play with the big boys and go true 4K in a quality that matches that of the codecs in your camera, you’d need something like the Videon VersaStreamer 4K:

The Videon VersaStreamer 4K is a more professional option than the consumer capture devices mentioned above, but we’re also talking about a completely different ballgame here.
The VersaStreamer 4K will let you simultaneously stream (RTMP/RTMPS) to and interact with people on three different platforms at the time, e.g., Facebook, YouTube, Twitch, Amazon Web Services, and more.
You can record an immediate backup to a USB device or card and auto-upload it to an FTP server.
It accepts and encodes resolutions up to 4K (3840×2160) up to 30 frames per second and FullHD (1920×1080) up to 60 fps in bit rates (both variable and constant) of up to 30 Mb/s.
It encodes in both h.265 HEVC and h.264 codecs, so you’re future-proofed in terms of camera codecs in many years to come (cameras and editing programs have just in recent years begun to support the efficient h.265 codec).
It supports MPEG-4 AAC-LC in ADTS for audio encoding at rates up to 512 kb/s with a 48, 44.1, and 32 kHz sampling frequency.
It has HDMI video input, 3G SDI Video input, audio embedded in HDMI/SDI, 3.5mm analog audio input, and 1 x RJ45 10/100/1000 Ethernet port.
If you’re a professional streamer, the Videon VersaStreamer 4K is the way to go.
Software for using your DSLR or mirrorless camera as a webcam
Several types of software will allow you to capture the signal from your camera; Some are free, some are only for specific cameras, some are only for PCs, and some are only for Macs.
There are three kinds of software that you should know about:
- Software that makes your DSLR/mirrorless camera act like a webcam, like SparkoCam, CamTwist, and EOS Webcam Utility
- Software that lets you broadcast yourself, like OBS.
- Software for streaming (Zoom, Skype, etc.)
Here, we are going to focus on numbers on and two.
Camera Live + CamTwist (Mac only)
If you want to use your DSLR or mirrorless camera as a webcam on a Mac without a capture device, you’ll need two programs: Camera Live and CamTwist Studio.
Camera Live lets you connect your camera to your Mac via a USB cable to use it as a webcam in the CamTwist Studio streaming application – without needing a capture device.
CamTwist Studio allows you to use it as a webcam for Zoom or Skype sessions.
CamTwist is limited to a 720p output, but you can upscale to FullHD if needed.
It also has some special effects, most of which are useless, though you can also use title overlays that may be useful.
SparkoCam (PC only)

SparkoCam Virtual Webcam is a “free” webcam software for broadcasting live – but only if you own a Canon or Nikon Camera (and webcams). And it’s only available for Windows.
Also, the free version has a huge watermark, so if you want to avoid this, you must upgrade to the premium version.
SparkoCam sells itself as a way to apply a lot of “fun” special effects to your livestream, but in my opinion, that’s just a nuisance.
But it does allow you to use your camera as a webcam without a capture device.
SparkoCam pros:
- Use your Canon or Nikon DSLR as a webcam without the need for a capture device
- It can automatically replace the green screen background with a selected background image
- You can use your camera simultaneously in multiple video chats and video recording applications
- It allows you to broadcast your desktop screen
- You can stream prerecorded video clips to your friends through chat applications (useful for webinars).
SparkoCam cons:
- Watermarked free version
- A lot of bloats, i.e., “fun effects.”
- It’s only really useful for Canon and Nikon cameras. You can see the full list of compatible cameras here
- Only available for Windows.
If you own one of the compatible cameras (especially Nikon) and want free webcam software (with a watermark), check out SparkoCam.
Or, if you own a Canon camera, you could also check out…
EOS Webcam Utility Beta Software
Canon has created a dedicated webcam software for Canon cameras that will allow you to use your Canon camera as a webcam without a capture device.
The good news is that it is available for both Mac and PC.
Not all Canon cameras are supported, though—the full list of compatible cameras and download and installation instructions here.
EOS Webcam Utility Beta Software pros:
- It allows you to use your Canon camera as a webcam using a USB cable without needing a dedicated capture device.
EOS Webcam Utility Beta Software cons:
- Only for a limited number of supported Canon cameras
- Limited resolution settings are available for now.
- It doesn’t record the audio from the camera for now, so you’ll need to use audio from an external source
- There are still minor bugs to iron out
As you can see, there are still some minor bugs to iron out and a few desired features, but it’s a nice move from Canon to make this software available, so you don’t need to depend on third-party software for your camera.
Lumix Tether
If you own a Panasonic camera like the GH5, you can use Lumix Tether together with OBS to stream yourself. But I wouldn’t recommend it because of the latency.
Lumix Tether isn’t designed for streaming or using your camera. But there’s a small workaround you can do that lets you use Lumix Tether like the ones above if you need to.
It requires Lumix Tether and OBS:
- Install both software
- Open Lumix Tether, set your desired camera settings, and press the LV (live view) button:

- Now in OBS, you can choose to add that particular window in the desktop streaming mode:
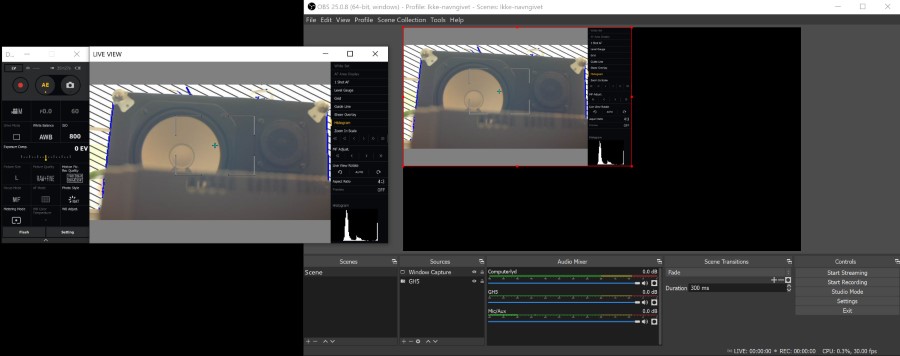
This is a quick, free workaround if you need to use your Panasonic mirrorless camera as a webcam and haven’t got a capture device. It’s slow, but it works.
OBS Studio – Open Broadcaster Software (Windows, macOS, and Linux)
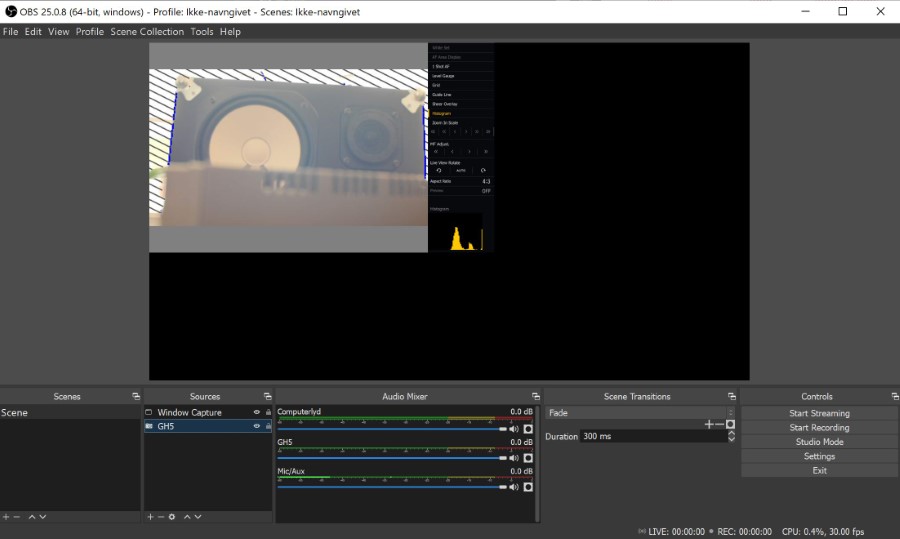
OBS Studio is a powerful free and open-source video and live recording software.
You still need to use either one of the free software mentioned above or – even better – a capture device before OBS will register your camera.
It will allow you to simultaneously capture audio and video from multiple sources and stream it to many different platforms.
As shown in the Lumix Tether section below, it will let you capture, record, and stream your screen – or even specific windows on your desktop.
The audio mixer is powerful and has useful filters such as a noise gate and noise suppression, and it even supports VST plugins.
OBS Studio pros:
- Extremely powerful
- Open-Source (free)
- Available for Mac, PC, and Linux
- Supports multiple video and audio sources
- Supports VST plugins for enhanced audio control
- Included audio filters
- Streams to multiple platforms from within the program
OBS Studio cons:
- Advanced
- I’ve never figured out how to record both the voice and the sound from within an NLE when the NLE uses the soundcard, even though my soundcard has multiple outputs and inputs (so I don’t know if it is possible in OBS Studio or if it is a user error – but I can do it in DAWs).
OBS Studio is an extremely powerful piece of software, and if you couple it with a hardware capture device, you have a really good base for streaming.
Other things to consider to get the best image quality possible
Your camera, hardware, internet connection, and computer are insufficient to ensure you get the best streaming experience.
You also need to consider light and audio.
Video Lights for Streaming at Home
Your camera itself isn’t enough to get a good image. You also need a light source.
Now, if you’re positioned near a window, you can change a lot for the better by simply positioning yourself to face the window while you’re streaming.
If that isn’t possible, and you’re experiencing a dull image even when opening the aperture, you must add a light source.
A soft light source will give you the most flattering result. You don’t need to go overboard. Often, a single light source, such as a ring light like those I’ve written about in this article, will do the trick.
Audio – Get a Good Microphone for Streaming
The microphones in laptops are often horrible. And bad sound quality has already ruined a lot of Zoom meetings and Skype sessions.
You can gain a lot by buying a headset with a microphone. Don’t buy the cheapest you can find because the microphone (and headset) you get are often worse than your computer’s.
But even an inexpensive option like the Logitech ClearChat H390 makes the audio your viewers experience much better.
Of course, if you’re serious about streaming, you should get a professional microphone like the Shure SM7B and a proper preamp to drive it.
You can read more about microphones and preamps and find many examples of lighting setups and audio options in my Ultimate Guide To The Tools And Equipment Youtubers Use.
Remember not to put the microphone directly in front of your mouth to avoid the most annoying (ex)plosive sounds and hisses.
It’s better to angle it a bit so the air from your mouth doesn’t hit the membrane in the microphone. This holds especially true if your microphone doesn’t have a pop filter and windscreen.
Stabilization a.k.a. a tripod
You’ll also need a tripod for your camera. What kind you need depends on where you want to place your camera.
If you want to place the camera above your screen, you can use an ordinary tripod for floor use. Read more about tripods.
But you can also get tripods meant to be placed on the table. I like the small Oben TT-100, but I don’t think it is available anymore. A good alternative is the tried and tested Manfrotto PIXI Evo 2.
Another popular and versatile option is the Joby Gorillapod.
Switch off the on-screen information tools on your camera
One thing to remember when using a hybrid camera such as a DSLR or mirrorless webcam is that you might need to go into your camera’s menu settings and switch off the overlay screen information.
If you don’t, you’ll end up streaming all the informational tools you usually use to capture the perfect image, like histogram, color profile, frame rate, shutter speed, etc.
You should also ensure that your camera supports live view to stream the captured image to your computer immediately through HDMI or USB.
Summary
If you want the best streaming experience possible, I recommend purchasing a hardware capture device and pairing it with OBS Studio.
The small amount you need to pay for the hardware will easily outweigh the hassle and bad quality you get from using software to do the same.
I hope you found this article useful. If I forgot anything or you have tips and tricks, please share them in the comment section below.

Hi Jan, I’ve just released PTP Webcam https://ptpwebcam.org to be able to live stream Nikon DSLRs and use them with Zoom and Skype on the Mac.
Hey, that sounds really cool. Nice work. I’ve approved your comment so people can follow the link to your site.
Hello,
Thank you sooo much for Software for using your DSLR or mirrorless camera as a webcam ! You’re my HERO 😉
Have a good day
Hi Valériana.
Thank you for your nice comment. I’m glad you found the article helpful 🙂
Best, Jan