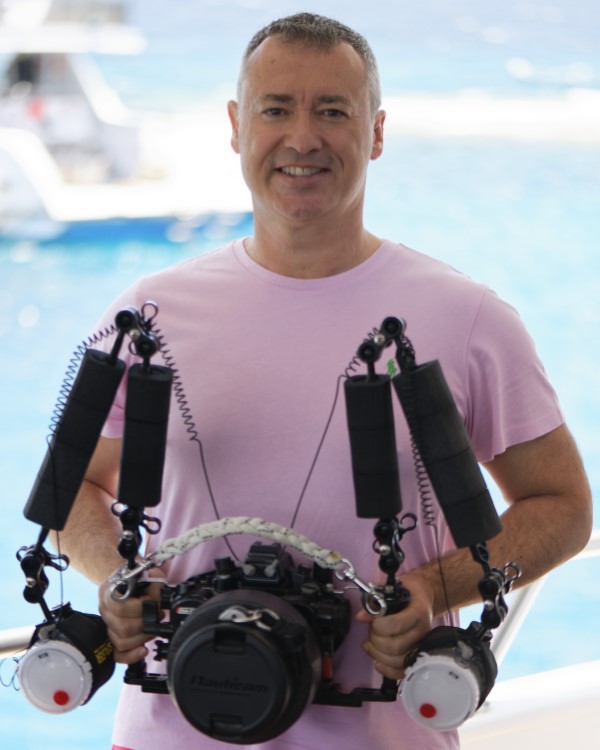
up for diving.
DISCLOSURE: AS AN AMAZON ASSOCIATE I EARN FROM QUALIFYING PURCHASES. READ THE FULL DISCLOSURE FOR MORE INFO. ALL AFFILIATE LINKS ARE MARKED #ad
I have been taking images since the beginning of consumer digital imaging, however, it is only in the last 9 years that I have been regularly shooting underwater video.
The reason I waited so long is that as a trained scuba diving instructor, I found underwater photographers somewhat irritating when I was leading dives and disrupting the enjoyment of diving.
If you ask a scuba diver what they think of photographers this opinion holds true even today.
Then I was working as a resident instructor in a Red Sea resort, I had the opportunity to work with professional underwater video operators selling DVD of the trips to guests and I noticed that underwater video was much more fun compared to pictures and you could actually still enjoy a dive.
A few years later I bought my first underwater housing and today I am the owner of a fairly significant rig built around a Panasonic GH5. I believe the quality of the footage you can take with consumer products has moved on a very long way.
To give you an idea here are two clips one dated 2011 in the Red Sea location of Sharm and the second is from October 2019 in another Red Sea location in Abu Dabab.
Both clips are taken on beach dives, accessible to anyone, so not exactly your most exotic or special location, but give an idea of the technology leap that we have witnessed.
Today footage that makes it to National Geographic or the BBC is taken with cameras like the GH5 or similar.
This clip, for example, is currently used on a marine biology website to show tiger shark behavior and shows the quality you can reach with contemporary equipment.
Underwater video in its classic interpretation is very similar to documentary filmmaking and therefore is very different from studio production although many James Bond movies feature wrecks that have been sunk with the purpose of making it a feature.
Movies featuring underwater scenes are still relatively uncommon, if you are a filmmaker and you get asked to do an underwater shoot, this article will make you realize that it is not a five-minute job.
In fact, you are better off calling for help as the learning curve is steep and the road to getting professional results is long.
The Three Main Challenges of Underwater Imaging

here on Amazon is a good way to get
started with underwater video. But you
need to factor in things like filters,
lights, and
housing (waterproof down to 60 meters)
as well in order to get good results.
With this guide, I hope to give you the best head start for professional underwater video results so that you can move beyond the shaky footage of GoPro-level filmmakers.
Now, I’m not saying that you can’t get decent results with an action camera like the GoPro Hero 8. I’m just saying that there’s more to it than simply sticking it on a pole and jumping in the deep end.
In order for you to get the best results, we first need to take a look at some of the major challenges of underwater filmmaking.
Challenge 1: Getting Stable Footage
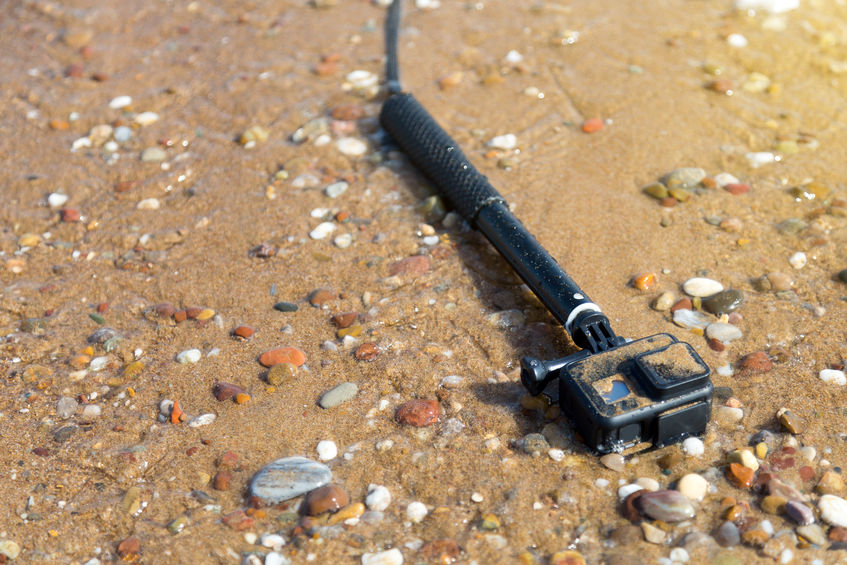
Since the introduction of the GoPro Hero 2 towards the end of 2011, the number of underwater video clips has had incredible growth.
With a very low investment, it has become possible to have something you can use for underwater video at less than the cost of a traditional camcorder not including underwater housing.
The accessibility, however, has not helped to improve the quality of the underwater video shots, because most people that take upon a GoPro are certainly divers but the predominant part has no experience in any form of imaging, video or stills.
This generates a sequence of pretty long, shaky videos that if watched for over a minute give you seasickness, so unsteady they are, as sometimes they are taken on a pole or even a mask mount.
This is not underwater video nor filmmaking but it is certainly the safest starting point if you just want to explore the challenge and document your dives.
The solution to Challenge 1: Be a good diver.
The unavoidable solution to challenge 1 is that you need to be a good diver – which, of course, takes a lot of time and practice.
Actually, you need to be an excellent one because you will be floating in the water and without the help of tripods, or gimbals or other stabilizers the quality of the footage will greatly depend on your diving skills and how steady you are.
In other words, it takes time to get really good results. On the other hand, if you’re already a good diver then you’re already halfway there.
Challenge 2: Limited Visibility
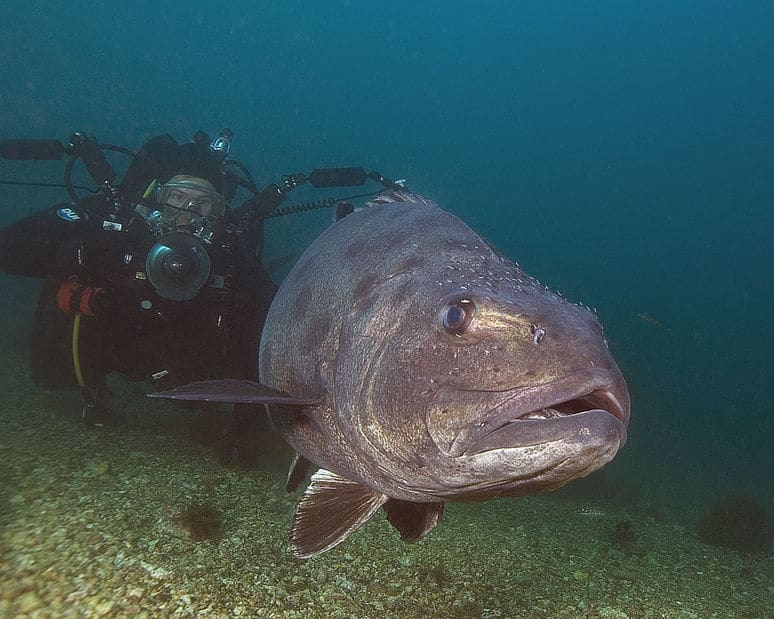
If we look at the visibility on an average winter day in London this is around 9 km.
In stark contrast, if you have a dive with great visibility you are talking about 30 meters.
The reason is that water is a fluid and ocean is not made of distilled water so all the floating particles significantly reduce visibility.
The solution to Challenge 2: Get as close as you can and use a wide-angle lens.
In order to do that you need to use a wide-angle lens – or even a fisheye lens (no pun intended!)
This is diametrically opposite to what you do on land, e.g. for a portrait shoot where you might choose an 85mm lens or longer.
Those focal lengths underwater are only for macro where you are centimeters away. In fact, some argue that any lens above 35mm is considered macro for underwater photography and video.
Challenge 3: Color Absorption
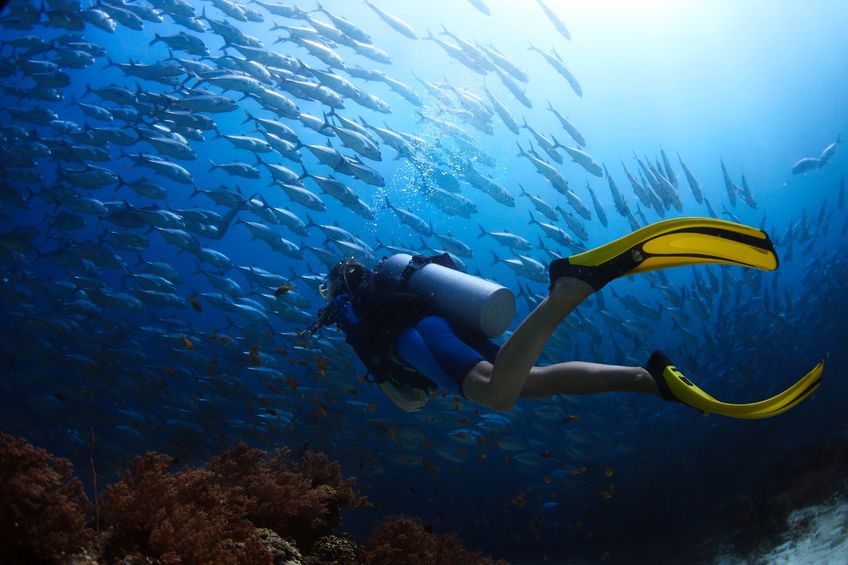
The third issue is that water absorbs light and therefore absorbs color in a selective manner.
As many GoPro users have found out, it is not expensive to get something that takes some footage, but when you look at your clips taken underwater, they look typically green and blue.
In essence, the longer wavelengths of red disappear in the first meters, and yellow and orange quickly follow.
What is left is mostly the shorter wavelengths of violet, blue and green that are able to travel farther. This is what gives water the classic aqua or cyan color that we are all familiar with.
Bluewater only exists where the bottom is really deep and the majority of coastal water is cyan to green in color due to more particles in the water, algae, etc.
A good read on underwater color is provided by Nasa which you can read here.
You can read more about light penetration and colors here.
You will notice that there is not a single remedy for lack of color and having vibrant color is actually the first thing someone will notice about an underwater clip or image.
First Solution to Challenge 3: Filters

GoPro Hero 8 is a good choice for
shallow waters.
The first solution to challenge 3 is to use filters.
A filter reduces total light and increases the color of which the filter is made by a certain intensity.
Most underwater filters have a reduction of two stops of exposure for an increase of 3 stops of red, pink and orange tones.
For this reason, filters are a great solution for shallow water but not so good when you go deeper than 15 or 20 meters.
Depending on the size and quality of your camera, the noise generated by the reduction of light of the filter, together with the light absorption in water, gets to a point where the image is really grainy.
Furthermore, at some point, there is no red tone left so filters are no longer useful. We now move into the second aid: video lights.
A quick note on Cameras and Custom White Balance

Olympus TG6 on Amazon can also white
balance.
If you have a camera that can perform white balance on a slate you don’t necessarily need a filter (in the first few meters from the surface), although I would always recommend one.
Custom white balance is the primary discriminator between a device like a GoPro where white balance can’t be set and a digital camera that in most cases will offer a custom white balance.
So if you want to up your game with professional features like custom white balance settings, but aren’t ready to shell out the big bucks yet for a mirrorless or DSLR camera, a camera such as the Olympus TG6 is a good way to go.
White balance and filters for underwater video are complex topics if you fancy an in-depth read please look into the material on the subject I wrote for my blog.
Second Solution to Challenge 3: Video Lights

place to start in terms of video lights
for underwater video.
With the arrival of cost-effective LED arrays and mass production in China, it is relatively easy to find video lights that can be also very wide and powerful.
Video lights are particularly useful when ambient light fades away at depth and have a constant color temperature and color rendition index (CRI).
Lights that are warm and have a high CRI are expensive however a value of 85 is an acceptable starting point underwater and certainly better than no light.
Affordable video lights typically make a GoPro set up go much further.
In addition, if you invest in good quality lights those can be used once the camera is upgraded. Lights tend to have a much longer life cycle than the imaging device itself and are worth the investment.
GoPro users realize if they have not before, that lights need a tray and trays help even further with stability. Larger cameras have in-built or dedicated trays.
Underwater Housings for Video Cameras
Now, if you got a DSLR or mirrorless camera, you probably don’t want to take it swimming without some kind of waterproof protective housing.
There are two kinds of housings available: plastic housings and aluminum housings.
Plastic Housings for Underwater Video

little point-and-shoot camera for which
you can get an Ikelite Lx10 plastic
diving house.
Some underwater video beginners already have a mirrorless camera or a DSLR with interchangeable lenses.
And even though some cameras can survive a bit of rain, they definitely can’t survive an 18-meter dive which means you need some kind of housing with a port system for the lens. I’ll get back to port systems later.
Plastic housings are somehow affordable and will work to some extent.
The problem with plastic housing is that they do not allow you to control all camera settings. They also only have limited compatibility with lenses and in some cases do not even allow zoom.
A good compromise can be advanced compact cameras like the Sony RX100 Mark VII, or the Panasonic LX10.
However, these cameras are much more expensive than GoPro and the cost of the housing becomes soon comparable to the camera.
Due to longer zooms also compact need a port system so with the exception of a few models this is immediately expensive.
Aluminum Housings for Underwater Video
As you get more control of camera settings and move into aluminum housing the cost goes up significantly.
As a rough indication consider that for my Panasonic GH5 a basic plastic housing is 25% of the camera cost, a housing with all controls but not metal is the same price of the camera and a professional grade housing is 1.6x the price of the camera, this even before you add lenses and ports.
A good choice for an underwater housing for the Panasonic GH5 is the Nauticam GH5.
Underwater video is an expensive hobby and requires dedicated optics and equipment that is vastly more expensive than the camera, this is something that is a shocker to most people wanting to start and the primary reason most GoPro users never upgrade to an interchangeable lens set up.
Port Systems for your Lens

8″ Dome Port Kit
with 2.75″ Lens Extension
for wide-angle lenses on Amazon.
When you get an underwater housing for your DSLR or mirrorless camera you’ll notice there’s a big hole in it. So don’t go diving just yet!
You’ll also need a lens port system.
A lens port system is a tube on the front of the housing that covers your lens and keeps it safe from water.
For macro lenses above 35mm, you’ll most likely need a flat port. And for wide-angle lenses, you’ll need a dome port. A dome port is like a big bubble, which gives the wide-angle lens a wider field of view.
The ports that offer the best optical quality is made from glass, but are also the more expensive option. When you’re first getting started, you should consider a port made of acrylic instead, because these are way cheaper.
You can get several types of ports and extensions so there’s a good chance you’ll find a combination for the lenses you want to use.
Wet lenses
A popular solution for underwater video is the use of wet wide-angle lenses. Those allow you to operate your camera like a camcorder with a single zoom lens or – in the case of a compact camera just with the camera – and still, give you the ability to get close shots.
Here more than anywhere else quality is important and although there are a plethora of lenses made in China by the same two or three factories and then rebranded, the best ones are made in Japan by Inon or in China by Nauticam in dedicated factories.
A good example of a great wet lens is the Nauticam WWL-C.
I was given a prototype to test a few years ago of the Nauticam WWL-1 and as of today, this lens is still unsurpassed for the GH5 and the default choice for video-makers on MFT sensors.
But wet lenses are extremely expensive and creates a significant barrier to entry for full-frame rigs.
Summary
It takes a lot of equipment and money to get to the point where your image quality for video is acceptable, but still, most underwater videos do not really say anything, they are just holiday clips.
In some cases, your footage is good enough and combined with aerial and land footage can make a good clip for a resort promotion, however, due to the lack of film making skills most videos, even of amazing quality soon lose the attention of the average watcher.
To sum up, the main challenges for and solutions to shooting professional-looking underwater video are:
| Challenge | Solution |
| Steady footage without tools | Good diving skills |
| Getting close to the subject | Wide-angle lenses |
| Lack of color | Lights, filters, white balance |
If you got to the end of this article ask yourself what is that you really want to accomplish before investing significant time in learning the technique, and likely huge funds into equipment.
If you are a hobbyist and just do it for enjoyment, then there is no limit other than your wallet to where this can go.
But if you need to make a living out of underwater video or you want to have some commercial success it is extremely important to start with a clear goal in your mind as this will lead you through the learning process.
I hope this article will help you on your way to achieving that goal.


